
With Google Apps Script, marketers can capture Gmail messages, parse them for relevant information, and add them row-by-row to a Google spreadsheet.
This can be especially helpful for capturing leads or contacts.
Here is a scenario. Imagine your ecommerce business has decided to work with a charity. Participants submit proposals via the charity’s website. Your job is to read through those proposals, select folks your business can help, and contact them to get started.
The trouble is that the charity’s website was built in the 1990s on a locked-down, proprietary platform. Submissions on the site cannot be added to a database or otherwise stored. Instead, those submissions can only be emailed to you in plain text format.
The solution? Capture and parse those emails for easy interaction by adding them to a Google Sheet. In this article, I’ll explain how to do just this.
Sheet and Script
The work starts with creating a new Google Sheet. I’ll name it “Charity Email Example.”
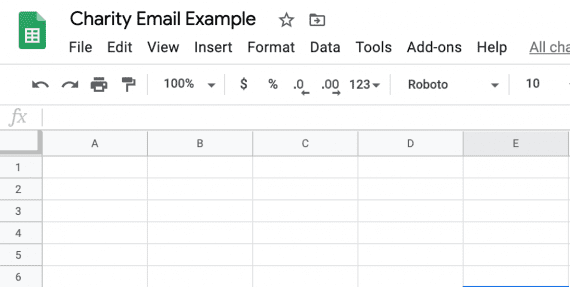
Start with a new Google Sheet.
Head to the “Tools” menu in the sheet and select the “Script editor” menu item.

Associate Google spreadsheets with custom scripts via the “Script editor.”
This link will open a new Google script editor, which is where we will be doing our work. I named this script “Charity Email Example.” The script editor allows us to write JavaScript functions that will run on our spreadsheet.
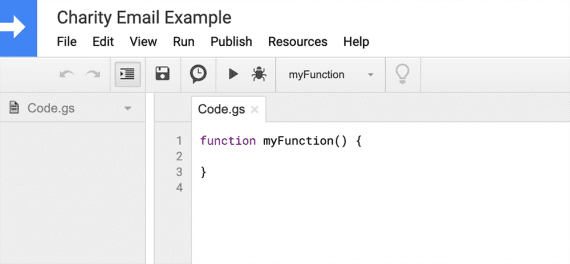
Use the script editor to write JavaScript functions to run on the spreadsheet.
There are numerous ways to write a script to retrieve Gmail messages and add them to a Google spreadsheet. In this example, I’ll use four functions: onOpen, gather, getGmail, and parseEmail.
onOpen
The onOpen function is unique in Google Apps Scripts. It will always run when a sheet is opened. Thus, the name must be onOpen. You can, however, make it do just about anything you want. In our case, we’ll add a new menu and menu item to the sheet.
function onOpen() {
    const spreadsheet = SpreadsheetApp.getActive();
    let menuItems = [
        {name: 'Gather emails', functionName: 'gather'},
    ];
    spreadsheet.addMenu('Charity', menuItems);
}
There are three parts to this function.
First, we’ll use the SpreadsheetApp class to get the active sheet — i.e., the sheet the user is looking at. This sheet object is assigned to the JavaScript constant “spreadsheet.”
const spreadsheet = SpreadsheetApp.getActive();
Next, I’ll create an array of menu items. In this example, our array has just one menu item, but it could have more. Writing it this way will make it easier to add menu items as needed.
Note that functionName describes the callback function that will run when a user clicks on the “Gather emails” menu item. In this case, I’ll call a function named gather.
let menuItems = [
    {name: 'Gather emails', functionName: 'gather'},
];
Google’s documentation describes in detail how to add a menu. For our purposes, you need only to employ the addMenu method — passing it, first, to the name of the menu and, second, to the array of menu items.
spreadsheet.addMenu('Charity', menuItems);
In the script editor, we can run this function by clicking the run button, the black triangle that looks like a play button for a video. Alternatively, we could refresh the spreadsheet, but that would close the script editor. If it does close, we can reopen it from the Tools menu.
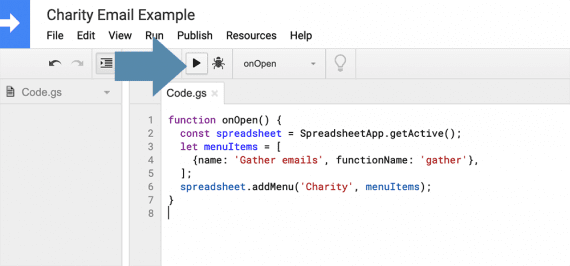
The run button allows us to execute a selected function within the script editor.
The first time you run the app, you’ll need to grant it permission to access your Google account.
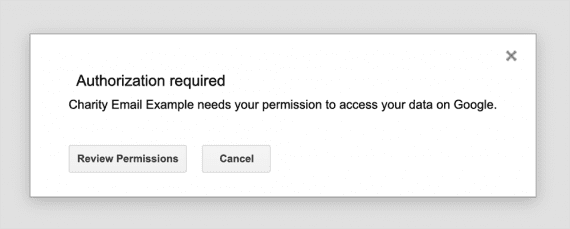
Grant the script access to your Google account.
After this function runs, we’ll move to a new menu and menu item in the charity spreadsheet.
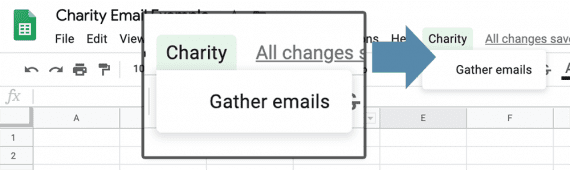
A new menu and menu item will appear on the spreadsheet.
gather
Next, let’s write the gather function.
Here the name should be logical. To me, “gather” conveys the idea of collecting and organizing. However, you can name the function whatever you want.
function gather() {
    let messages = getGmail();

    let curSheet = SpreadsheetApp.getActive();

    messages.forEach(message => {curSheet.appendRow(parseEmail(message))});
}
The function completes three tasks.
First, it retrieves all of the charity email messages by calling the getGmail function, which I’ll write next.
let messages = getGmail();
Next, it uses the SpreadsheetApp class to obtain the active sheet.
let curSheet = SpreadsheetApp.getActive();
Finally, the function iterates across all messages, adding the desired content from each to the spreadsheet after sending it to the parseEmail function that we have yet to write.
messages.forEach(message => {curSheet.appendRow(parseEmail(message))});
A lot is happening in this last step, so let’s review it.
For each message in messages, the function gets the current sheet, curSheet.
It then uses Google’s appendRow method to add a row to the sheet. This method normally takes an array object. But in this case, we’re providing the result of another function, parseEmail, which will, in turn, provide the required array.
getGmail
The getGmail function does the most work.
First, we set the value of a JavaScript constant called “query” to a Gmail search string.
const query = "from:a@e.com AND subject:Charity Example NOT label:done";
This search string is exactly what you would use for advanced search in Gmail. Notice that we specify the “from” address and the email’s “subject.” We also ensure that the email message does not include the “done” label.
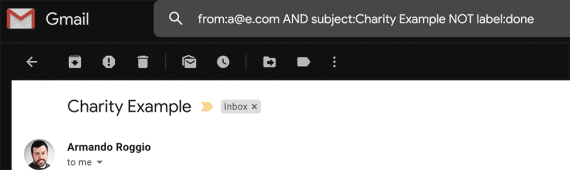
The search query string is identical to an advanced search in Gmail.
Next, we use Google’s GmailApp class to run a search on the user’s inbox. The result of that search will be all the threads from the charity with the correct subject.
let threads = GmailApp.search(query);
If there are many messages in your Gmail account, you can obtain batches of ten. This will speed up the script.
let threads = GmailApp.search(query,0,10);
The next two lines of the function prevent an email from being added twice to our spreadsheet.
Remember, in the search query, we excluded messages with the “done” label. So now we add the “done” label to the messages we just retrieved. When the script runs next, it will ignore these messages.
The first line uses Google’s getUserLabelByName method to find the “done” label and assign it to the variable “label.” If that label does not yet exist in the user’s Gmail account, the next line will create it.
let label = GmailApp.getUserLabelByName("done");
if (!label) {label = GmailApp.createLabel("done")}
The last section of this function collects each email message, adds it to the “messages” array, and labels it “done.”
threads.forEach(thread => {
    messages.push(thread.getMessages()[0].getPlainBody());
    label.addToThread(thread);
});
Finally, the function returns the array of messages.
return messages;
What follows is the completed getGmail function.
function getGmail() {
    const query = "from:roggio@yahoo.com AND subject:Charity Example NOT label:done";

    let threads = GmailApp.search(query);

    let label = GmailApp.getUserLabelByName("done");
    if (!label) {label = GmailApp.createLabel("done")}

    let messages = [];

    threads.forEach(thread => {
        messages.push(thread.getMessages()[0].getPlainBody());
        label.addToThread(thread);
    });

    return messages;
}
parseEmail
The last function will “parse” the email message and format it to fit our spreadsheet.
This function has to be specific to the message’s plain text format. So let’s look at what the charity’s website is sending us.
date: Thu, April 16, 2020

first_name: Olga
last_name: Razcok
email: oraxcok@example.com
phone: 202-456-1111
ip: 35.138.107.243
comment: I would really like to participate in this program.
fav_color: brown
I’ll apply JavaScript regular expressions to clean up and format this message copy. I’ll use Regex Pal, a regular expression tool, to determine which expressions would do what I need.
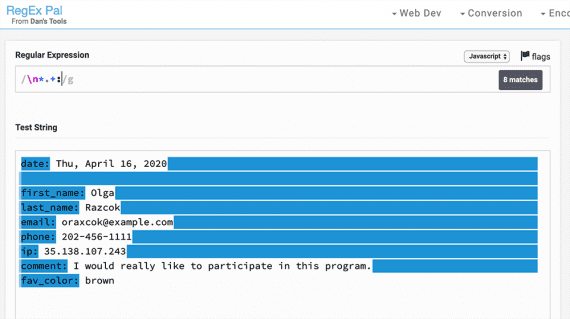
Regex Pal lets you see what portions of text a particular regular expression will match.
I’ll use commas later to separate items on the list. Thus I’ll remove the commas in the date to avoid confusion.
date: Thu, April 16, 2020
This regular expression will replace the commas with an empty string, which is effectively nothing.
let parsed = message.replace(/,/g,'')
In this case, “message” is the message passed to the parseEmail function from the gather function I wrote earlier.
The next regular expression is powerful as it removes most of the newline characters (n) from our plain text email message and deletes all of the characters before, including colons.
As an example, it will turn “first_name: Olga” into “, Olga,” (yes, that is a comma, a space, and the word “Olga”).
let parsed = message.replace(/,/g,'')
    .replace(/n*.+:/g,',')
The previous step will leave an unwanted comma before the date. So the next replace statement removes it.
let parsed = message.replace(/,/g,'')
    .replace(/n*.+:/g,',')
    .replace(/^,/,'')
There are still a couple of remaining newline characters. This next statement removes them.
let parsed = message.replace(/,/g,'')
    .replace(/n*.+:/g,',')
    .replace(/^,/,'')
    .replace(/n/g,'')
We now have a comma-separated string that looks like the following:
Thu April 16 2020, Olga, Razcok, oraxcok@...
We can transform this into an array with JavaScript’s built-in split method.
let parsed = message.replace(/,/g,'')
    .replace(/n*.+:/g,',')
    .replace(/^,/,'')
    .replace(/n/g,'')
    .split(',');
Now, our email message is compartmentalized, if you will, as an array.
["Thu April 16 2020", "Olga", "Razcok", "oraxcok@..."]
You could nearly stop now. Add a simple return statement, and the script would work.
return message;
There is, however, another improvement we can make. The email message includes info that we don’t need, such as the submitter’s internet protocol (IP) address and her favorite color.
ip: 35.138.107.243
fav_color: brown
We can remove these from our array with map, the JavaScript array method. Here the result of the map method is assigned to the variable “result.”
let result = [0,1,2,3,4,6].map(index => parsed[index]);
This line is dense, so let’s take it piece by piece. First, we have an array of numbers.
[0,1,2,3,4,6]
The numbers in this array represent positions in the message array. Remember that arrays are zero-based. When you count the positions in an array, you start at zero.
- Date — position 0
- First name — position 1
- Last name — position 2
- Email — position 3
- Phone — position 4
- IP — position 5
- Comment — position 6
- Favorite color — position 7
The map method will take each number in the array and assign it to the “index” value, creating a new array minus the unwanted IP address and favorite color data.
[0,1,2,3,4,6].map(index => parsed[index]);
Here is what the completed parseEmail function looks like.
function parseEmail(message){
    let parsed = message.replace(/,/g,'')
        .replace(/n*.+:/g,',')
        .replace(/^,/,'')
        .replace(/n/g,'')
        .split(',');

    let result = [0,1,2,3,4,6].map(index => parsed[index]);

    return result;
}
Try It
Assuming the charity has sent a plain text email with the same format as above, when you click the “Gather emails” menu item, you will have a new row.
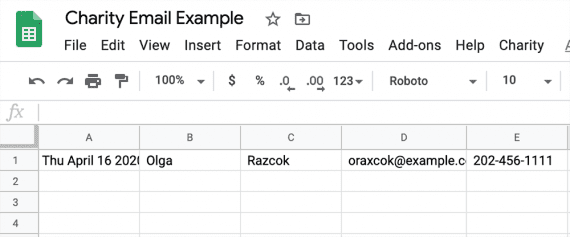
The script added a row to the spreadsheet. It will add a row for each email the charity sends whenever the “Gather emails” menu item is clicked.


