The sales cycle can be long and unpredictable. While you can’t control whether prospects respond to your selling point, you can control when you reach out to them. Perhaps you’re constantly working through a queue of qualified leads, but there’s a lag between when a prospect expresses interest and when that information is uploaded to Salesforce, your CRM.

If you use Google Forms to capture that lead information, you won’t want to upload that information manually. Instead, you can use this Zap—our word for our automated workflows—to send every new Google Form submission to Salesforce, speeding up your response time and securing sales faster.
Before you begin
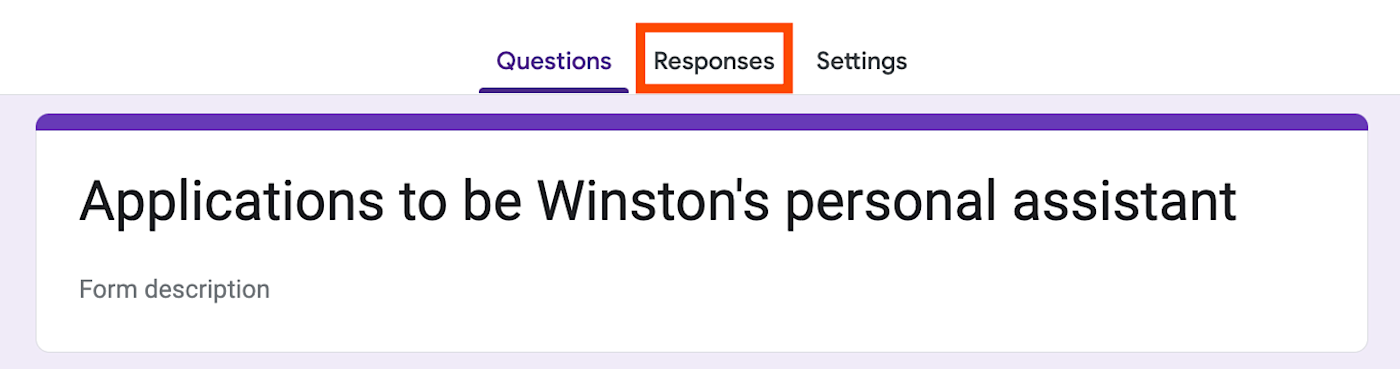
Make sure you have a spreadsheet attached to your Google Form where responses are collected. To do so, visit your Google Form and click on the Responses tab.
Click on the Google Sheets icon. If you haven’t attached a spreadsheet to your form yet, you’ll be prompted to create a new one to collect responses or use an existing spreadsheet.
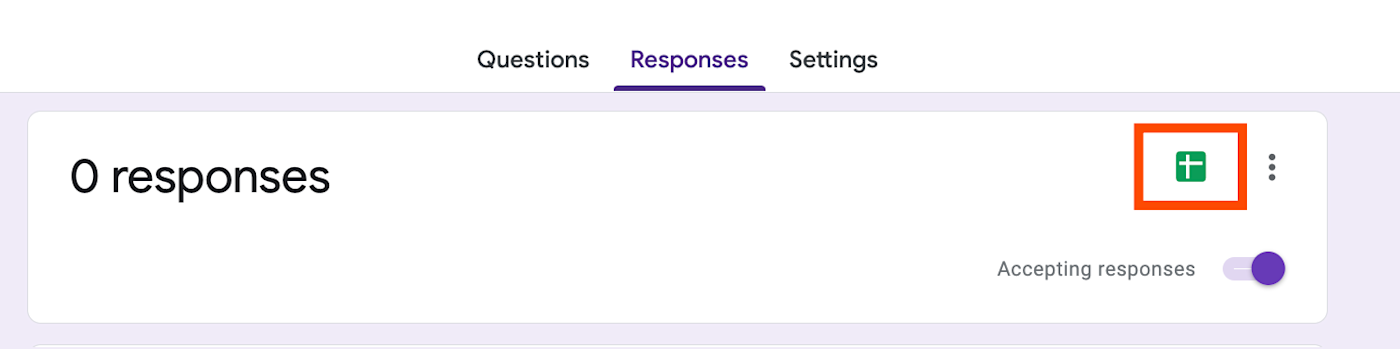
If you already have a spreadsheet connected, you’ll be directed to the Google Sheet.
How to create Salesforce leads from new Google Form responses
Zapier lets you create automated workflows called Zaps, which send your information from one app to another. You can create your own Zap from scratch without any coding knowledge, but we also offer quick templates to get you started.
If you’d like to start with a template, click on the Zap template below, and you’ll be taken to the Zapier editor. You’ll need to create a Zapier account if you don’t already have one. Then, follow the directions below to set up your Zap.
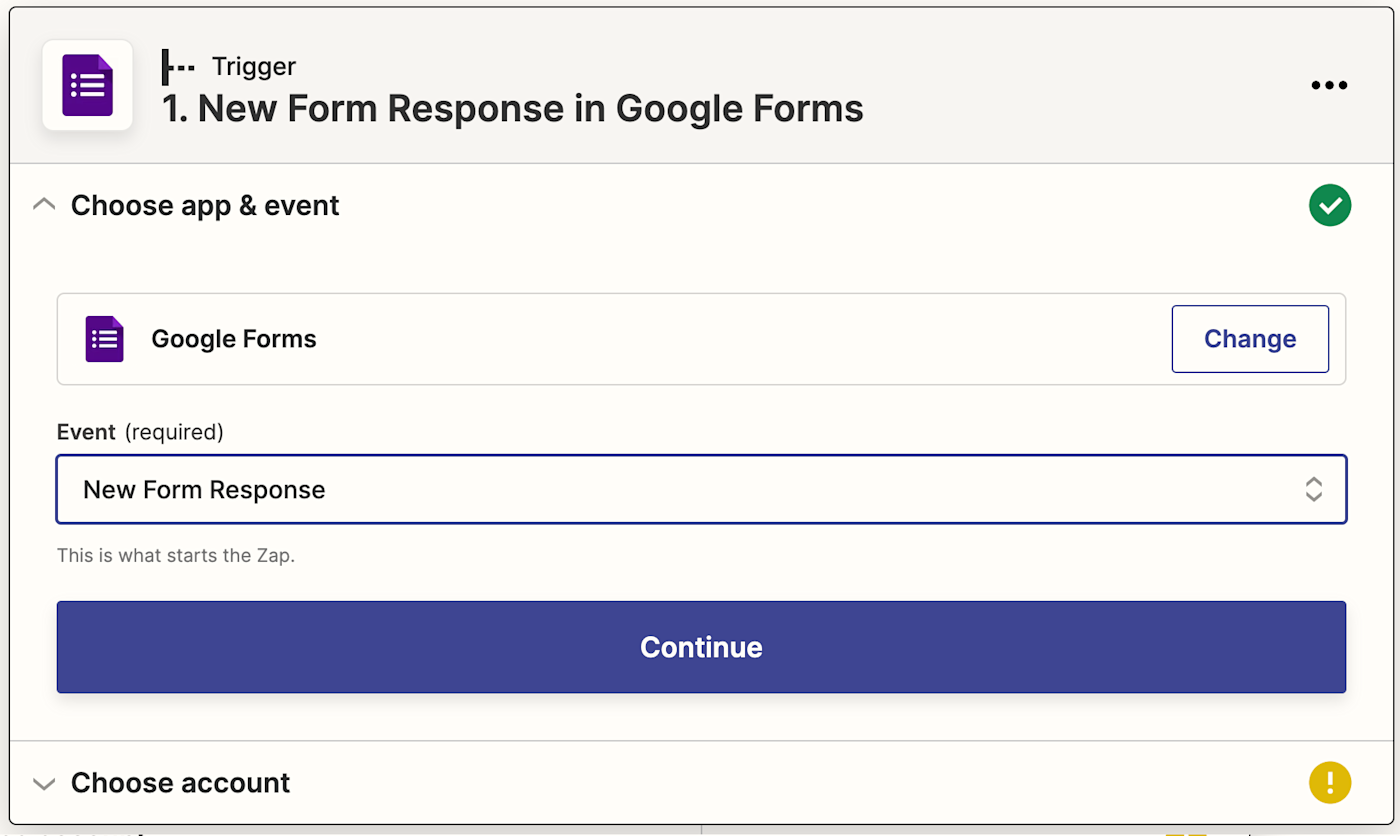
Set up your Google Forms trigger
First, set up your trigger—the event that starts your Zap. Search for and select Google Forms as the trigger app and New Form Response as the trigger event. Click Continue.
Next, connect your Google Forms account. Click on Choose an account… and either select an account from the dropdown menu (if you’ve connected Google Forms to Zapier before) or click + Connect a new account.
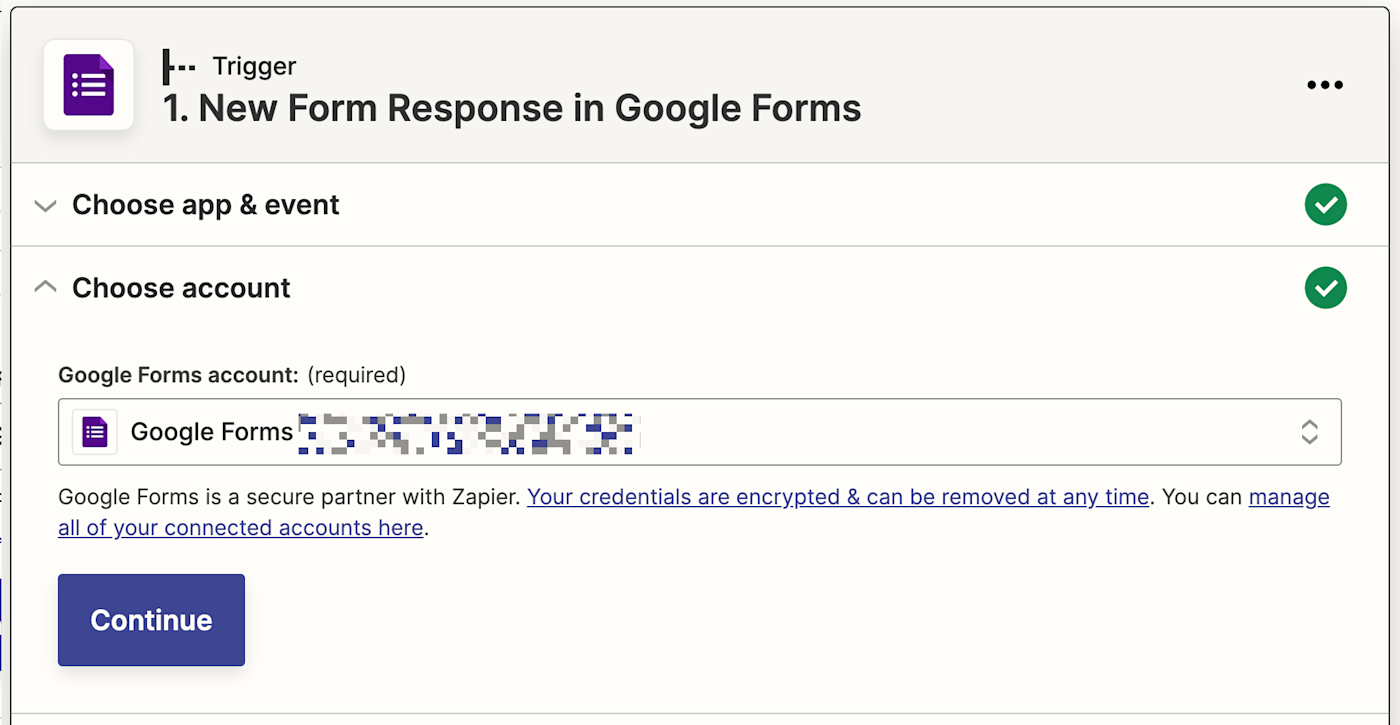
Once you’ve connected your account, click Continue.
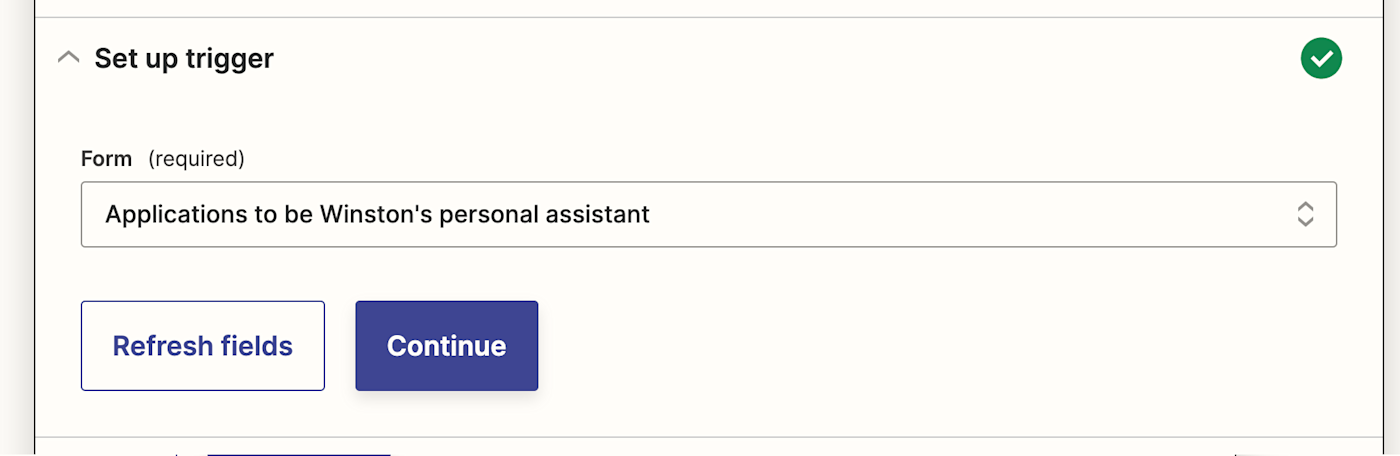
Next, select which form you’d like your Zap to trigger on. Be sure to select the right one.
Click Continue. Now you need to test your trigger. Zapier will find a recent response to the form you selected earlier. This will be used to set up the rest of your Zap.
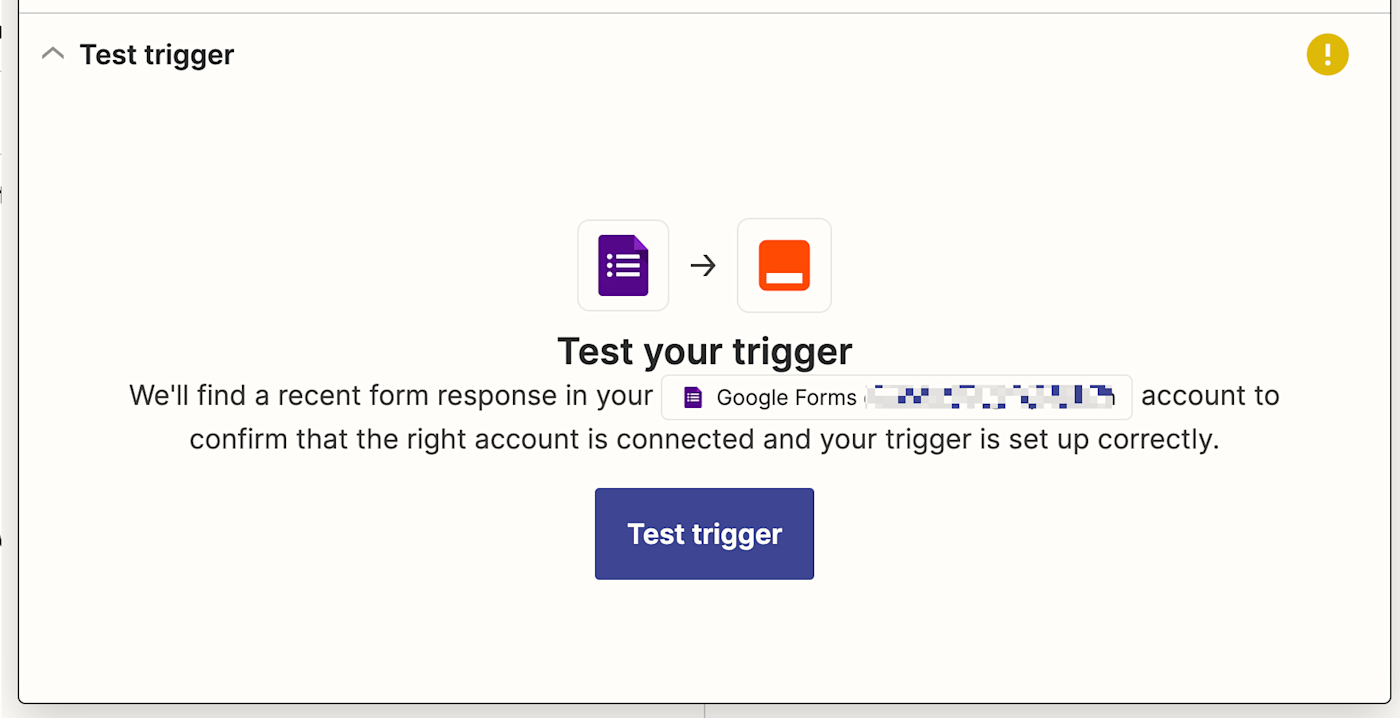
Click Test trigger. Once you see that your trigger is working properly, click Continue.
Set up your Salesforce action
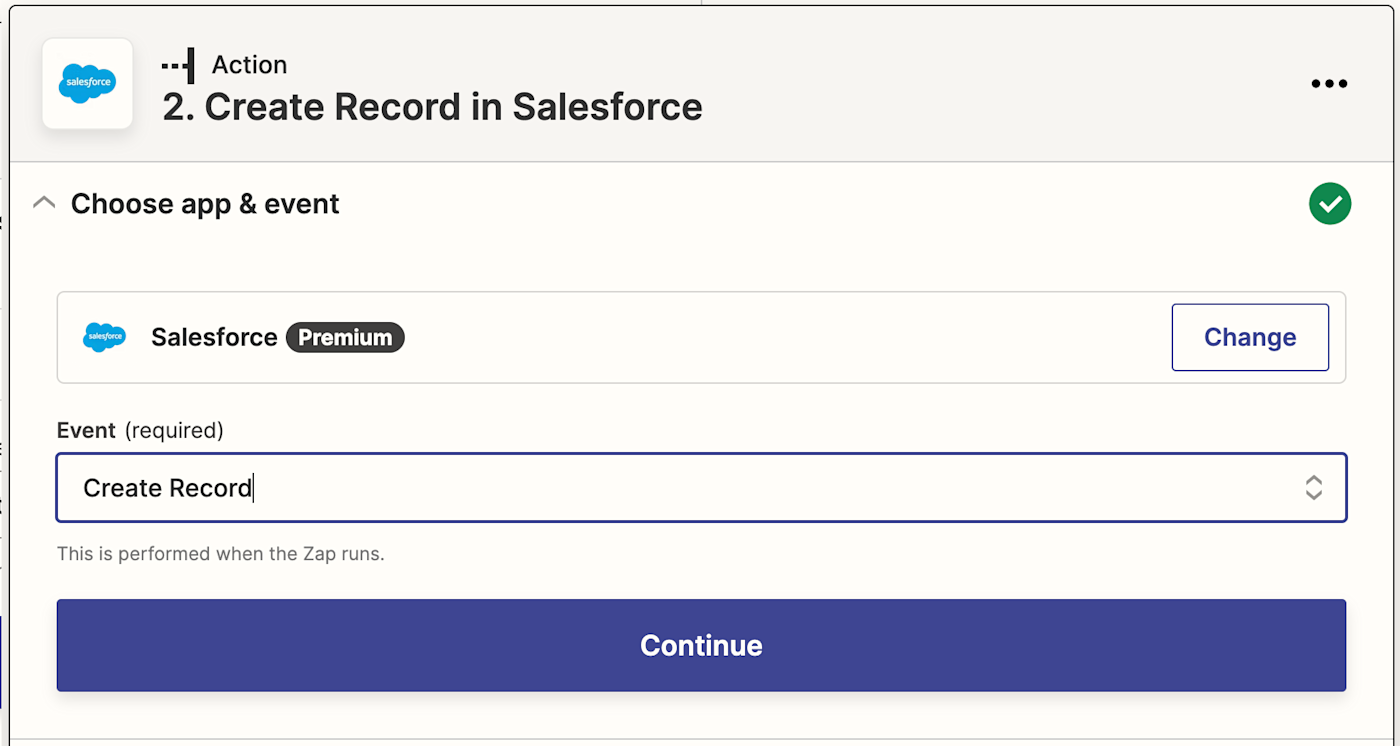
Now let’s set up the action—the event your Zap will perform once it’s triggered. Select Salesforce as your action app and Create Record as your action event. Click Continue.
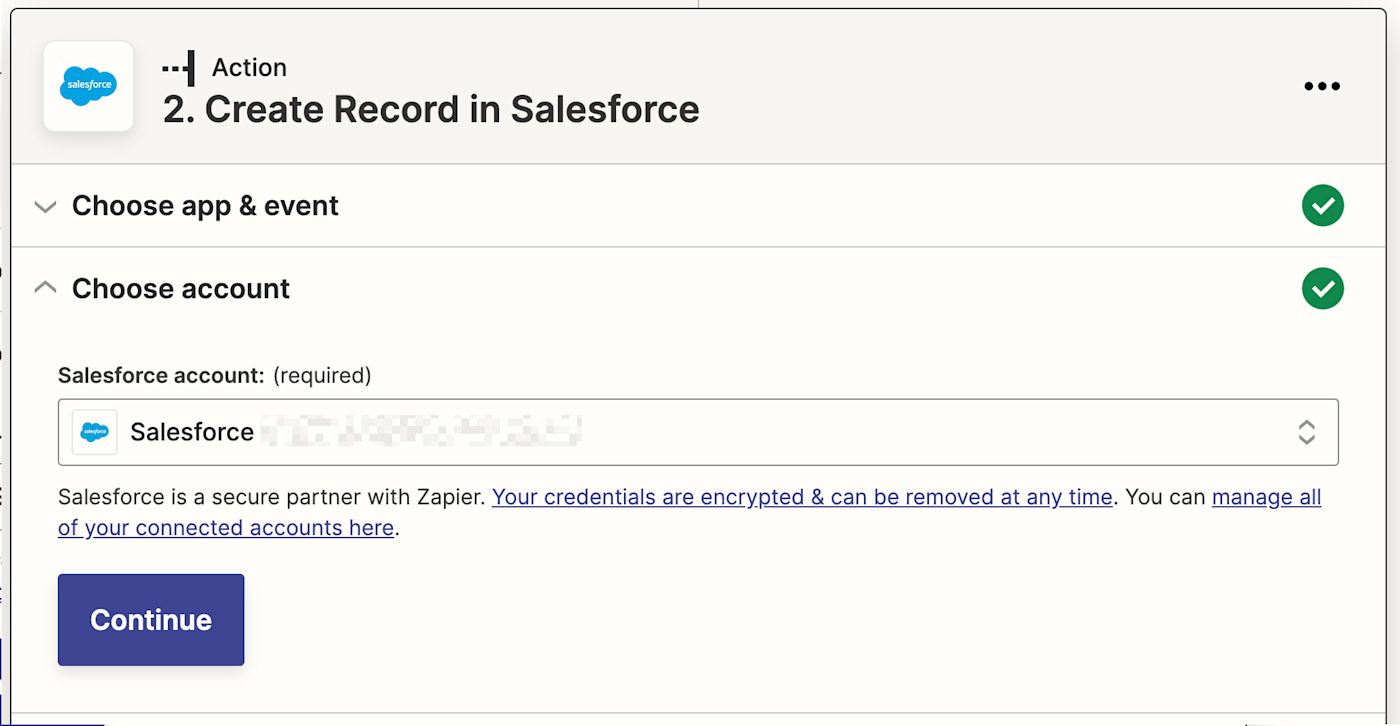
Connect your Salesforce account to Zapier and click Continue.
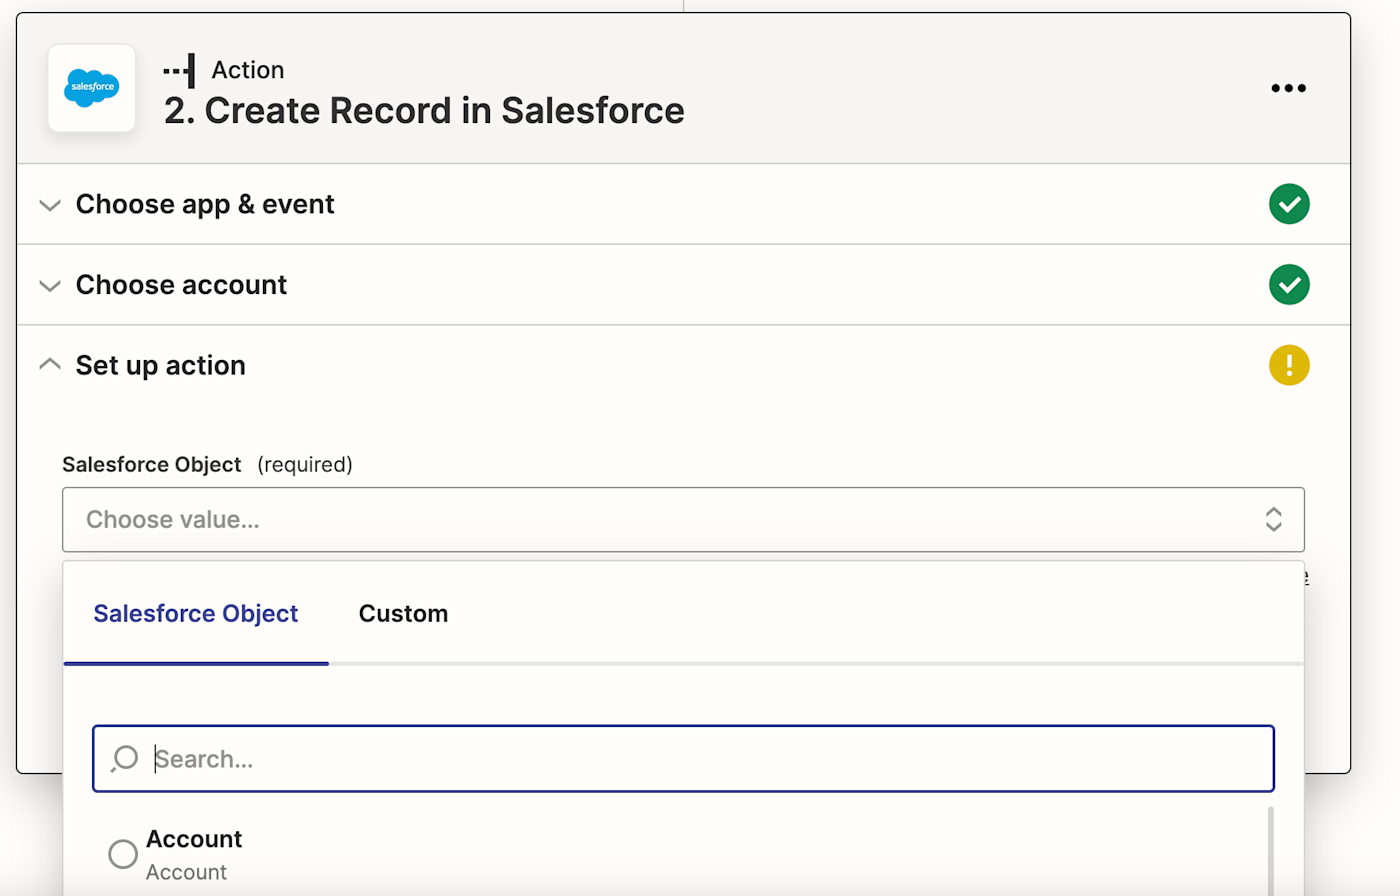
Next, choose the Salesforce Object you want to create inside Salesforce. In this instance, we’ll select Contact, but you can choose whichever suits your workflow.
Now you need to tell your Zap how to set up the Salesforce lead. You can pull in data from previous steps in your Zap by clicking inside any empty field where you want the data to go and selecting an option from the Insert Data dropdown menu. This includes your lead’s personal information (last name, first name, salutation, prefix, and title).
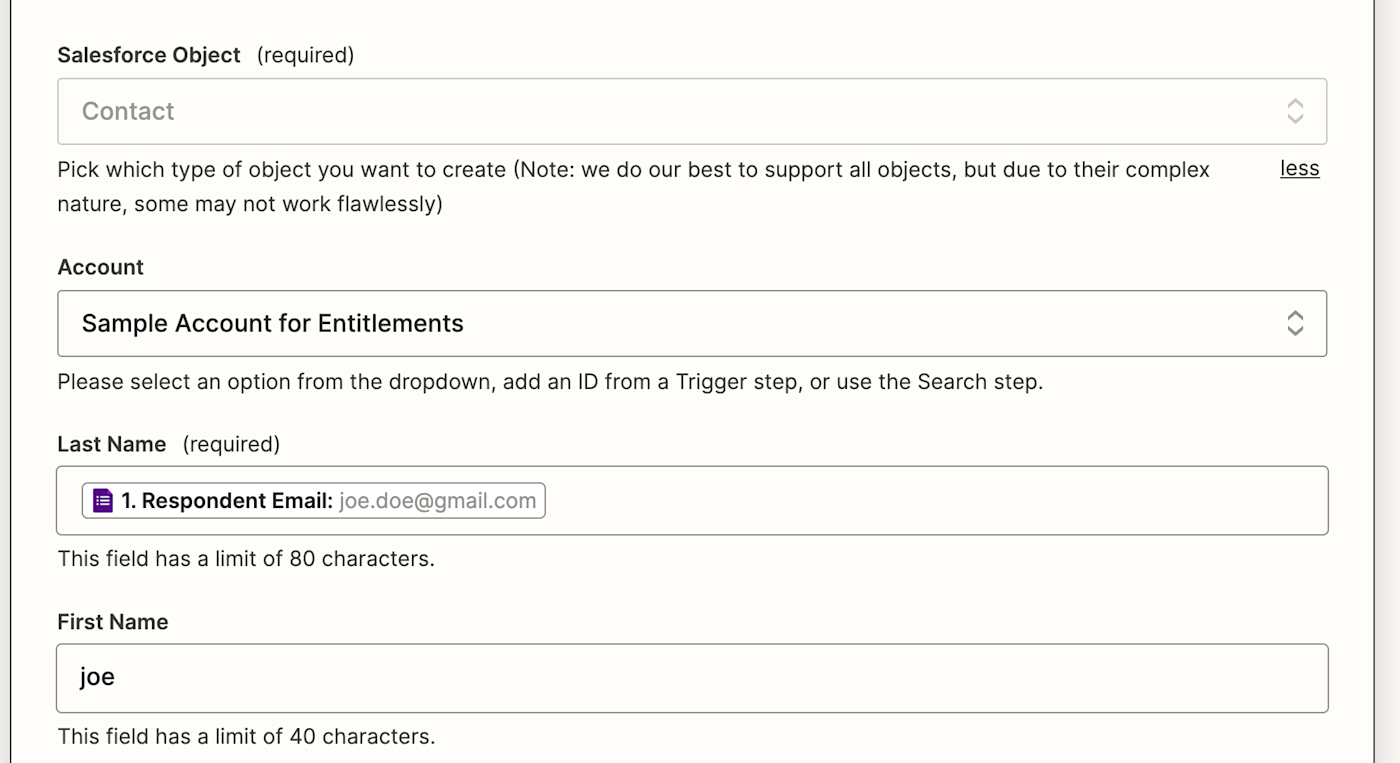
In addition, you’ll also be able to prefill other important lead information, like company name, title, company address, phone number, and email address. Other optional fields include lead source, status, industry, and rating.
Once you’ve finished customizing these fields, click Continue.
Now it’s time to test your action. When you click Test & Review or Test & Continue, Zapier will create a record in Salesforce according to how you customized the fields.
It’s a good idea to test your Zap so you can check if your Salesforce record looks okay.
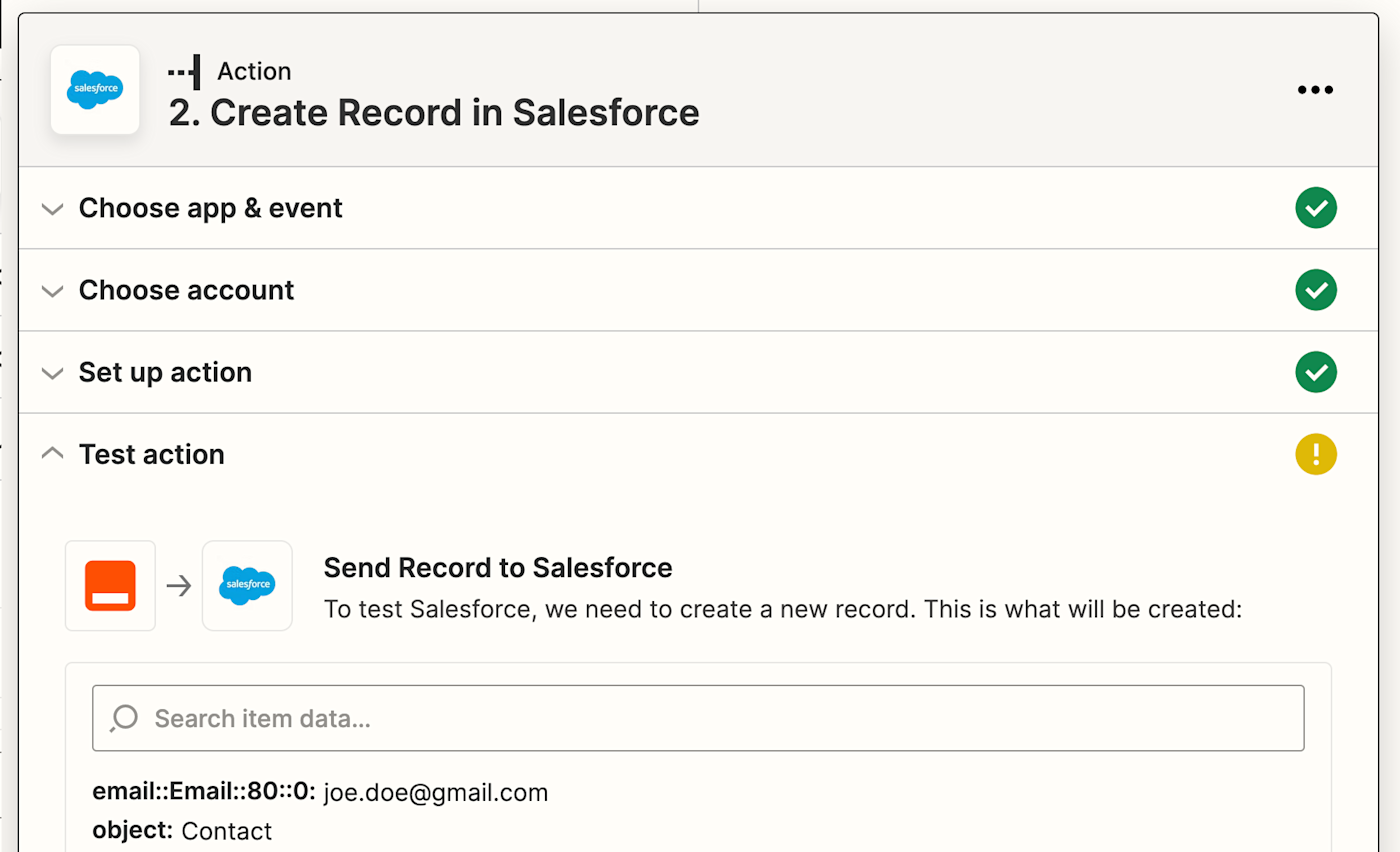
If you’d rather skip the test, just click Skip Test in the top-right corner.
If your test looks good, your Zap is now ready to use. If something looks off, go back and tweak things until you get it just right.
Streamlined, smoother sales
From now on, every time a contact fills out a specific form in Google Forms, Zapier will automatically create the lead in Salesforce. With this simple workflow, you can reach out to leads as soon as they express interest without having to first manually transfer over contact details. It’s a simple way to keep a well-oiled lead pipeline.
New to Zapier? It’s an automation tool that helps anyone connect apps and automate workflows—without any complicated code. Sign up for free to use this app, and many others, with Zapier.
This article was originally published in August 2019, with previous updates by Krystina Martinez. It was most recently updated in September 2022 by Elena Alston.
Related reading:
Need Any Technology Assistance? Call Pursho @ 0731-6725516

")
")