Speed is the name of the game with leads, which is why automation can be a game-changer for sending new prospects quickly to your business-critical apps.

Many customer relationship management (CRM) tools have automation and workflow features already. But if your platform doesn’t have the integration you need, you might think you’re stuck managing those leads manually.
Fortunately, most CRMs give you a plan B and offer webhook functionality. And luckily, Zapier can help in those plan B situations. We’re a no-code automation tool that lets you connect apps through automated workflows we call Zaps.
In this tutorial, we’ll show you how to use our built-in webhooks tool with Facebook Lead Ads to automate lead capture and keep your sales funnel moving.
Using webhooks with CRMs
Many CRMs have built-in workflow features so you can automate the process of moving new leads through your sales funnel. These features allow you to automatically change deal status and properties, and they often work with other built-in integrations you’re already using.
Many CRMs with a workflow automation feature also allow you to use webhooks to connect other apps, but if you don’t have coding experience, it can be intimidating to know where to start.
What’s a webhook?
Webhooks let apps send automated messages or information to other apps whenever there’s new information available. These messages—often called a payload—are sent to a unique URL. You’ve maybe seen a field for that URL in your app’s webhook settings or the URL itself in your CRM workflow builder.
Webhooks are another way you can automate tasks between your favorite apps. If your app has webhook functionality or a public API, you can automate it!
We’ll show you how you can use Webhooks by Zapier to connect your business-critical tools to your CRM automation workflows so you don’t miss a single opportunity.
Before you begin
We’ll be using Facebook Lead Ads in this example, but you can use whatever app you typically use for capturing new leads. Just make sure that you already have at least one lead in the tool you’re using.
Then, make sure you can create or use webhooks. Depending on the app you’re using, you may need permission from your account owner to do so. Your CRM help docs should tell you what permissions you’ll need and if webhooks can be used in its automation workflow features.
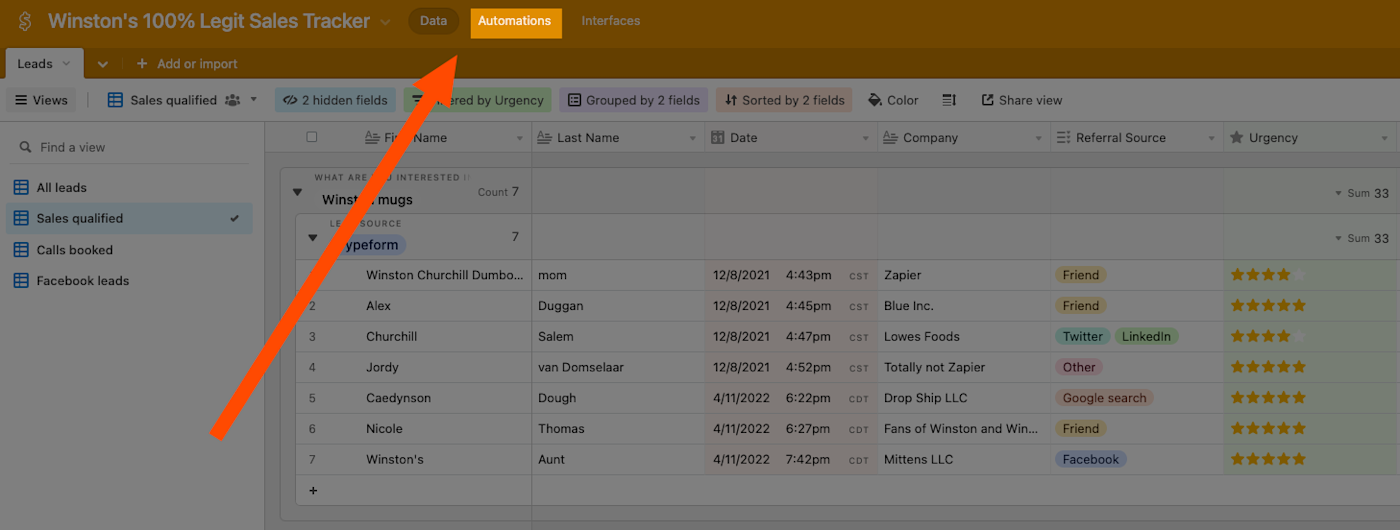
For this tutorial, I’ll use Airtable’s workflow builder since it supports webhooks and is a popular tool for tracking lead data.
Once you’ve verified that you can create webhooks in your app, you’ll need two browser tabs ready: your CRM’s workflow builder and Zapier.
How to send leads from Facebook Lead Ads to a webhook
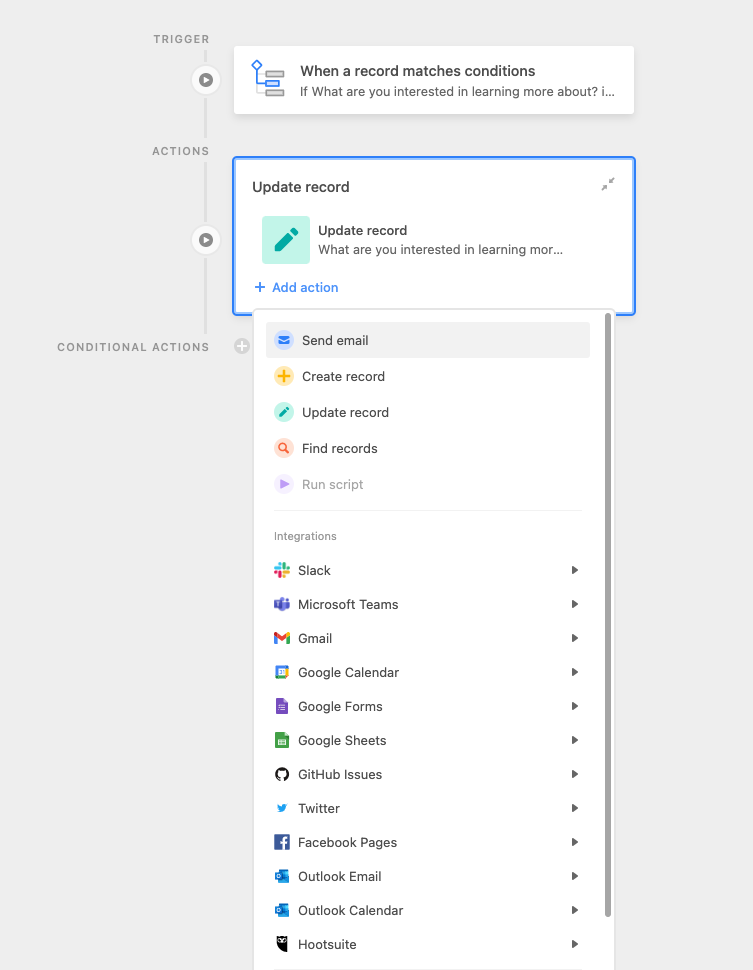
You can create your own Zap from scratch with our point-and-click editor, but we also have quick templates to get you started.
To get started with a Zap template—what we call our pre-made workflows—just click on the button, and we’ll guide you through customizing it. It only takes a few minutes. You can read more about setting up Zaps here.
Here’s how to set it up:
-
Create your Facebook Lead Ads trigger
-
Create and test your webhook action
-
Finish creating your CRM workflow
-
Make sure your Zap and CRM workflow are ready to use
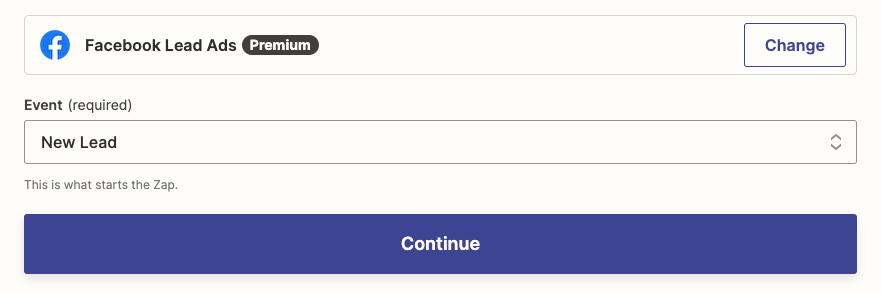
Create your Facebook Lead Ads trigger
If you’re starting from the template, click on the trigger step in the Zap editor. If you’re starting from scratch, select Facebook Lead Ads as your trigger app and New Lead as your trigger event, then click Continue.
Next, select the Facebook Lead Ads account you want to use. If you haven’t connected your Facebook Lead Ads account to Zapier before, click on the dropdown and select +Connect a new account. Once you’ve connected your account, click Continue.
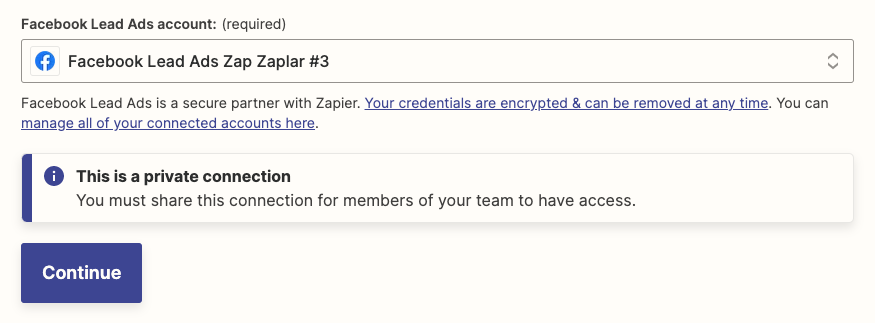
For each app you connect, Zapier will ask for a general set of permissions which allows you to be flexible with your Zaps. The only actions Zapier takes on your app accounts are those a given Zap needs to accomplish what you’ve set up.
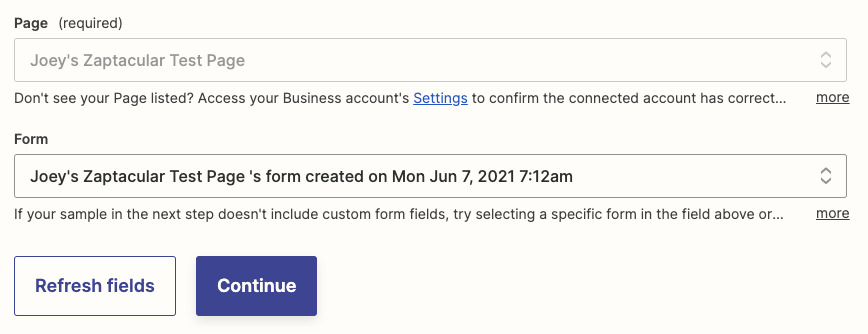
Next, select the Facebook page you want to use and the form associated with your campaign. Click Continue.
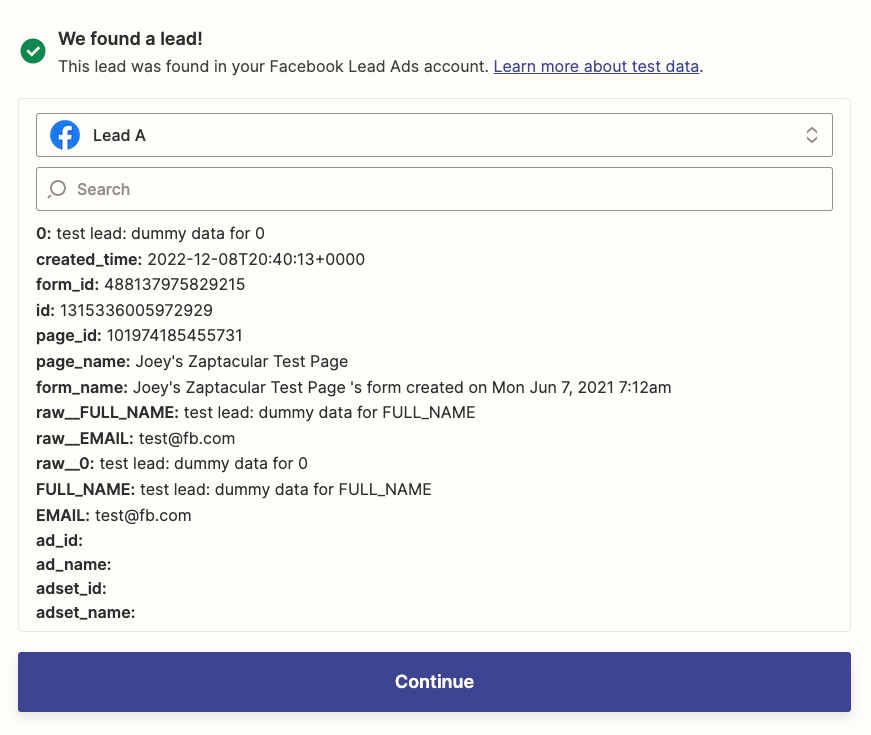
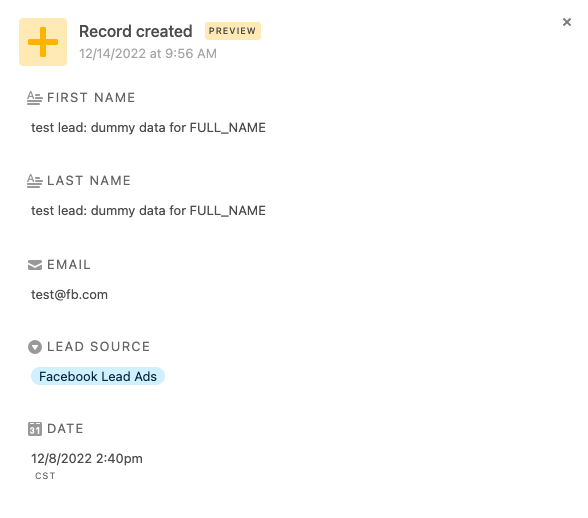
Now you need to test your trigger to see if it’s working. Zapier will look for an existing lead in Facebook Lead Ads, which you’ll use to customize the rest of your Zap. Click Test trigger.
You’ll see a success message if Zapier finds a lead. Click Continue to move on to your action.
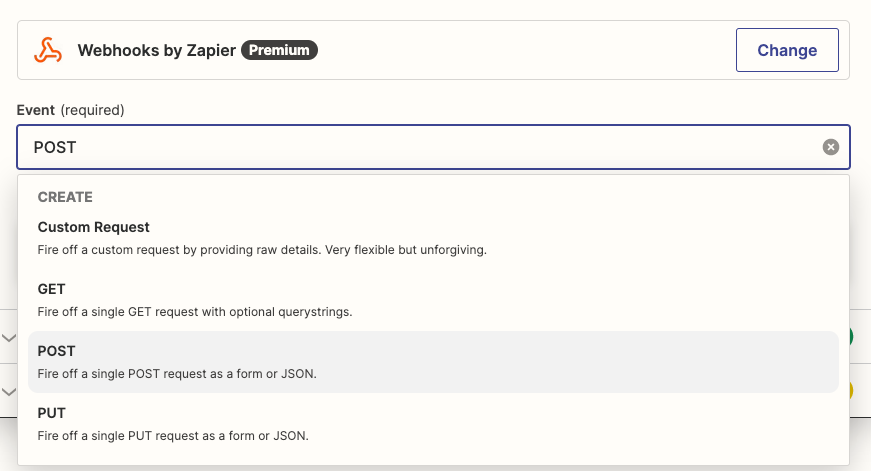
Create your webhook action
If you’re working from our Zap template, the action and event will be pre-selected for you. If you’re creating from scratch, select Webhooks by Zapier as your app and POST as your event.
POST requests send information to an app to create something new, such as a new lead. Since that’s what we want, go ahead and click Continue.
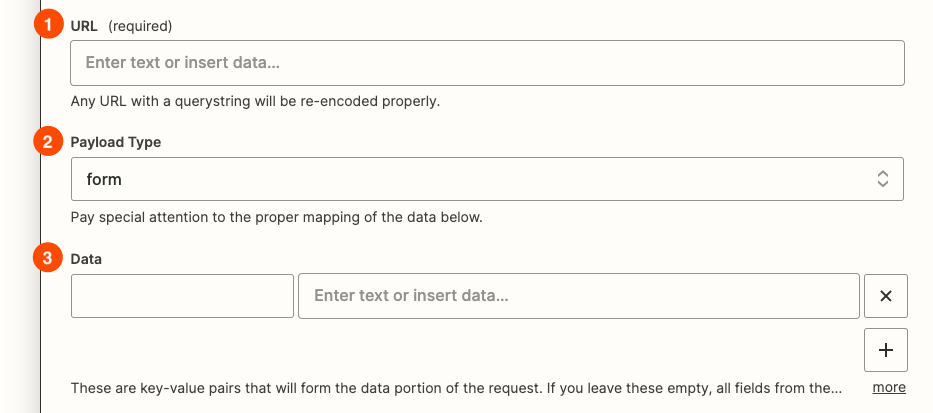
The editor will ask for several pieces of information so the webhook can make a POST request:
-
URL: Remember, a webhook needs a unique URL—often called an endpoint—to know where to send or request information. Think of it like an address for an app. The workflow builder in your CRM may provide a URL for you, like Airtable, or you may have to provide it yourself.
-
Payload Type: Remember that a payload is a message or information you want to send to another app. Payload Type refers to the format in which our webhook sends the message. We need to specify this, so our app knows how to interpret the message received. Your app’s help docs will be clear if it requires a specific format for webhooks.
-
Data: In a typical HTTP request, this section makes up the Body of our message, similar to the body of an email message. This is how we’ll pass information from Facebook Lead Ads to our webhook. However, webhooks are more specific in how that body should be structured, so your app may have additional instructions for that.
First, grab the webhook URL. Toggle to your CRM’s workflow builder in your second browser tab. If you’re using Airtable like me, click on the Automations tab at the top of your base.
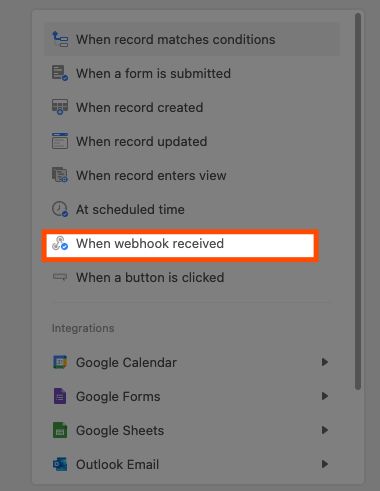
If you’ve used Zapier, Airtable’s workflow builder is similar. Their automations start with a trigger, followed by an action. Click on +See all to reveal your trigger options and select When webhook received.
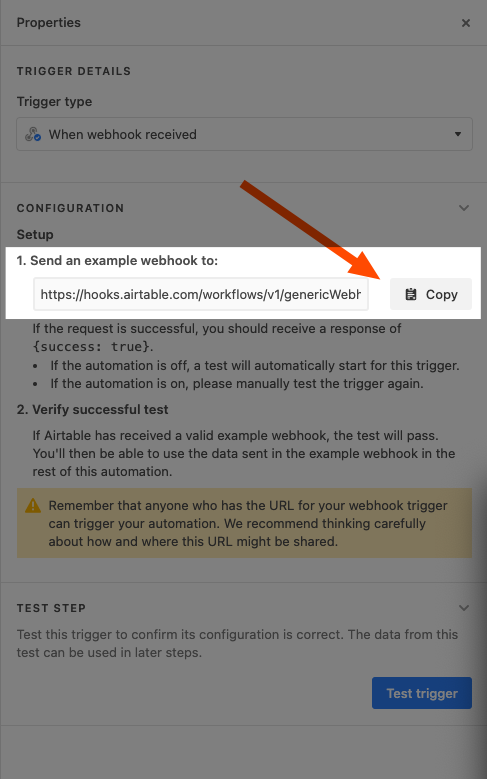
A pane will pop up to the right of the automation builder to customize your workflow. Airtable will generate a webhook URL for you. Click Copy to copy the link to your clipboard.
Return to the Zap editor and paste your webhook in the URL field. I also changed the Payload Type to json since most apps understand that language. However, check your app’s help site to see if it requires a different format. Zapier supports JSON, XML, form-encoded, or raw payloads.
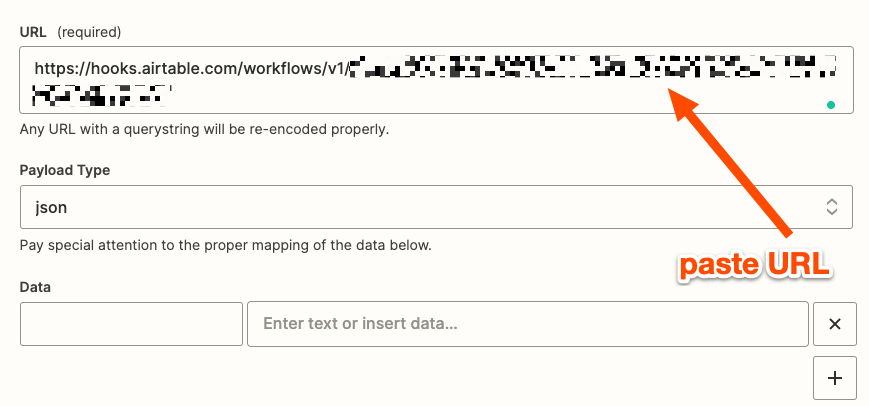
You can leave the Data section empty if you want to send all data from your trigger to your webhook. If you want to narrow down the information your webhook receives, you can customize that here.
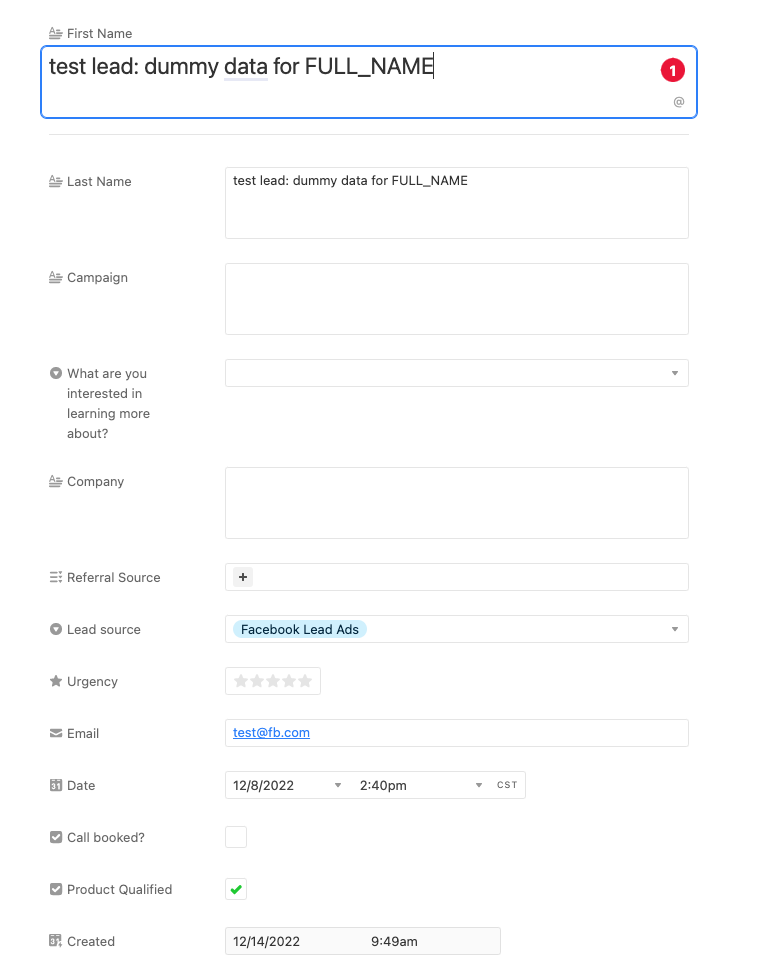
The left-hand side will be your keys, which are the names of your fields. For example, your keys might be First Name, Last Name, or Email. The right-hand side will be your values. This is how you’ll pass information to your webhook.
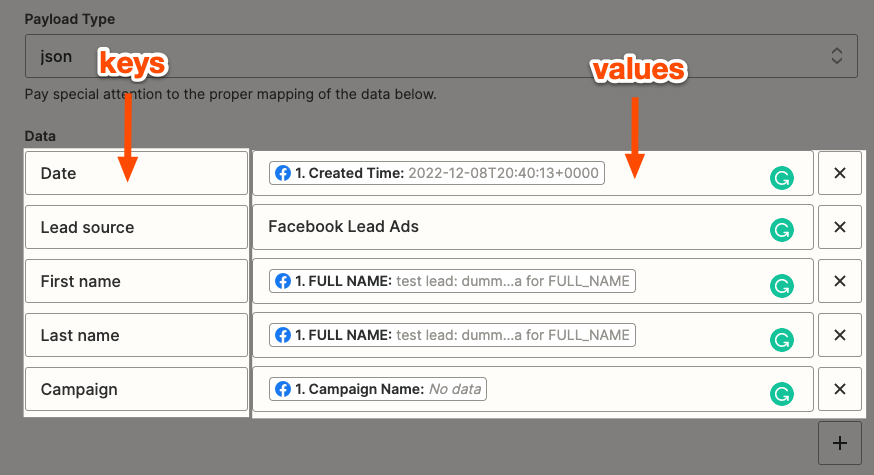
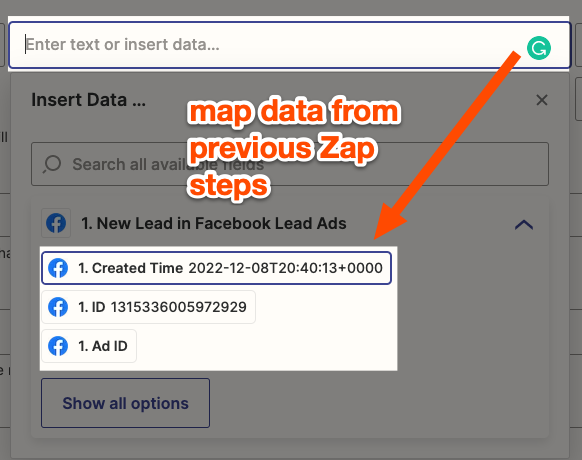
When you click to add a value on the right, you can type in text—which will appear the same each time your Zap runs—or you can map data from previous Zap steps.
Depending on your app’s requirements, you may need to authenticate—or give permission—for the webhook to access your app account. You can set this up under Basic Auth or Headers.
For example, if your app requires you to authenticate through Authorization: Bearer ACCESS_TOKEN, you’d type in Authorization on the left beneath the Headers section. To your right, your value will be Bearer, a space, and the API key generated in your app account settings.

Airtable doesn’t require authentication to use their generated webhook in an automation—and your CRM may not require it either—so I’ve left this section blank. When you’re done, click Continue.
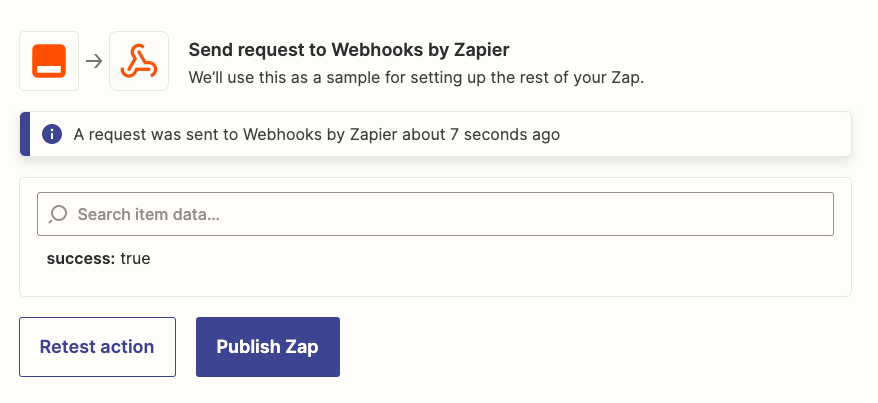
Test your webhook
Click Test trigger to test your webhook. This test will send your trigger information to your webhook according to how you set it up earlier. If it’s set up correctly, you’ll see a success message of some kind in the editor.
Since I’m using an Airtable-generated webhook, it will return either a true or false message under success to indicate whether everything was set up correctly.
If something didn’t work, go back to the previous step and make any adjustments.
Finish creating your CRM workflow
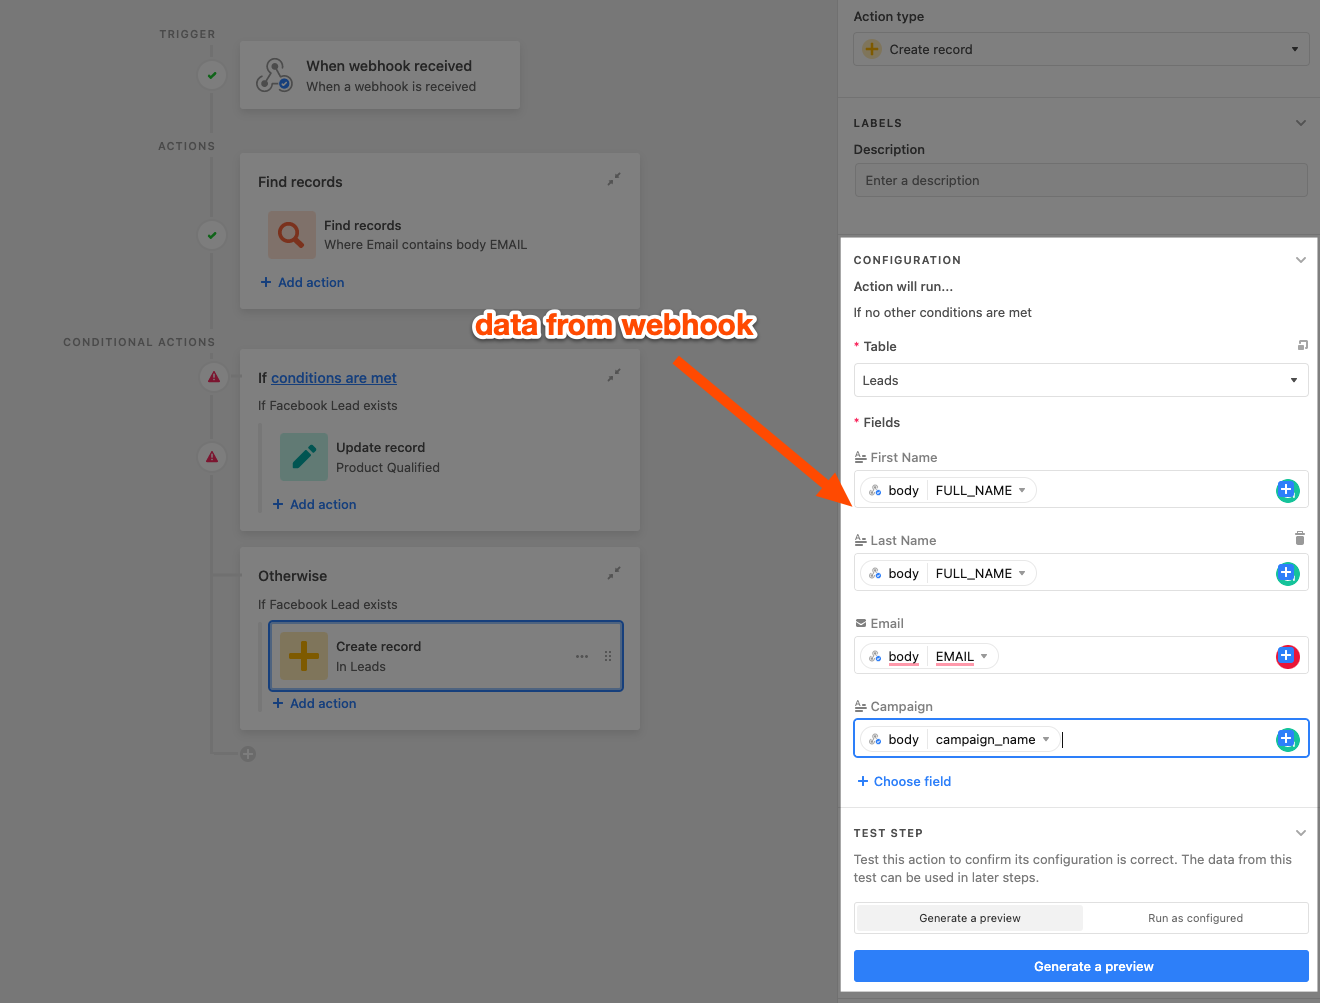
Once you’re done testing your webhook, toggle back to the browser tab with your CRM workflow builder. In Airtable, there’s a success message for my workflow trigger along with the information it received.

When I click on the body tab, I can see the information about my lead from Facebook Lead Ads, exactly how I set it up.

Now that you know your webhook was successful, you can set up the rest of your workflow. Your CRM should let you map your lead data to the corresponding properties.
Make sure your Zap and CRM workflow is ready to use
Once you’ve set up the rest of your workflow, your CRM most likely has an option for you to test or preview the end result. Airtable lets you preview your workflow and test the entire automation.
If you have the option, test the full automation in your CRM to make sure it’s working as expected.
Once everything is working how you want it in your CRM, turn on your automation there. Then, toggle back to your Zap to make sure it’s ready to use!

Act on opportunities faster with Zapier webhooks and your CRM
You don’t need to have a coding background to automate your work. With Webhooks by Zapier, you can connect your business-critical lead tools to your existing CRM automation stack, so you can focus on closing deals.
Zapier is the leader in no-code automation—integrating with 5,000+ apps from partners like Google, Salesforce, and Microsoft. Build secure, automated systems for your business-critical workflows across your organization’s technology stack. Learn more.
Need Any Technology Assistance? Call Pursho @ 0731-6725516
")
")
