The arrangement and alignment of text in a consistent manner are important to do justice to your presentation design; this will make it look good and provide a better user experience. The proper content arrangement will make it easier for your viewers to scan the slides and grasp key points. In this tutorial, we are providing step-by-step instructions on how to arrange and align objects in your presentation. So, let’s begin!

Arranging an Object
Step 1 – Go to your Google Slides presentation and the slide that contains the object/element to be arranged. Select it.
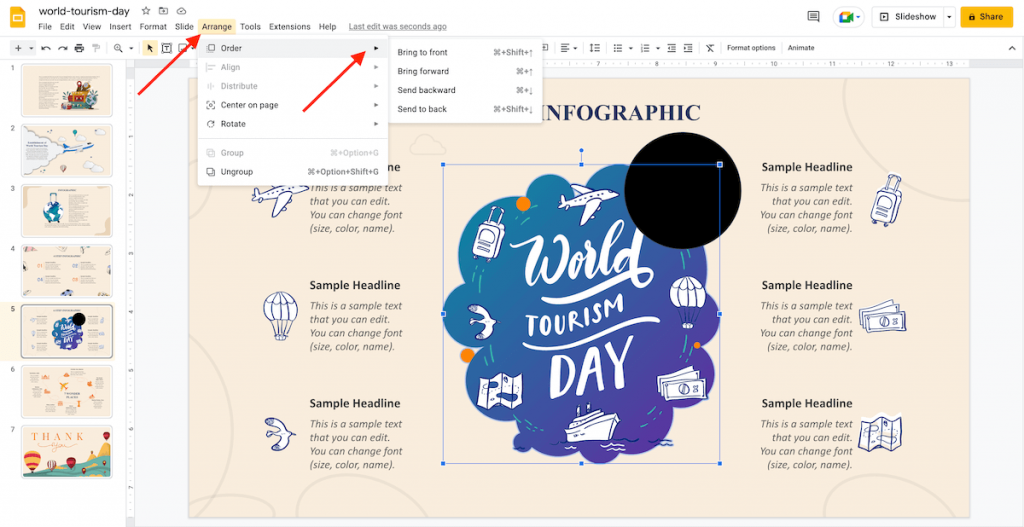
Step 2 – Select ‘Arrange’ on the top menu.

Step 3 – There are several options to choose from. Take a look:
Arrange → Order: This will allow you to place objects behind or on top of others, making it easier to select and give them more visibility. For instance, if you choose the option “Bring to front,” the selected object will be on top of others and can be easily seen in its entirety. The option “Bring forward” will do the same, but one layer at a time.
Arrange → Order → Send to back: This option will allow you to send the selected element behind the others. You can do the same, but one layer at a time, if you choose “Send backward” instead.
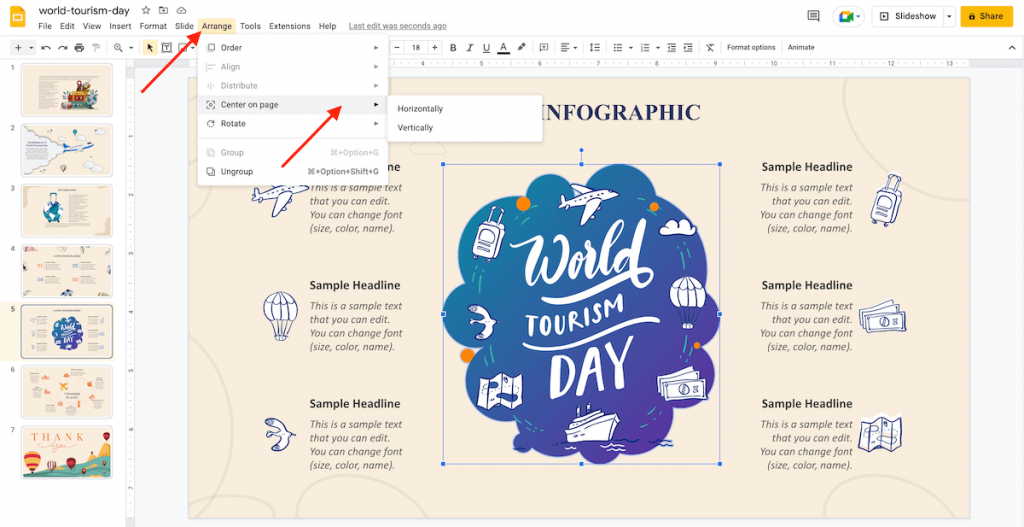
Arrange → Center on page → Horizontally: The chosen element will be horizontally centered on the selected slide.
Arrange → Center on page → Vertically: The chosen element will be vertically centered on the selected slide.
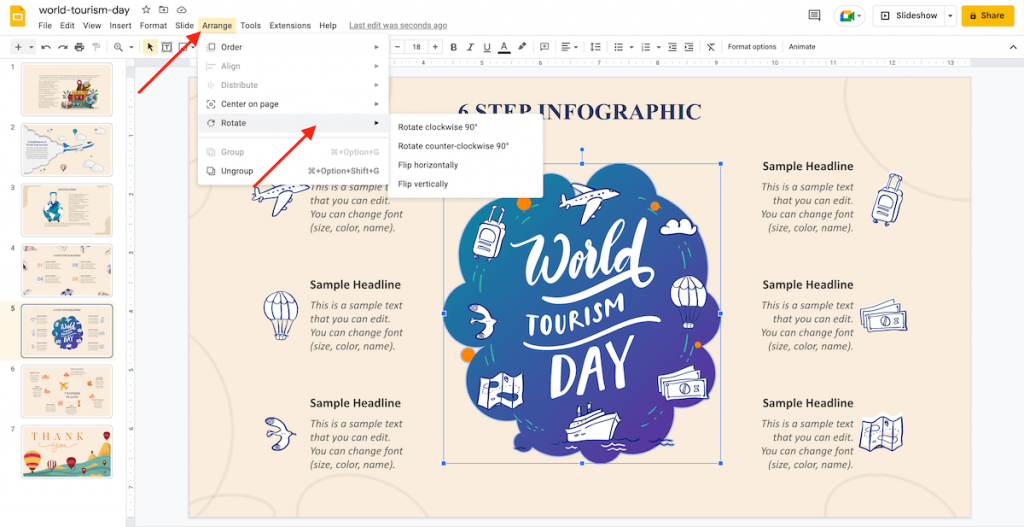
Arrange → Rotate: This option will let you rotate the selected object clockwise or counter-clockwise. You can also flip it horizontally or vertically.
Arranging Multiple Objects at the Same Time
Step 1 – Go to your Google Slides presentation and select the objects to be arranged.
Step 2 – To select multiple objects at a time, click one of them, hold Shift, and choose the other elements you want.
Step 3 – Select ‘Arrange’ on the top menu. There are several options to choose from:
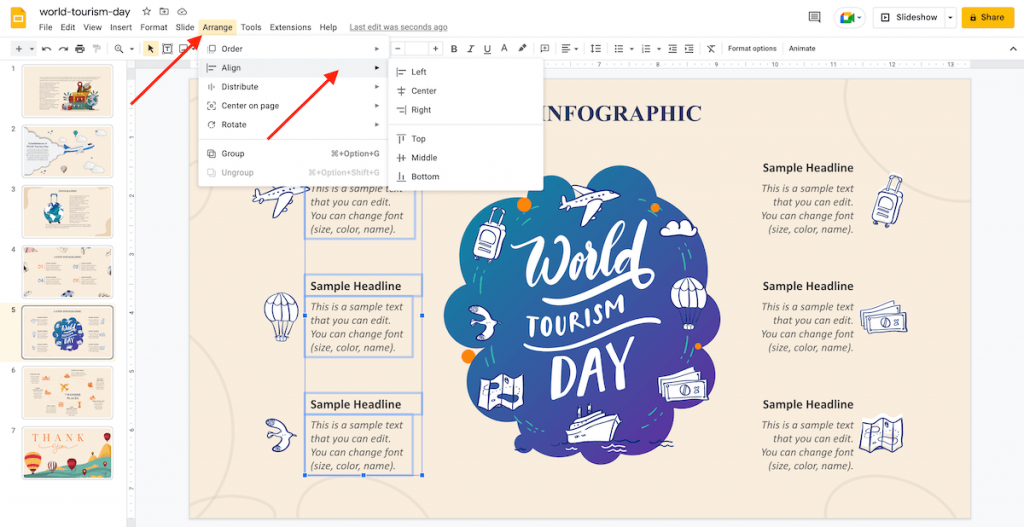
Arrange → Align → Left: With this option, you can align the selected elements to the left.
Arrange → Align → Center: With this option, the selected elements will be centered.
Arrange → Align → Right: With this option, you can align the selected elements to the right.
Arrange → Distribute: These options help to evenly distribute the spacing between the selected elements vertically and horizontally.
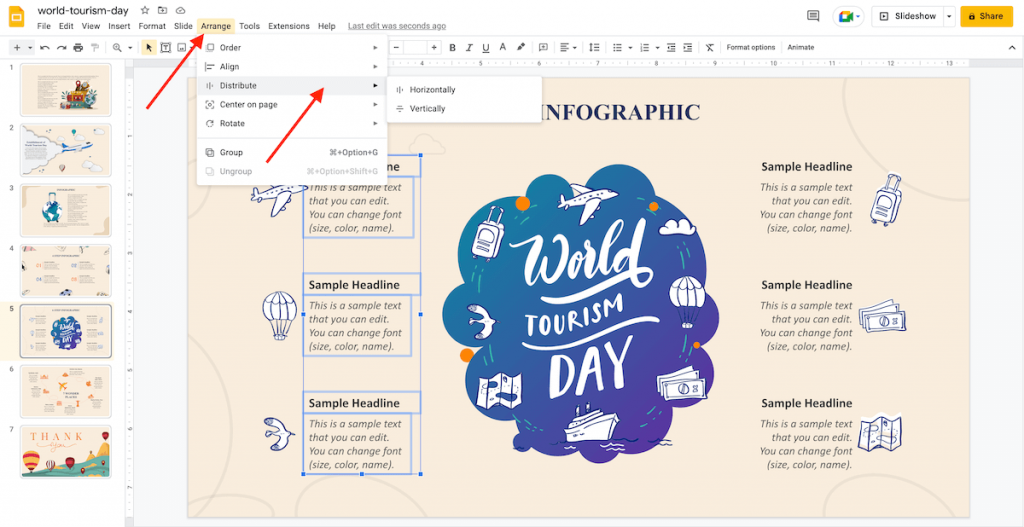
Arrange → Distribute → Horizontally.
Arrange → Distribute → Vertically.
Arrange → Group: This option will allow you to group several objects to act as one element.
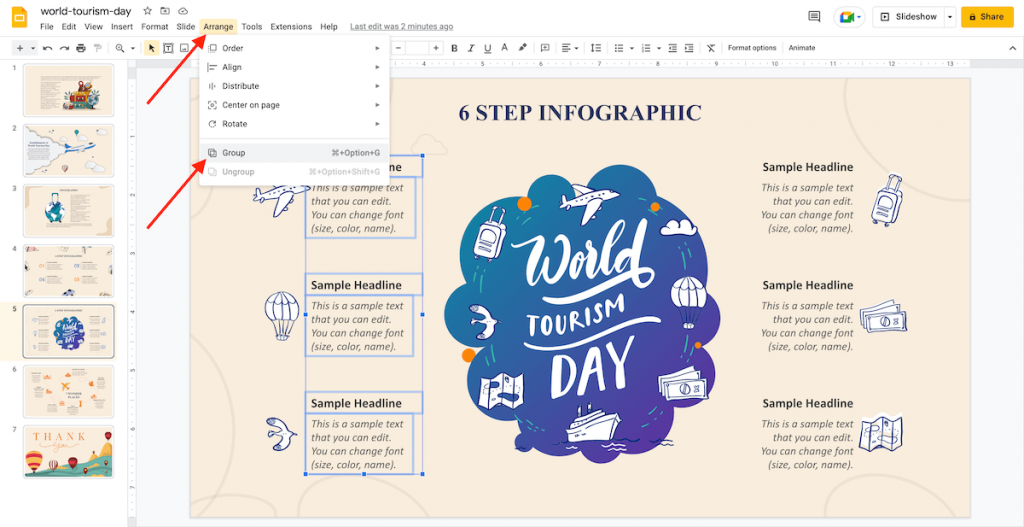
After grouping the desired elements, you can double-click on any of these to work individually on them.
Arrange → Ungroup: This option will let you ungroup the elements in the group and work individually on them.

Aligning Objects Automatically on a Slide
Go to your Google Slides presentation and select the objects to be aligned.
You get two options to align the objects automatically on a slide:

View → Snap to → Guides: While dragging an object, you will notice a few red lines that indicate to which another object you’re aligning the chosen one. This option remains enabled by default.
View → Snap to → Grid: While dragging an object, it will be aligned to an invisible grid. But, unlike the previous option, you won’t notice any red lines.
And that’s all! If you follow this guide step-by-step, your object arrangement and alignment will stand out for you. Share your comments. And stay tuned for more such tutorials!
Looking For Powerpoint Design Agency?
Call Pursho @ 0731-6725516
Telegram Group One Must Follow :
For Startups: https://t.me/daily_business_reads
#Arrange #Align #Objects #Google #Slides

