Google Slides is a powerful tool that allows you to easily create professional-looking presentations. One feature that can bring richness to your presentations is the ability to include a video. Whether you want to include a promotional video, a product demonstration, or just add some visual interest to your presentation, adding a video can help capture your audience’s attention.
This tutorial will guide you on how to add a video to Google Slides.
So let’s get started!
Why add a video to your presentation?
There are several good reasons to consider adding a video to your presentation. Here are a few:
To Capture The Attention Of Your Audience
People tend to be more engaged when presented with a mix of visual and auditory information. Adding a video to your presentation can help keep your audience’s attention and make your message more memorable.
To Add Depth And Context To Your Content
A well-produced video can add depth and context to your presentation by providing a more immersive experience for your audience. This can be especially useful when discussing a complex topic or trying to illustrate a point.
To Tell A Story
Whether you are presenting to a small group or a large audience, a video can be an effective way to tell a story and engage your audience emotionally. This can be especially powerful if you are trying to convey a message or promote a product or service.
To Effectively Present Information
Instead of trying to explain something complex or abstract in words, a video can quickly demonstrate a concept or process. This can save time and help you get your message across more effectively.
Overall, adding a video to your presentation can be a powerful way to engage your audience and enhance your message.
Try Our Google Slides Templates
To Create Engaging Slide Presentations
How to Add a YouTube Video to Google Slides?
Here are the steps on how to add a video link to Google Slides:
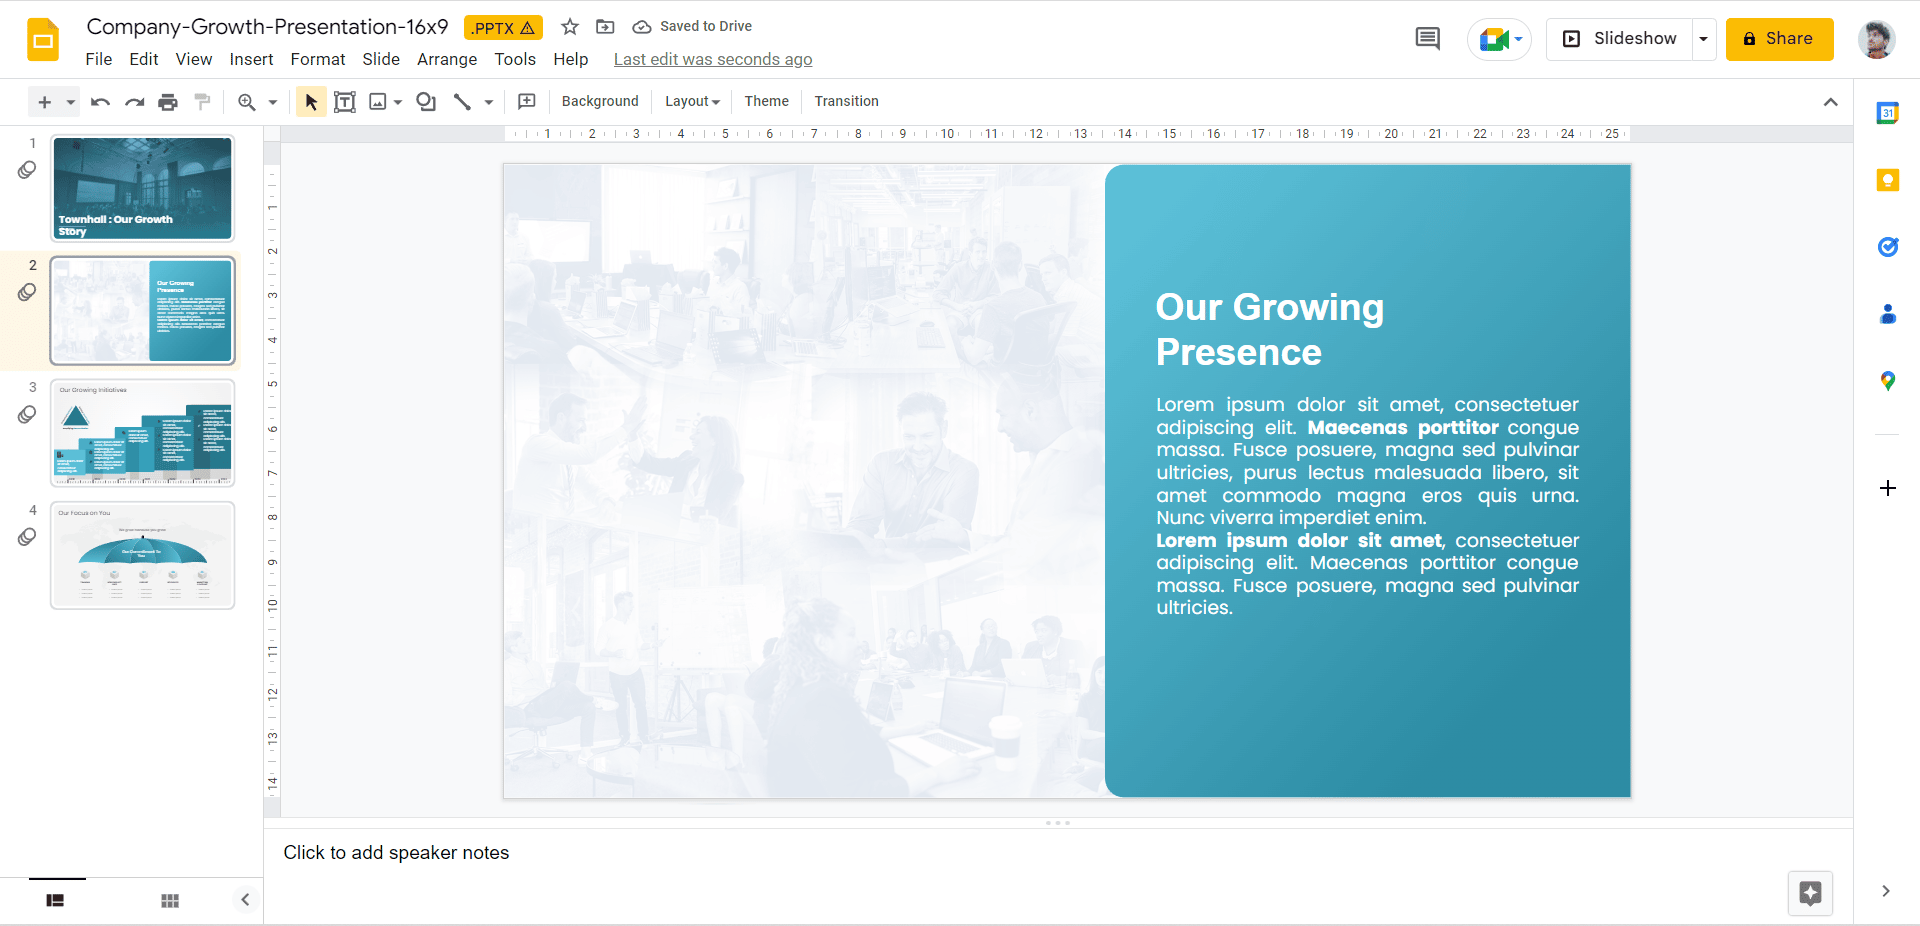
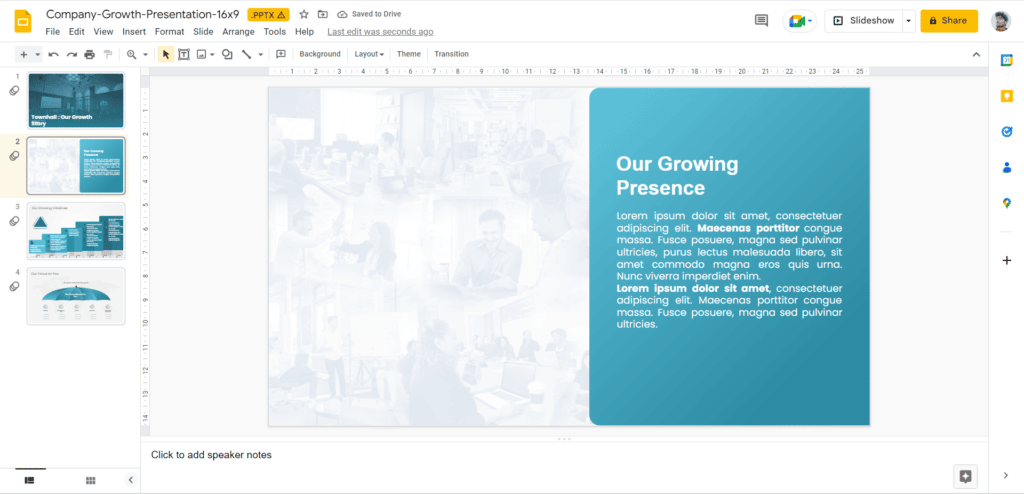
Step 1: Open Google Slides Presentation and navigate to the slide where you want to include the video.
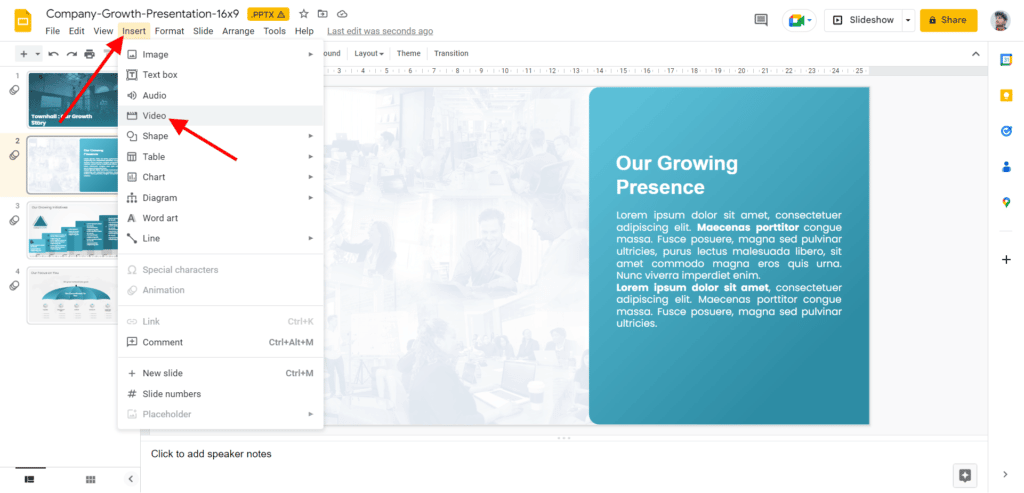
Step 2: Select ‘Insert’ and click on ‘Video.’
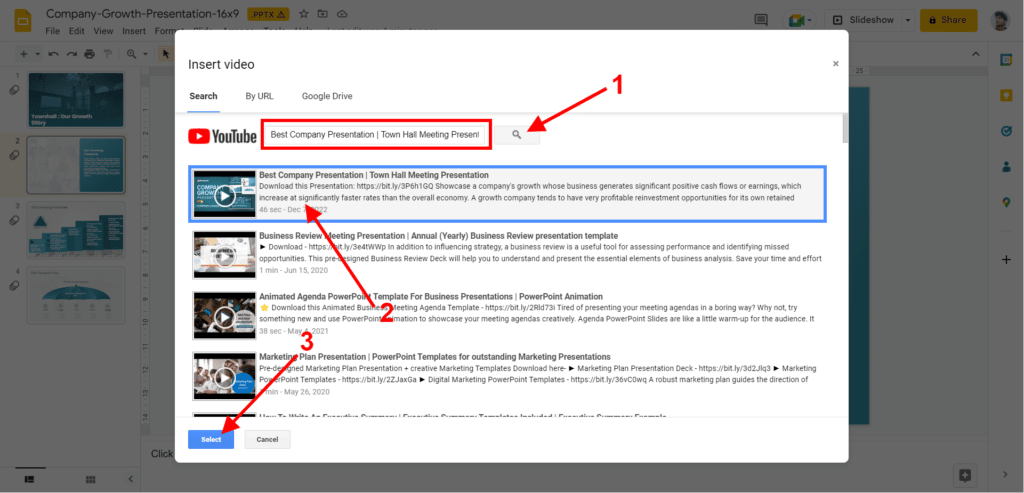
Step 3: A new window will be opened.
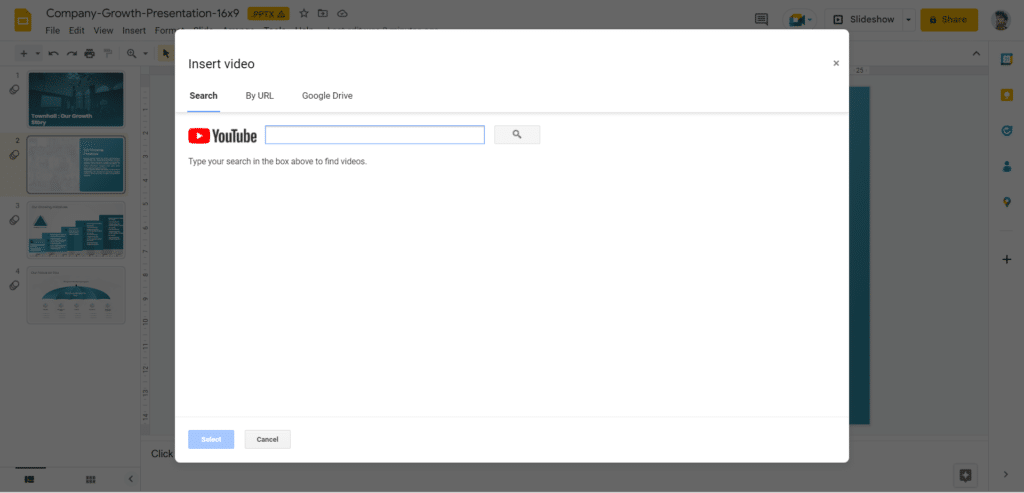
Step 4: The first tab, ‘Search,’ enables you to find the YouTube video you wish to include in the presentation. When you’ve found it, click ‘Select’ to embed a video in Google Slides.
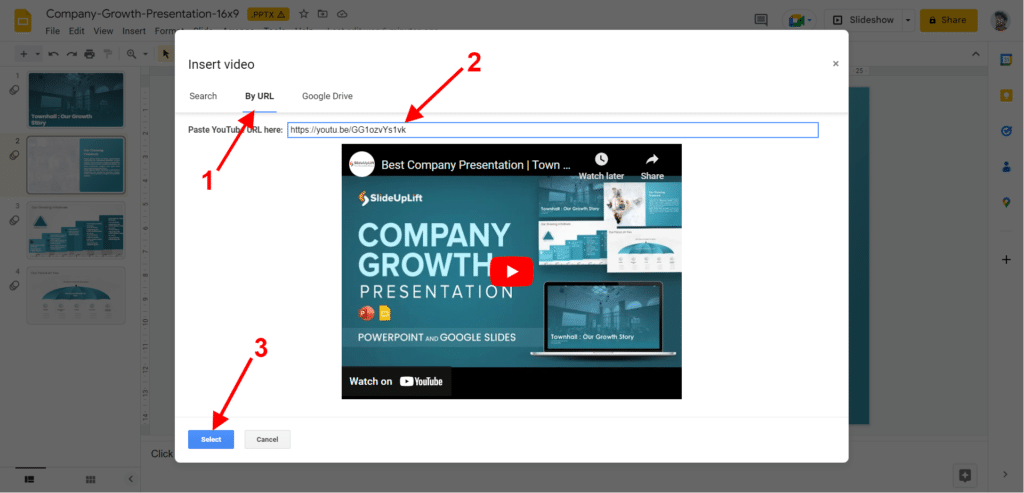
Step 5: If you have the video’s URL, go to the ‘By URL’ tab and enter it into the text field. You will see a video preview. If everything is in order, click ‘Select’ to add the video to the slide.
Step 6: Place it anywhere you want and modify it to your preferences.
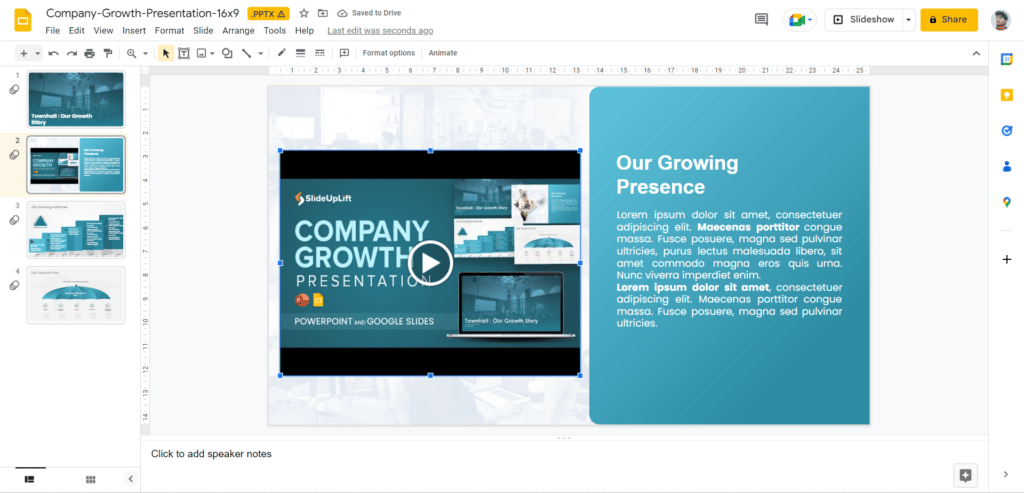
Please keep in mind that you cannot crop a video in Google Slides, so you will need to experiment with the other visual components to create a cohesive look.
How to add a video clip to Google Slides From Google Drive?
Here is a step-by-step tutorial on how to embed a video in Google Slides.
Step 1: A video that isn’t from YouTube must be saved in your Google Drive account in order to be added.
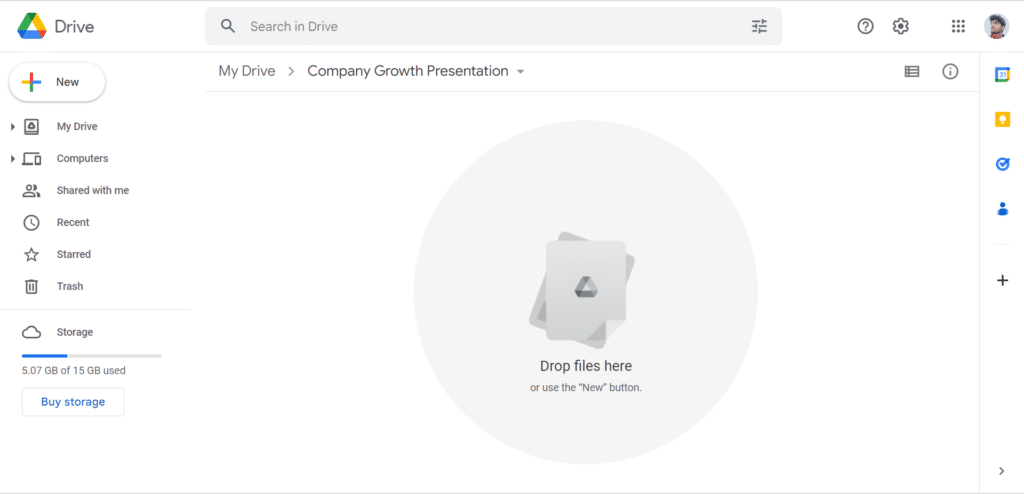
Step 2: Open Google Drive.
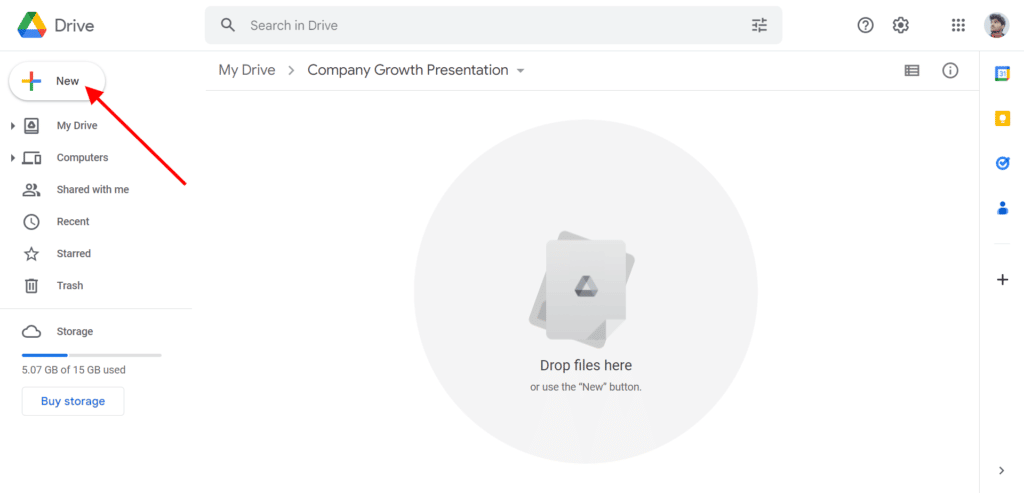
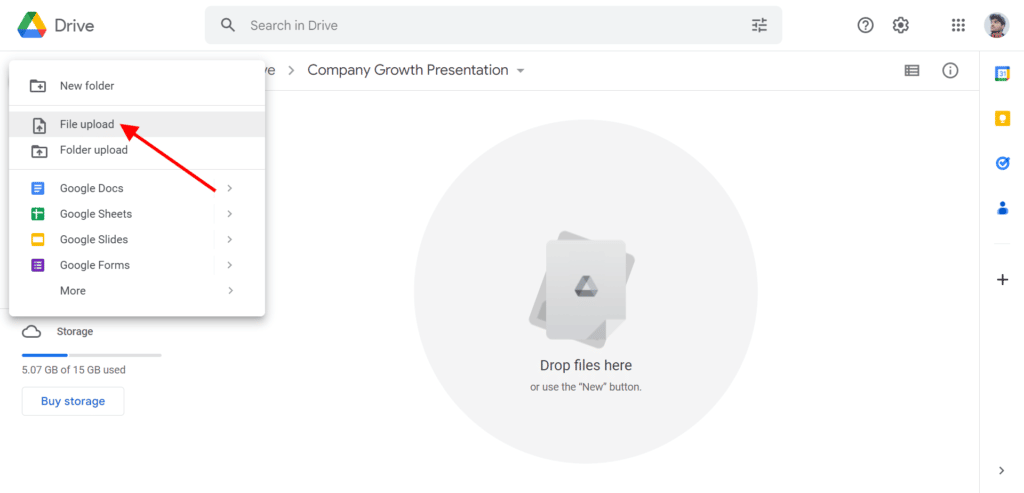
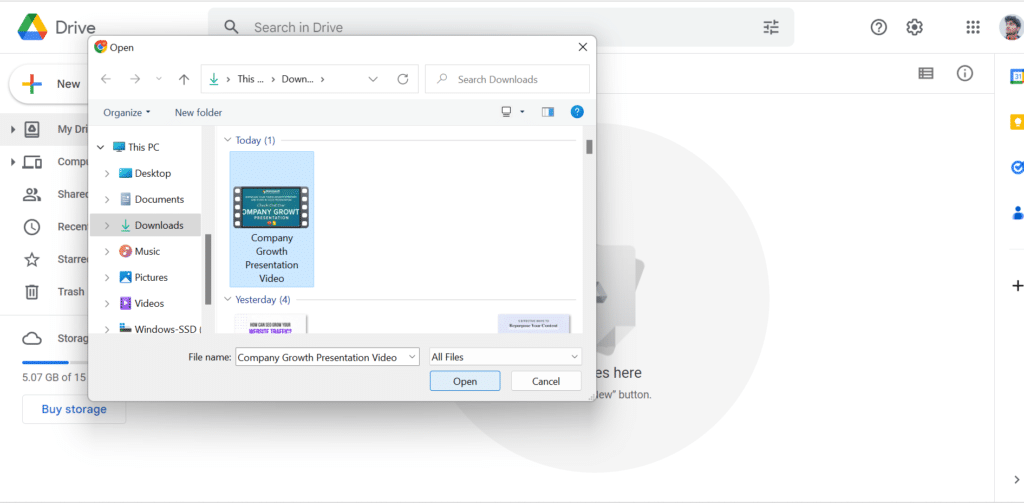
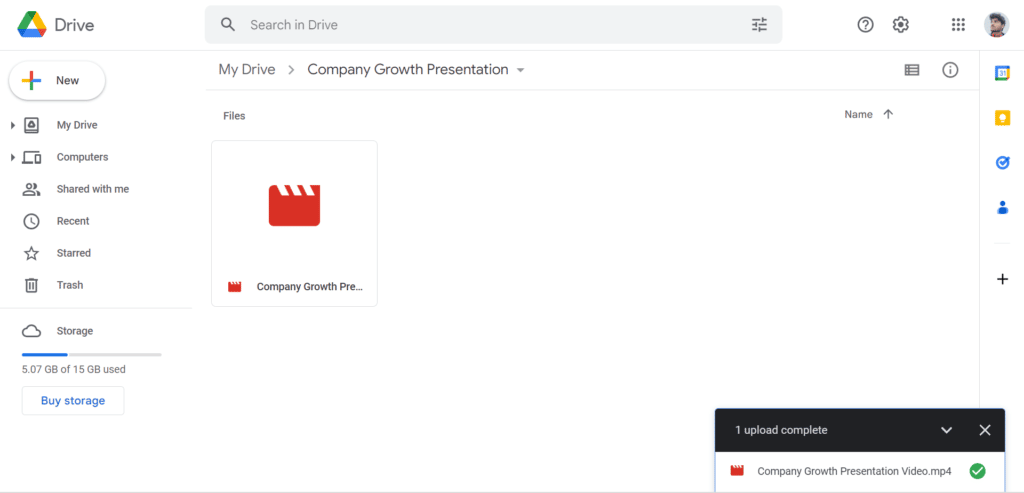
Step 3: Drag the video to ‘Google Drive,’ or click the ‘New’ and then select ‘File Upload’ option. Find the file on your desktop and upload it to Google Drive.
Step 4: Open Google Slides and navigate to the slide where you want to include the video.
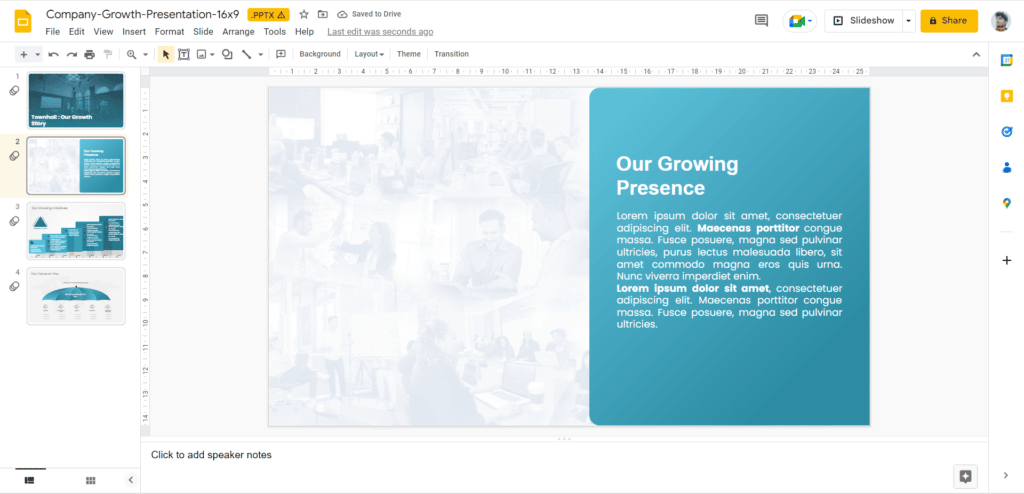
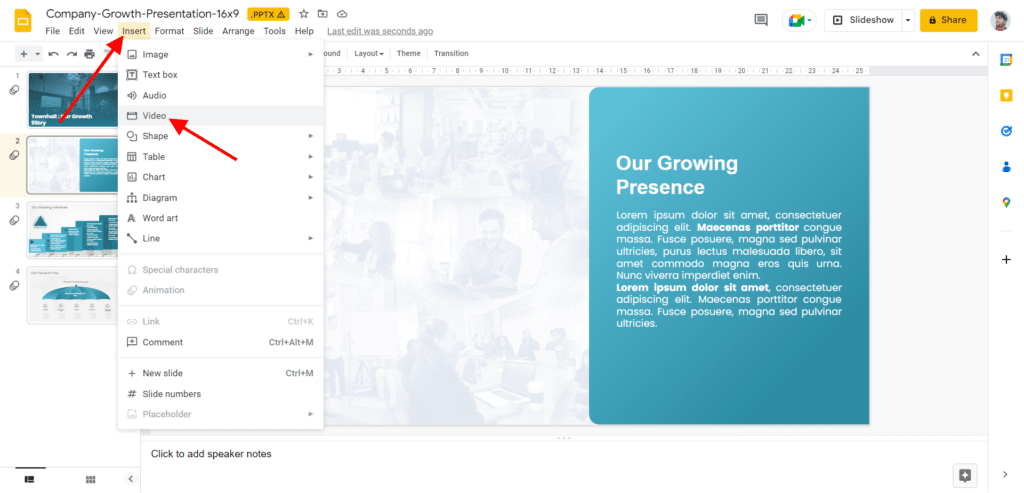
Step 5: Click the ‘Insert’ option and then select ‘Video’.
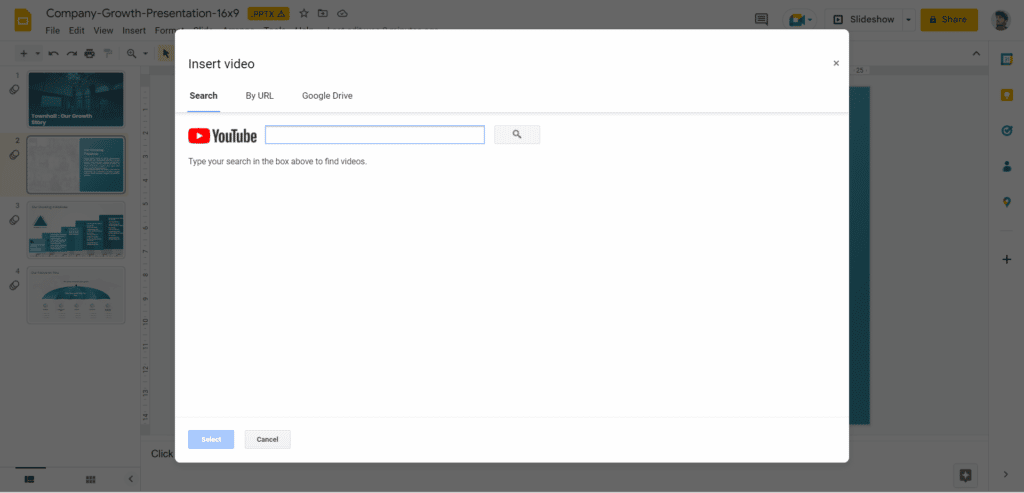
Step 6: A new window will be launched.
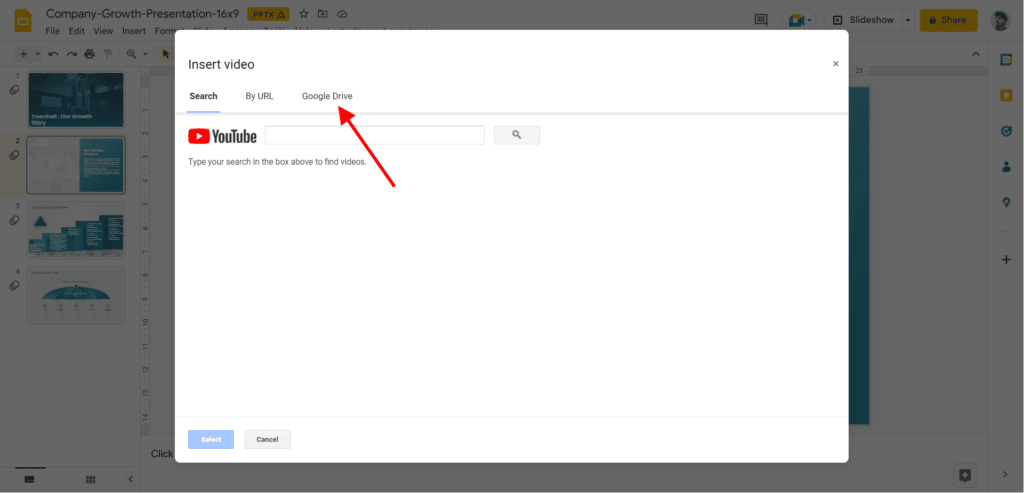
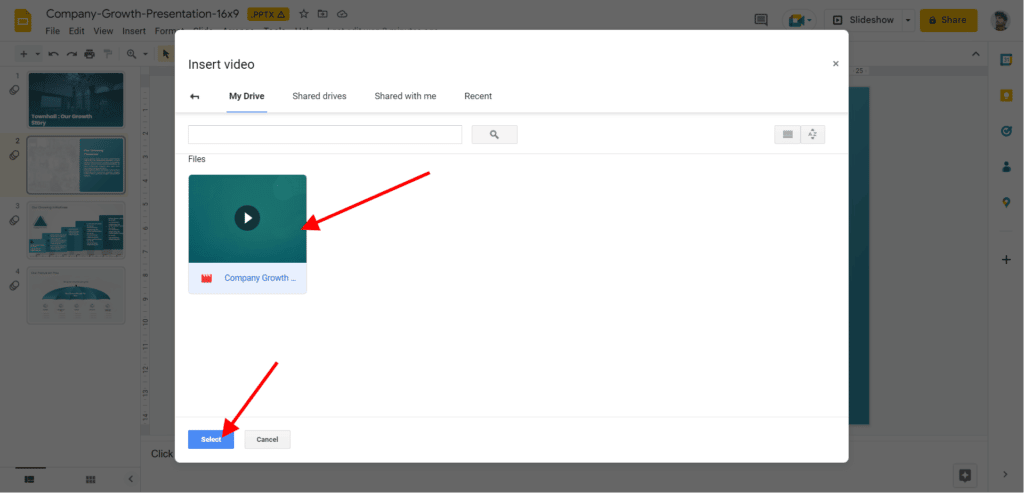
Step 7: The ‘Google Drive’ tab displays all of your videos that are saved in or shared with your Google Drive account. Choose the video you wish to upload and press the ‘Select’ icon.
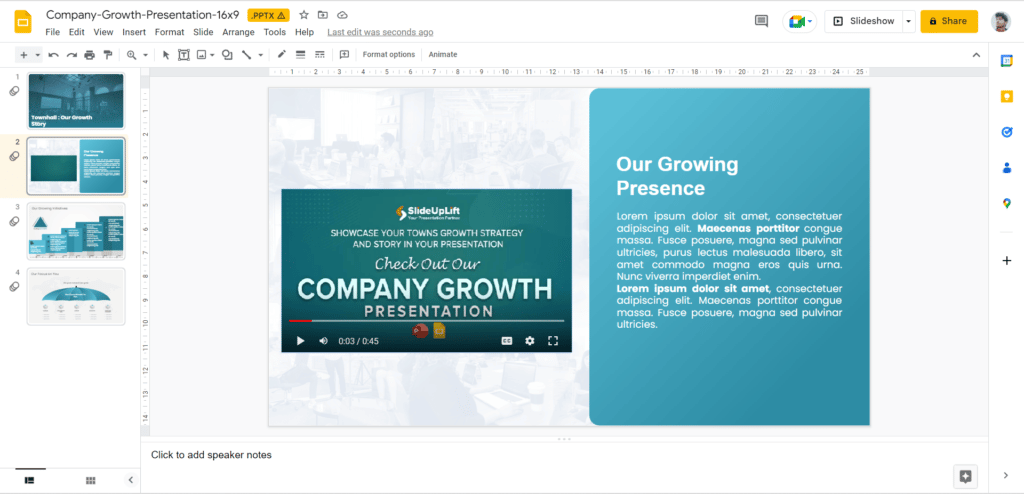
Step 8: The video will be uploaded to the slide, and you can now customize it.
Try Our Free PowerPoint Templates
To Create Engaging Presentations
How to Edit a Video in Google Slides?
Now, let’s learn about how to edit a video in Google Slides.
Step 1: Select the video that you have inserted into the presentation.
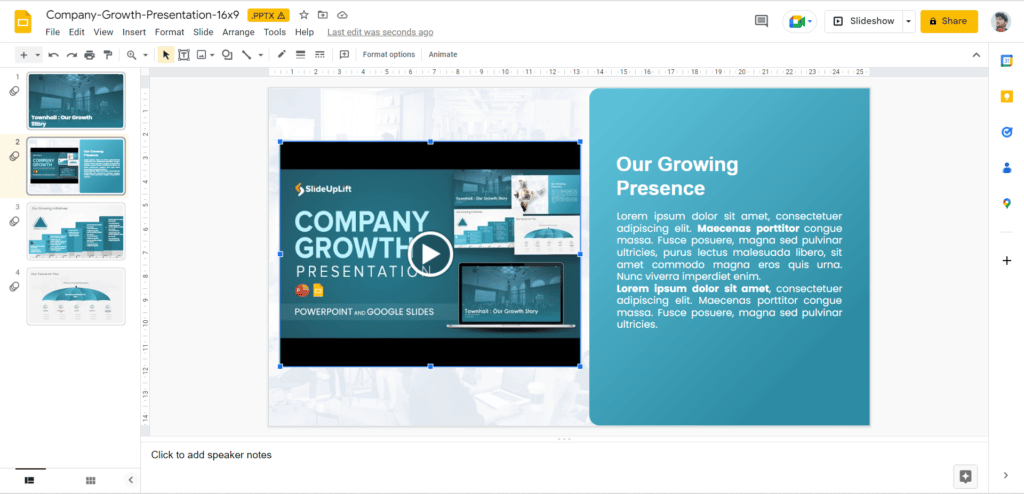
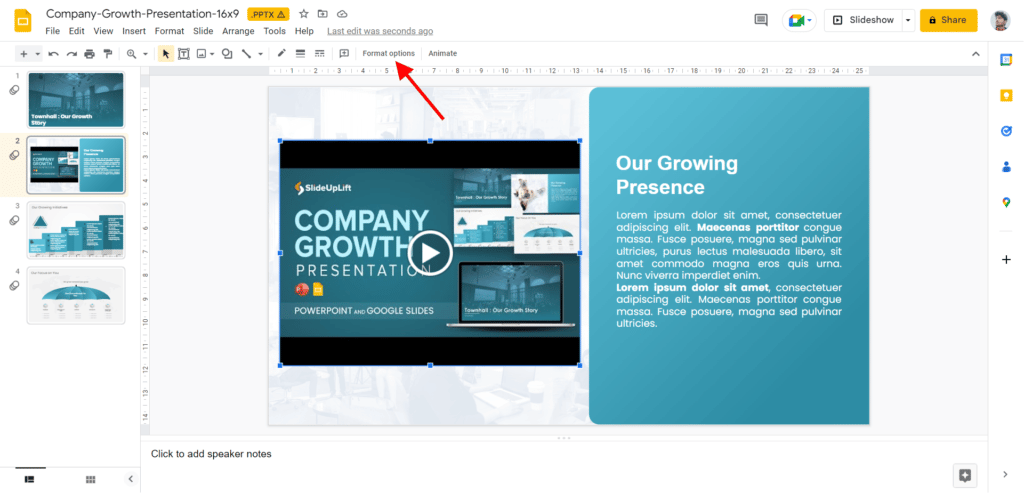
Step 2: Navigate to the toolbar and choose ‘Format options.’
Step 3: Just on right side of the screen, a new panel will appear.
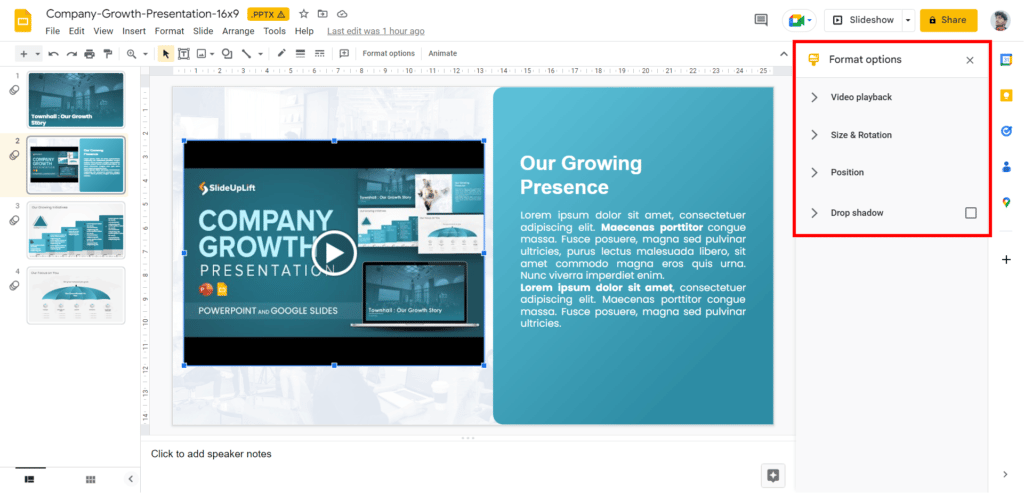
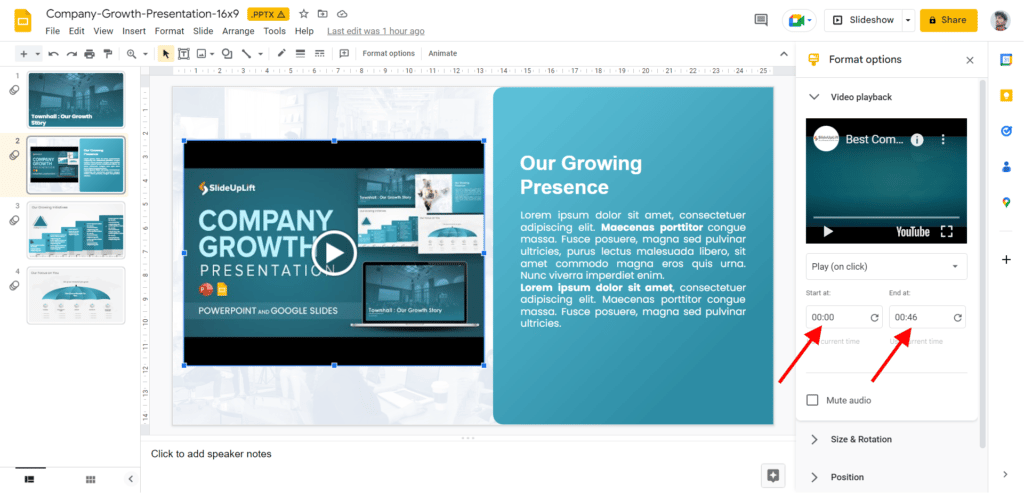
Step 4: Click the drop-down arrow next to ‘Video playback’ to view the options. You can cut the video based on the start and end times you choose. There are two boxes where you can enter the start and end times.
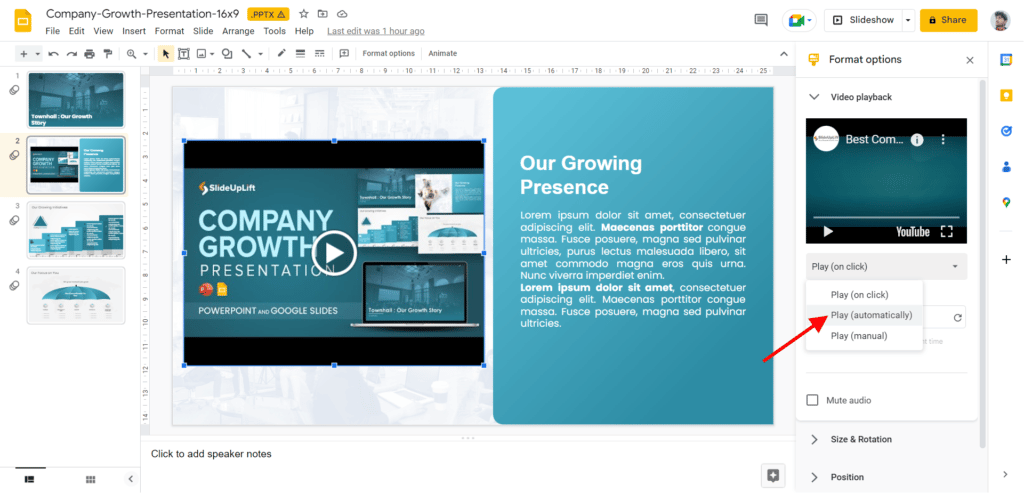
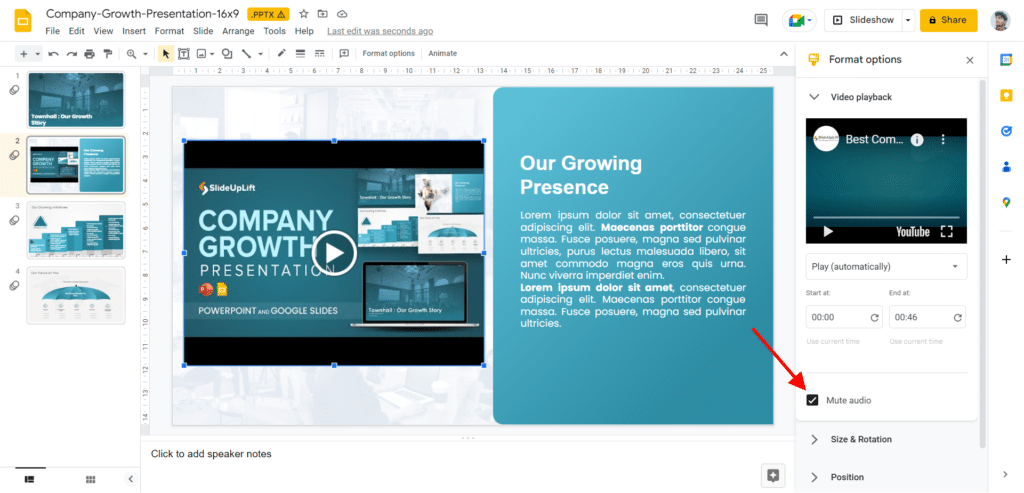
Step 5: You can enable autoplay when presenting by clicking ‘Play (automatically)’, and you can also mute the audio using the option below.
Step 6: The remaining tabs on the ‘Format options’ panel provide settings for adjusting the video’s size and position as well as adding a drop shadow to it.
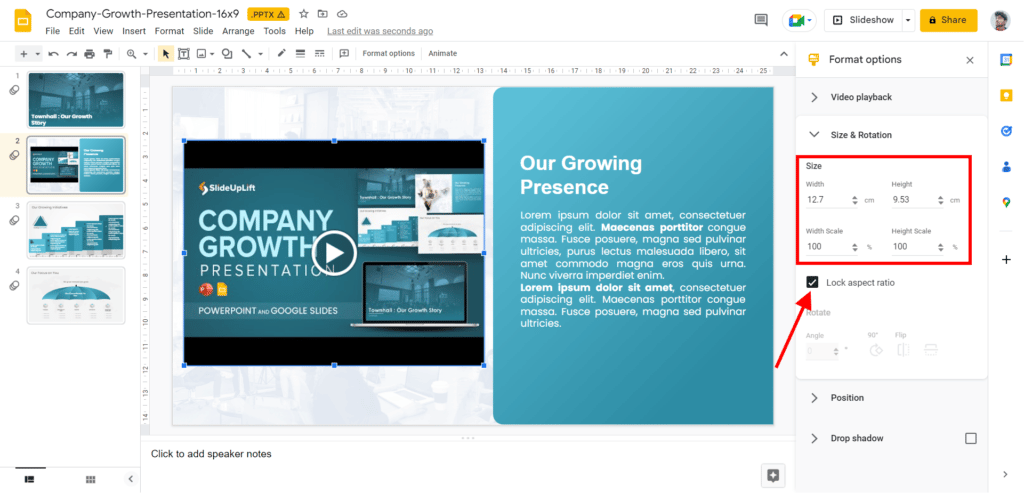
Step 7: You may change the width and height numbers for the video under the ‘Size and rotation’ tab. If you wish to retain the video proportions, you can also lock the aspect ratio.
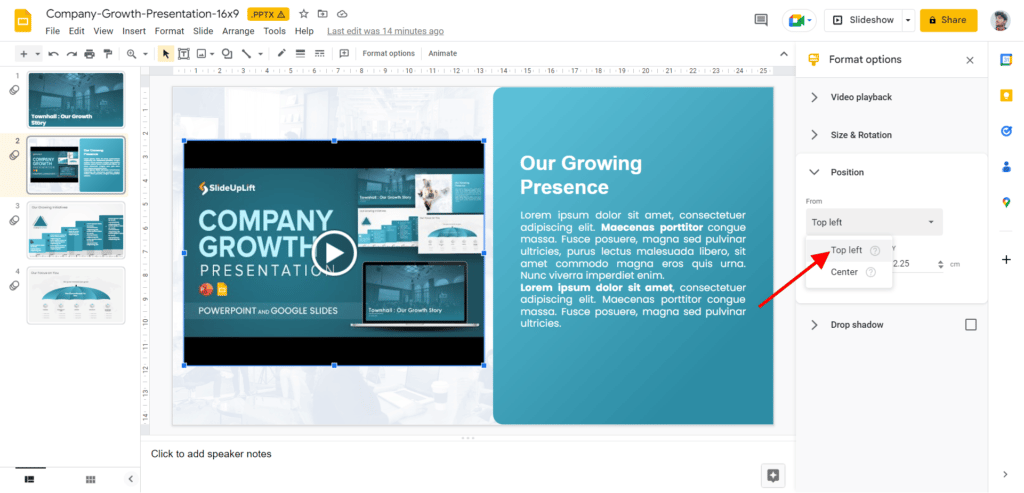
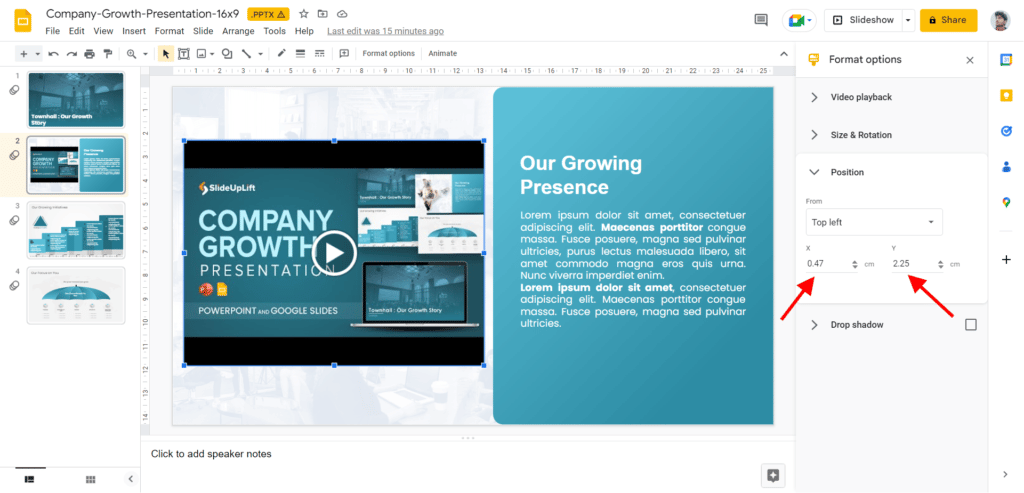
Step 8: Within the ‘Position’ tab, you may choose where you want the video to appear, using the top-left corner of the video’s center as a reference. To move the video, you must change the values of the X and Y axes.
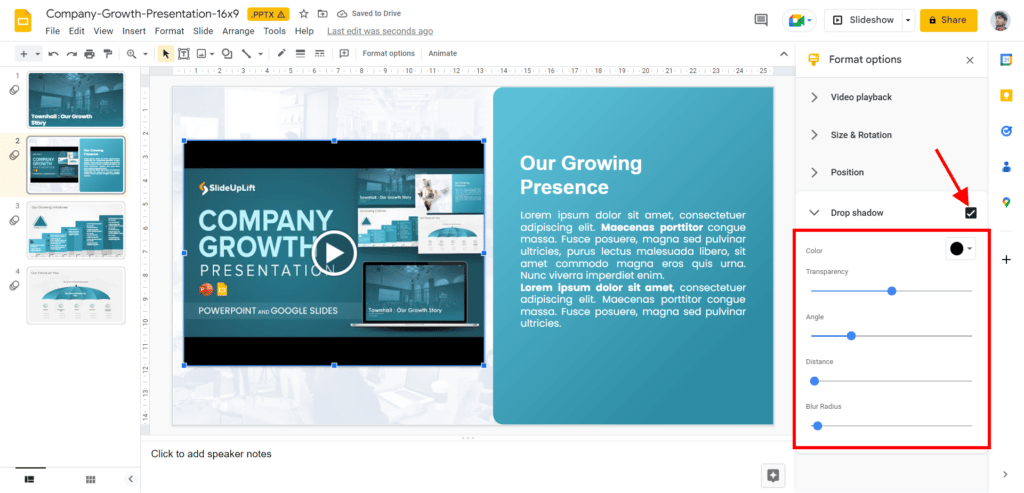
Step 9: The last tab, ‘Drop shadow,’ has a box that you can check to create a drop shadow. You may change the color and behavior of the shadow (angle, transparency, distance, and blur) by clicking the drop-down arrow.
Watch this step-by-step tutorial for a better understanding
Wrapping It Up
Adding a video to your Google Slides presentation is a simple process that can significantly enhance your presentation. By following the steps outlined in this tutorial, you can easily insert a video into your presentation and ensure that it plays smoothly during your presentation.
Along with using a video to capture your audience’s attention, add depth and context to your content, tell a story, or present information more efficiently, making your presentations more dynamic and effective. We hope this tutorial about – ‘How to add video to Google Slides?’ has been helpful and that you are now comfortable adding videos to your Google Slides presentations.
Looking For Powerpoint Design Agency?
Call Pursho @ 0731-6725516
Telegram Group One Must Follow :
For Startups: https://t.me/daily_business_reads
#Add #Video #Google #Slides

