I host events all the time at work. Sometimes they’re fun social events, sometimes they’re optional business meetings.
As much as I love hosting events, organizing them takes time. I used to post a message on Slack and tell people to comment or react with a certain emoji (reacji) if they wanted to attend. I would then check that message every day and manually add people to the calendar event.
As you can imagine, it was tedious and mind-numbing work. Not to mention, there were times when I missed a reaction and forgot to add people to the calendar invite—which left me feeling horrible. I needed a better process that didn’t waste my time and made sure everyone who wanted to come to an event got the invitation.
My solution: I created a Zap that took me out of the workflow. The Zap automatically adds people to a calendar invite when they react with a specific emoji to a Slack message. I’ve streamlined the whole process by just copying that Zap every time I host a new event. All I have to do is make sure the copied Zap matches the right Slack message, looks for the right emoji response, and sends people to the right calendar invite.
It’s great! I can keep hosting events; I don’t have to waste time with the tedious parts; and no one is left out.
You’ll need a Zapier account to use the workflows in this piece. If you don’t have an account yet, it’s free to get started.
Use my Zap: automatically add people to your calendar events
I created a shared Zap, so I could share this very Zap with you. To try it for yourself, click Try this Zap and you’ll be taken to the Zap editor to set things up. Now let’s walk through the things you need to confirm so this Zap works for you.
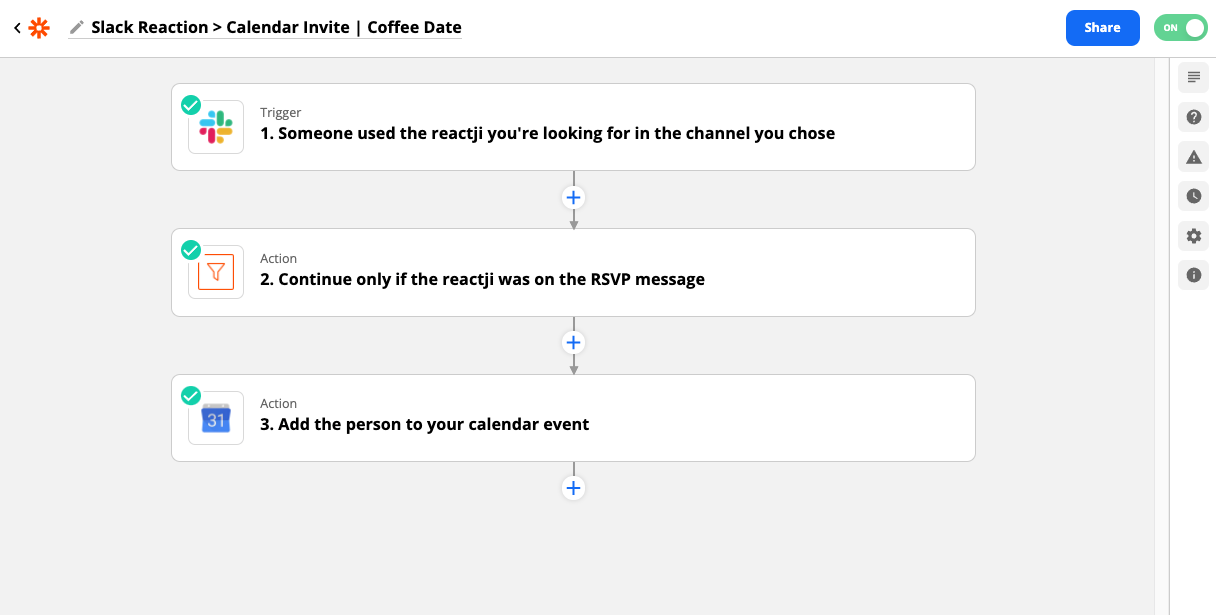
Here are the steps you’ll follow this time and every time you want to use this Zap to let people invite themselves to your events:
-
Duplicate your Zap (if it’s your first time doing this, clicking that Try this Zap button on the shared Zap page brings you to the same setup point as if you copied an existing Zap in your account!)
-
Send the message in Slack and add the reacji you’ll use as the RSVP
-
Test the trigger so that your official message comes through as the trigger sample data
-
Update the filter
-
Update the calendar step
-
Turn on the Zap
Before you begin to change anything in the copied Zap, first go into Slack and send your invite message. Then, react with the correct emoji yourself. Now, it’s time to go back to the Zap editor and finish setting up your Zap.
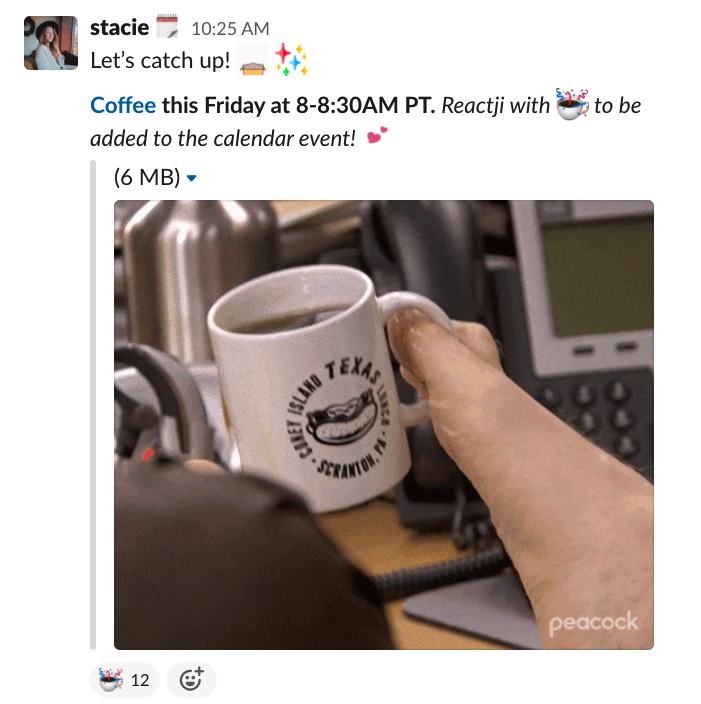
Set up your trigger: confirm your Slack channel and emoji
Start by selecting your Slack account. Then, it’s time to confirm which emoji is your yes. In my Slack message I told teammates to respond with coffee-da, so I filled that in under reaction.
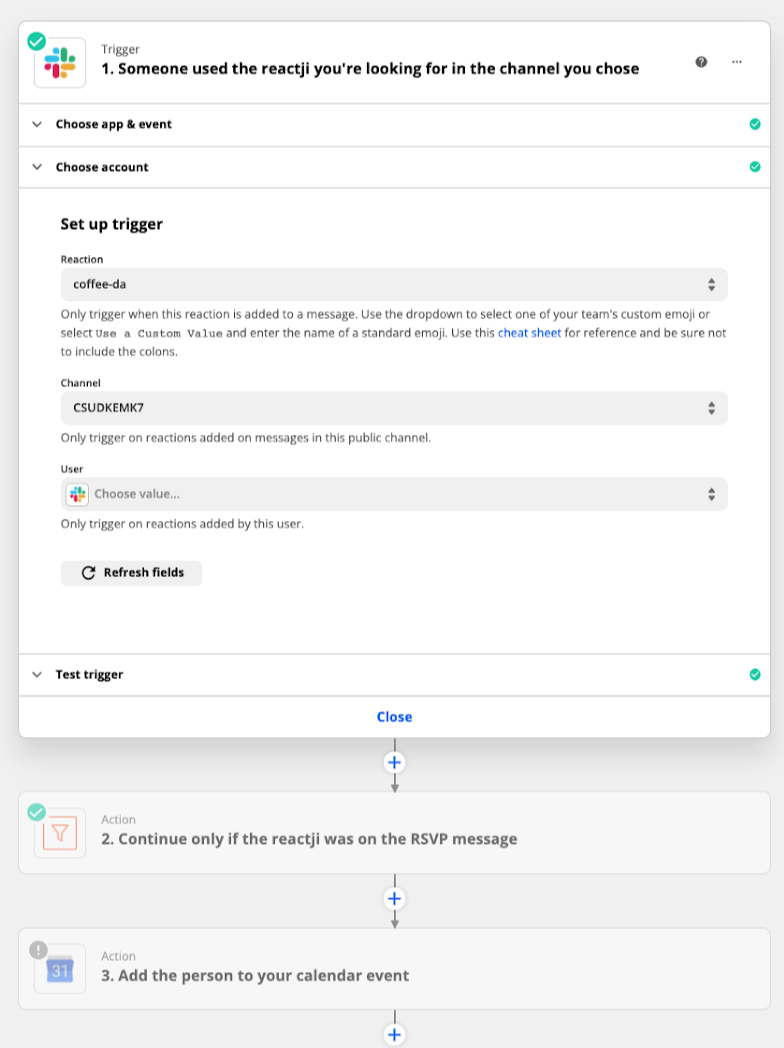
After choosing your emoji reaction, you need to specify your Slack channel. Since you already connected your Slack account, you should be able to search by channel name.
Before moving on, test what you have set up so far by going into Slack and reacting to the right message in the right Slack channel with the right response emoji.
Tip: Use an emoji that doesn’t have other forms (like skin tone) because it has to be the exact emoji you selected in order for the Zap to work.
Configure your filter to look for the correct slack message
Next, we need to set up a filter so the Zap only runs for reactions to my specific Slack message. Slack tags their messages with timestamps. When you tested your trigger, your timestamp should automatically populate in the filter step. But if it doesn’t, just go back up to the sample data from your trigger test and select the time stamp.
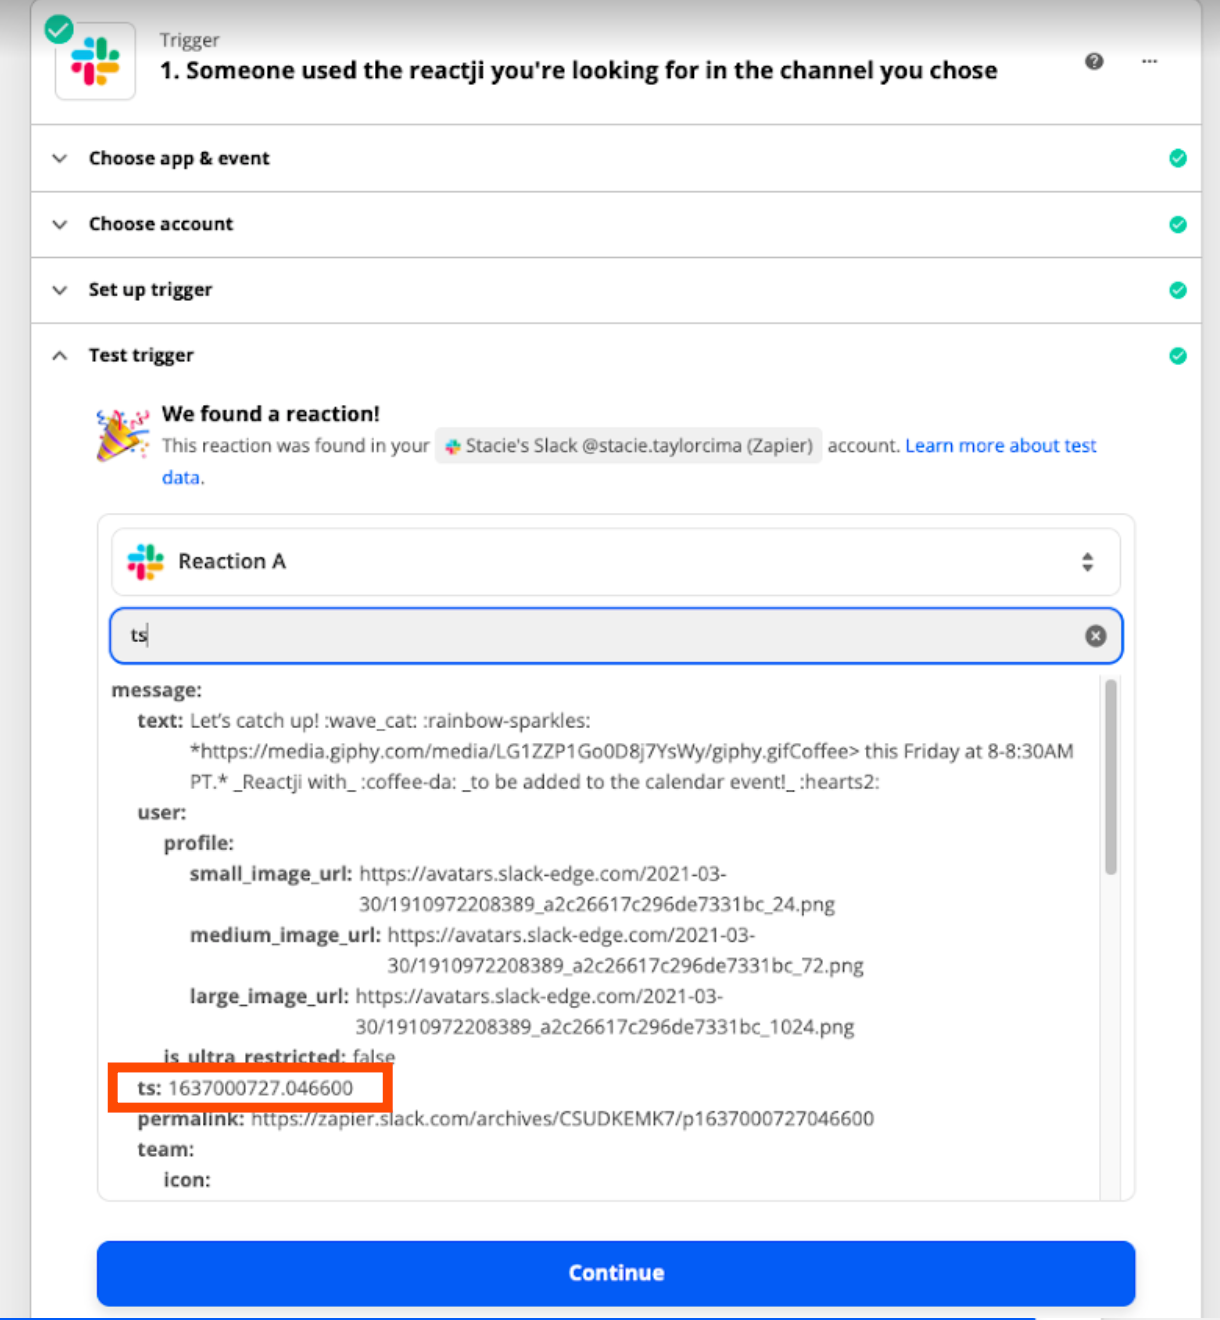
Grab the numbers after the “ts” and paste that into the filter step like this:
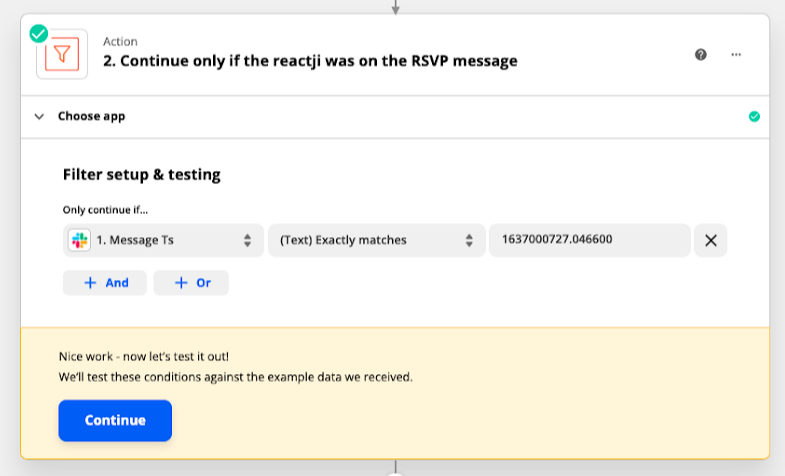
This filter keeps your Zap from continuing if someone uses the same reaction on a different message in that Slack channel.
Set up your action: specify the right calendar event
Now, it’s time to make sure you have the right calendar event selected. Select your Google account and then search for the calendar event you want people to be added to when they react with the right emoji. Since you have attached your Google account, you should be able to search by event name.
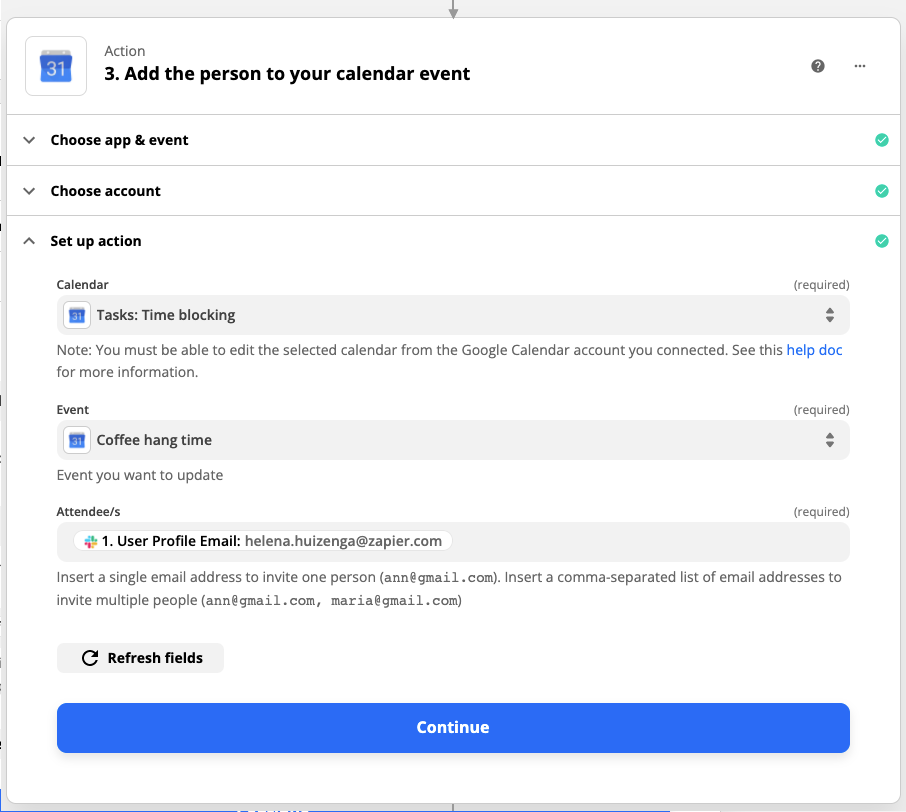
Leave yourself as the attendee, don’t worry about adding anyone else—once you turn your Zap on, it will do that automatically.
Turn on your Zap
There you have it! Now, any time you need folks to invite themselves to an event you created, copy the Zap you just made and update it to reflect your latest Slack invite message!
Need Any Technology Assistance? Call Pursho @ 0731-6725516

