
Managing a growing eCommerce business and need details on your inventory? Spreadsheets are a great tool to track your store’s inventory, list all of your products and supplies, as well as log whenever anything’s added or taken out.

The only problem is that it can be tedious—and time-consuming—to update and edit your spreadsheet every time a new product is added to your stock or a new sale is made that decreases your inventory.
Fortunately, there’s a way to automatically manage and update your inventory in a Google Sheets spreadsheet every time a new Google Forms response is submitted, so your stock quantity updates the moment something changes.
Set up your Google Forms trigger
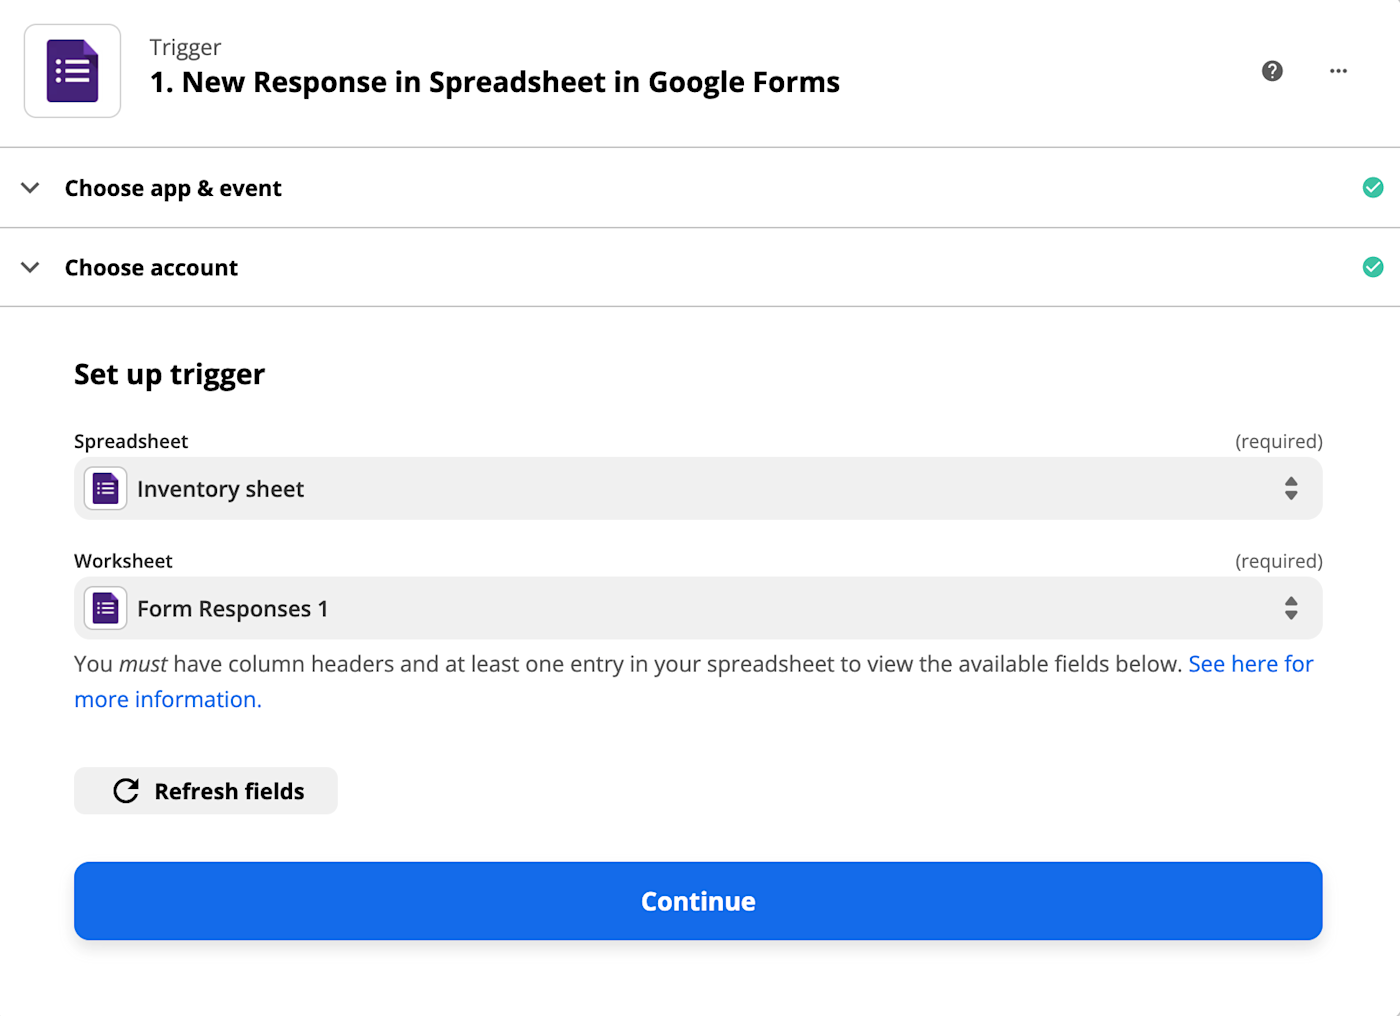
First, set up your trigger—the event that starts your Zap. Search for and select Google Forms as the trigger app and New Response in Spreadsheet as the trigger event. Click Continue.
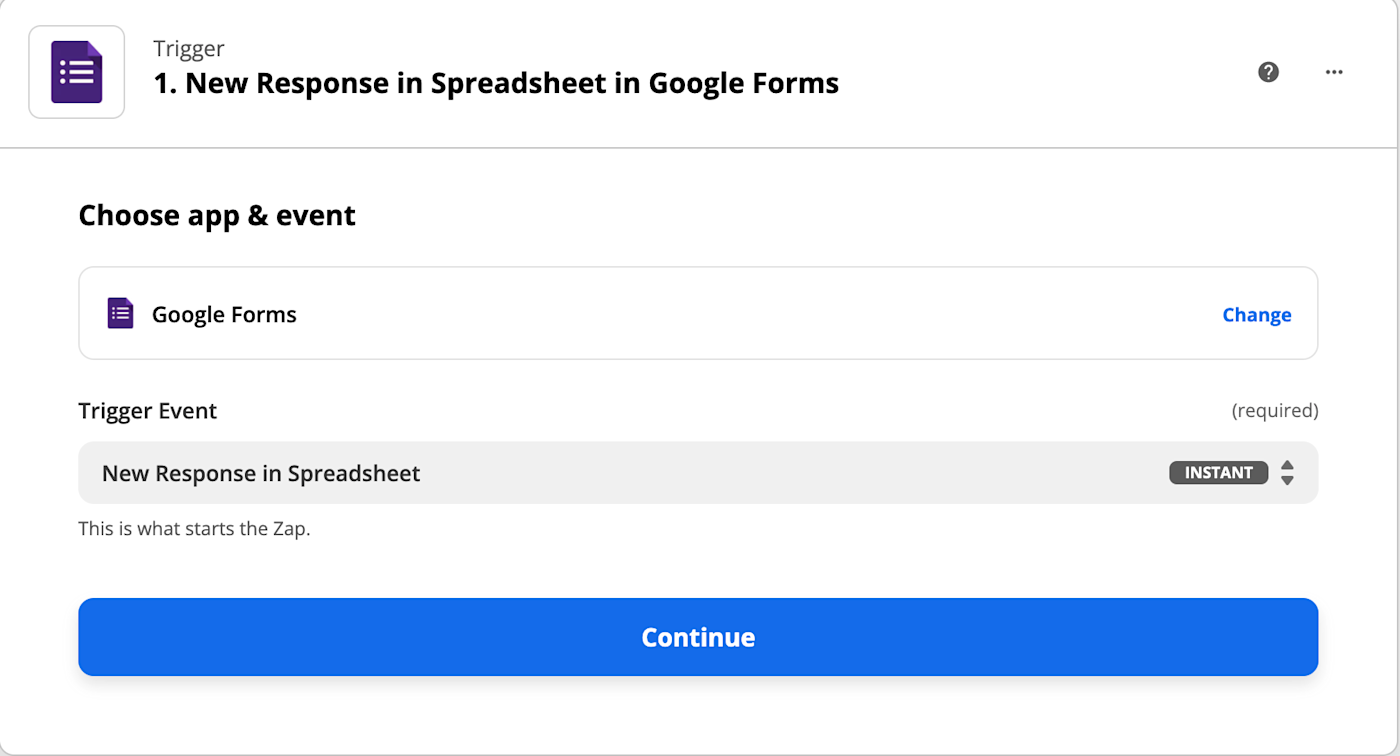
Now, connect your Google Forms account. Click on Choose an account… and either select an account from the dropdown menu (if you’ve connected Gmail to Zapier before) or click + Connect a new account.
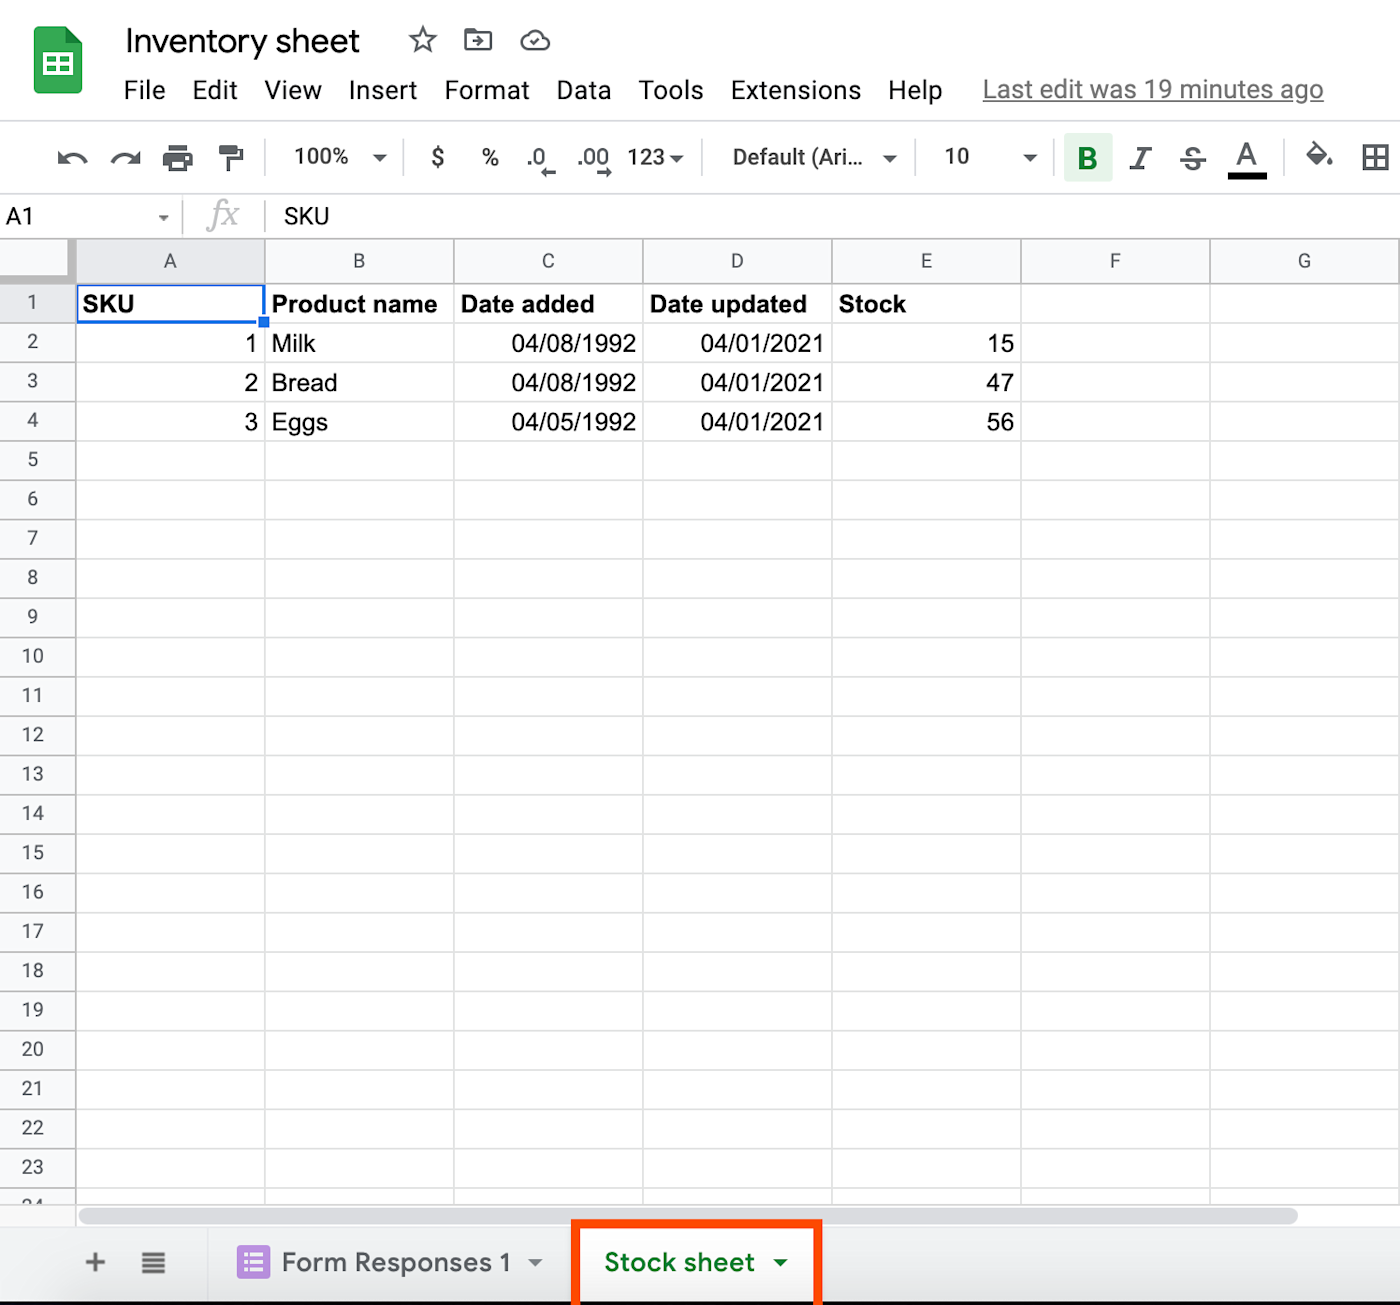
Before we continue setting up the trigger, you need to build your inventory spreadsheet if you don’t already have one. In a separate window, open Google Sheets, make a new spreadsheet, then list your inventory there. Be sure to add at least a column for your product ID numbers—or SKU for stock keeping units—and the quantity of the items you currently have.
Now, we’ll create a new Google Form to update inventory. Inside the same spreadsheet, click Tools > Create a new form in your spreadsheet.
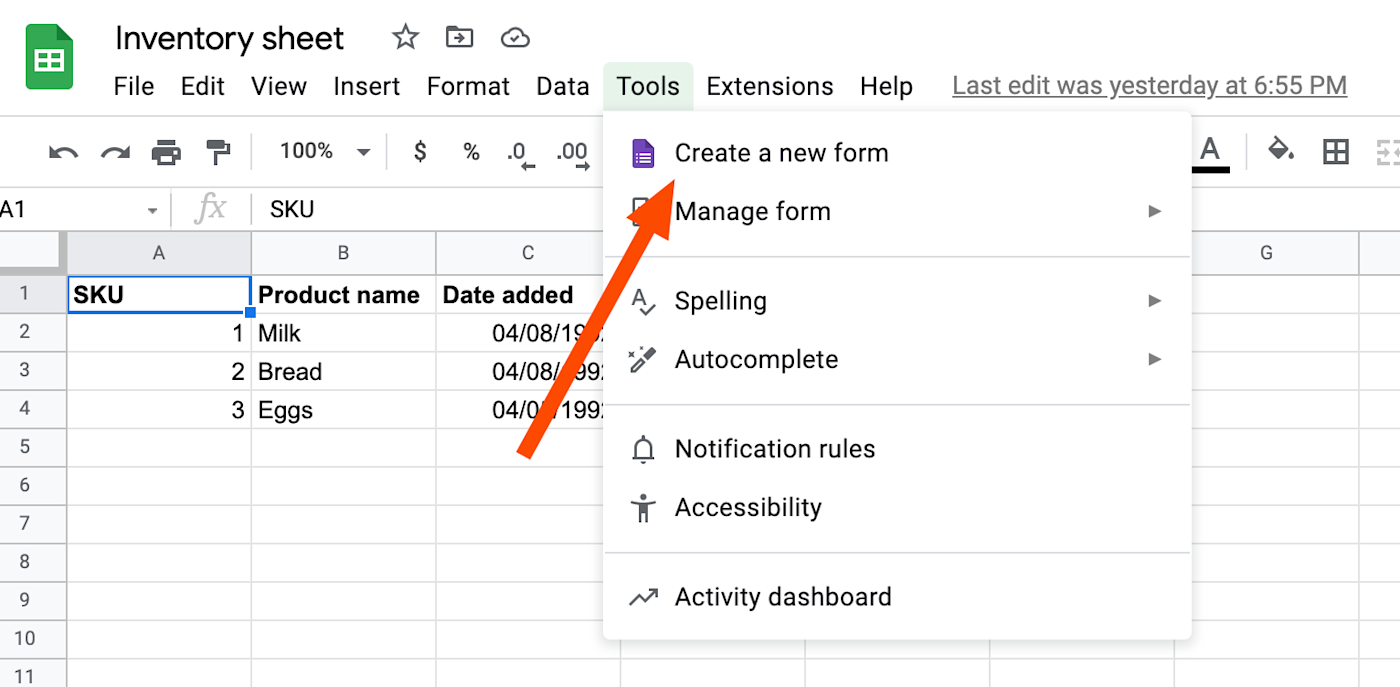
In the form, add the fields you’d want to update—including at least the product ID or SKU and the number of stock you’re adding (or removing—which you’ll do by adding a negative quantity).

You can also add a validation to your quantity—click the 3 dot menu on that question, select Response Validation, and add the details you need to make sure you have the correct data.
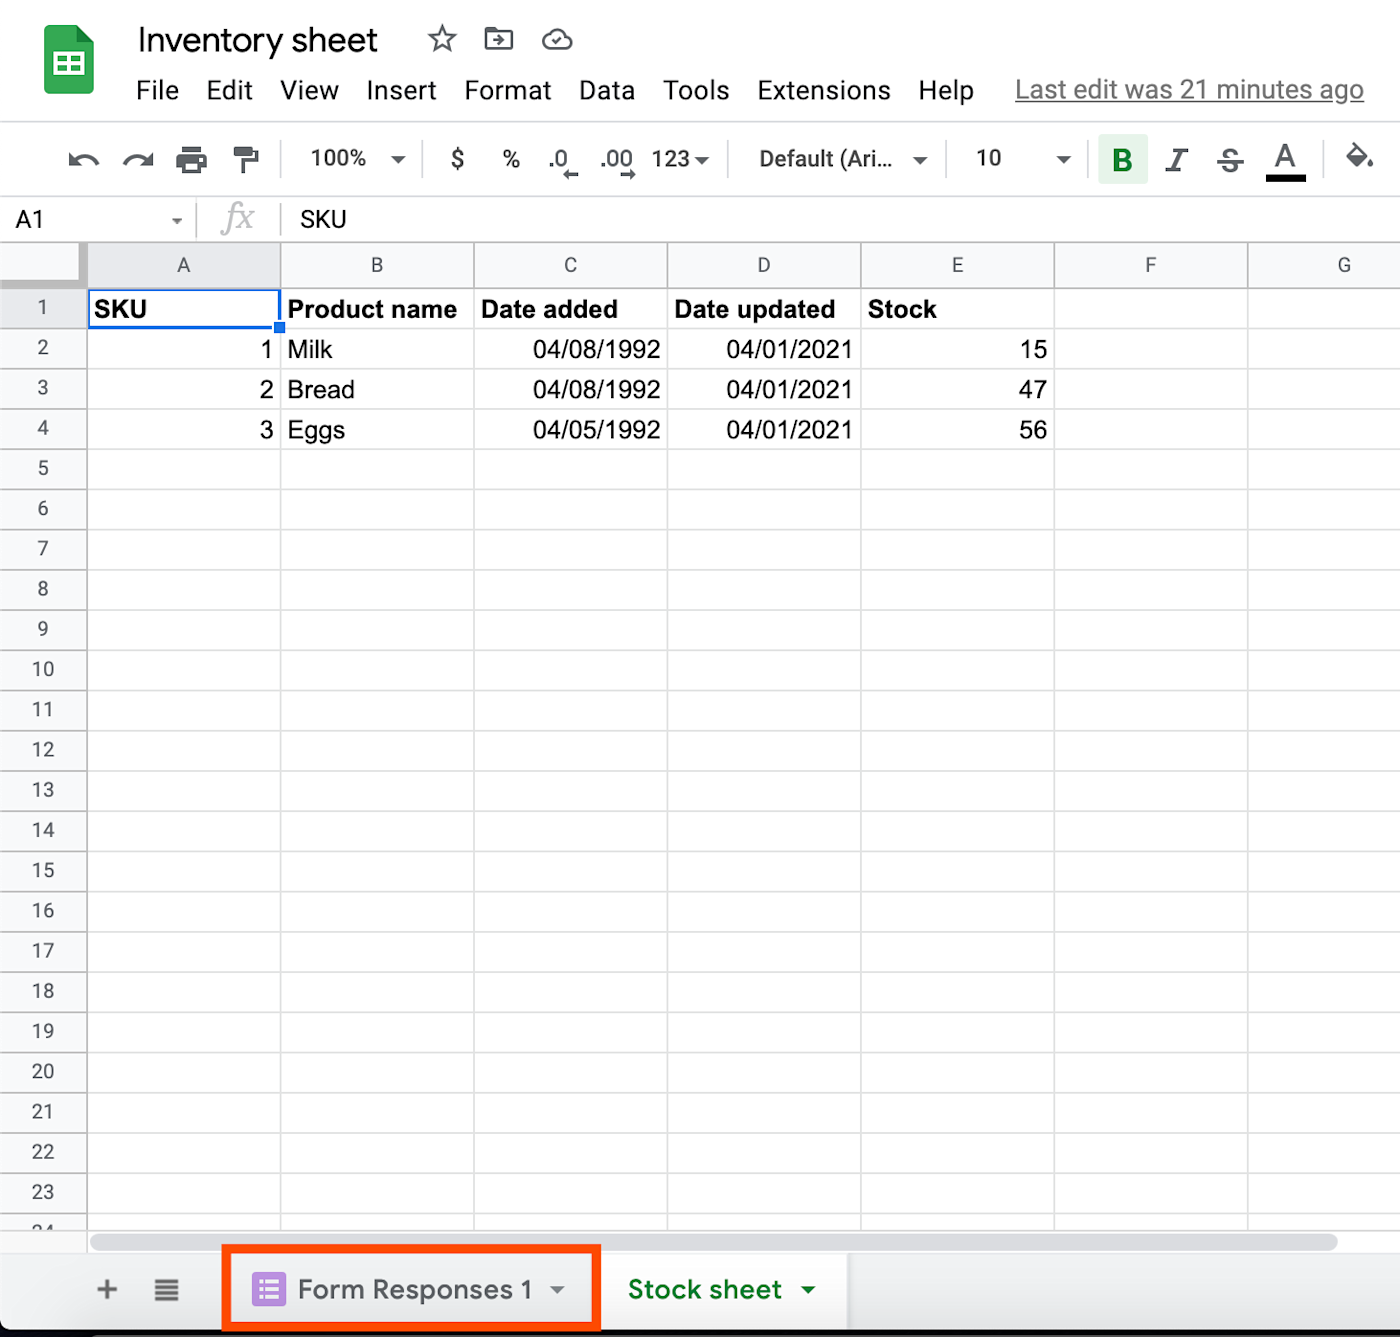
A tab will automatically be created within your Google Sheet, so every time you fill out your Google Form, your responses will be routed there. We’ll call this tab “Form Responses 1”.
Now we can continue setting up the trigger. Go back to the Zap editor. Under Spreadsheet, select your Google Forms spreadsheet, and under Worksheet, select the tab where your Google Forms responses will live. Click Continue.
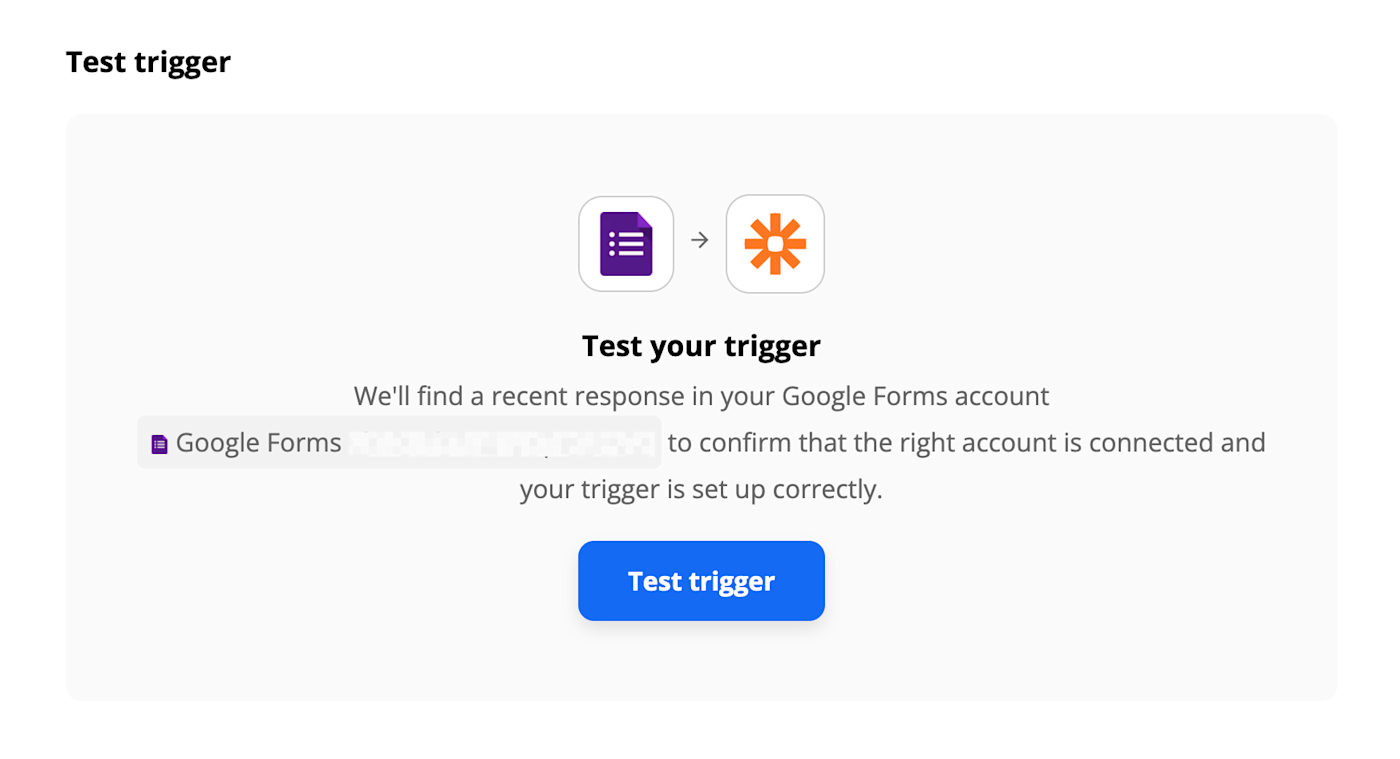
Now it’s time to test your trigger. Zapier will find a recent form response from your responses tab in your spreadsheet. If you’ve never submitted a response before (because the form is new), submit a Google Forms response now with some new product numbers. (You can delete this later.) This data will be used to set up the rest of your Zap.
Click Test trigger. Once you see that your trigger is working properly, click Continue.
Set up your Google Sheets action
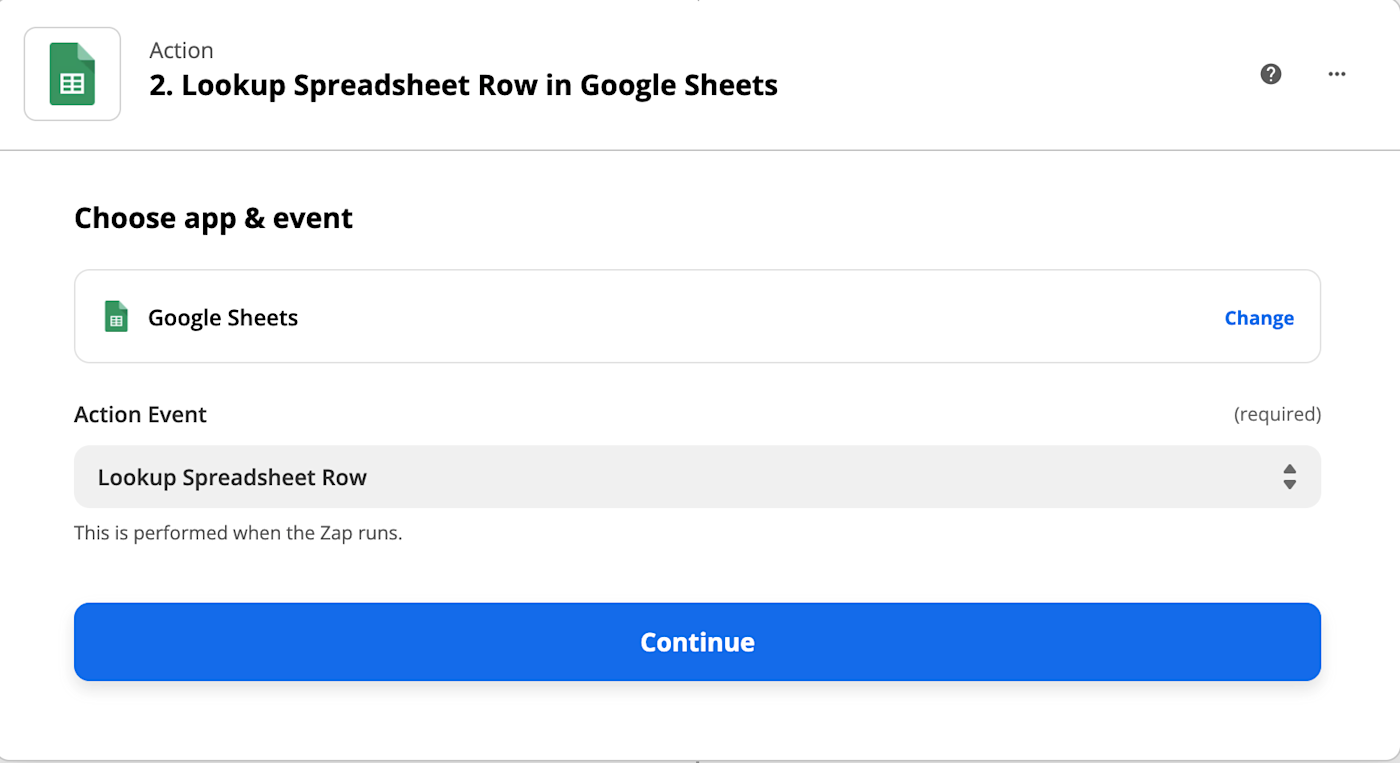
Now let’s set up the action—the event your Zap will perform once it’s triggered. Select Google Sheets as your action app and Lookup Spreadsheet Row as your action event. Click Continue.
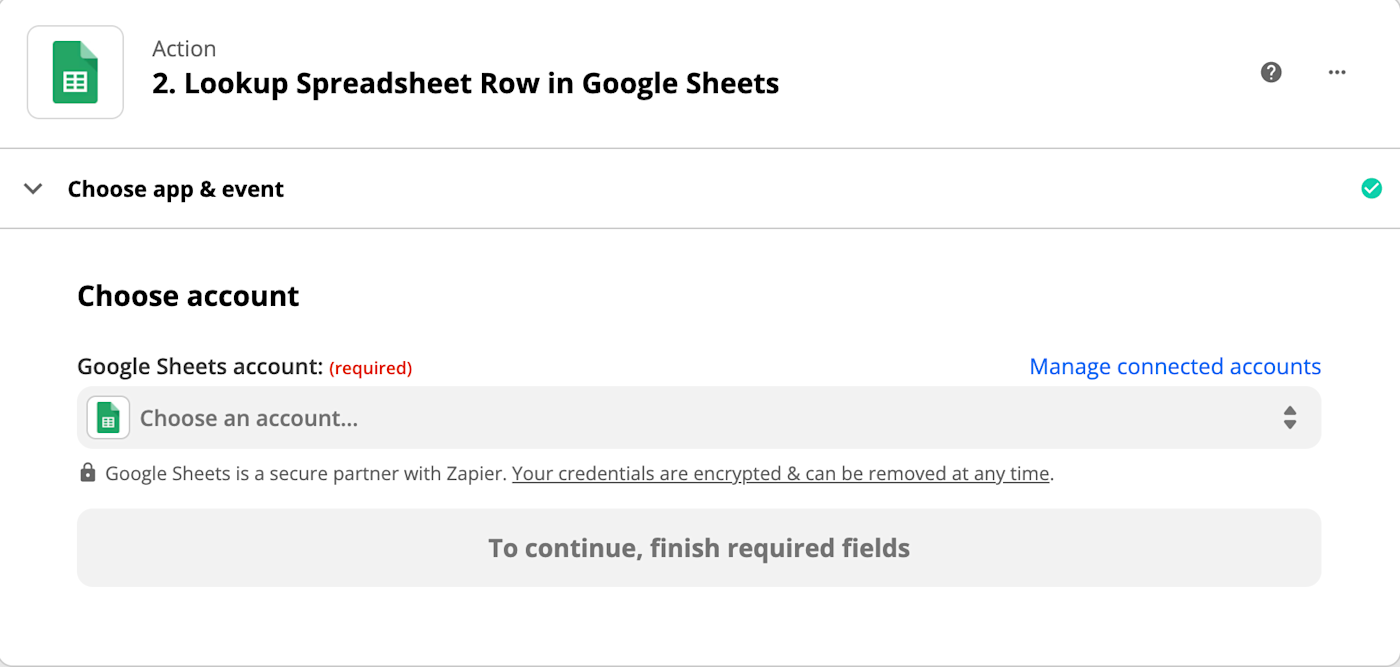
Connect your Google Sheets account to Zapier and click Continue.
Now it’s time to customize how Zapier will find the inventory you want to update. Under Spreadsheet, select your main spreadsheet. Under Worksheet, select the sheet with your inventory list (in our example Stock sheet).
Under Lookup Column, choose your product ID or SKU column from your inventory tab. Then under Lookup Value, select the SKU field from your Google Form.

Tip: Want to add new products to your spreadsheet from this form, too? Tick the Create Google Sheets Spreadsheet Row if it doesn’t exist yet? box, then fill in the info from your form to add new products if this item isn’t in your inventory yet.
After you’ve adjusted your settings, click Continue.
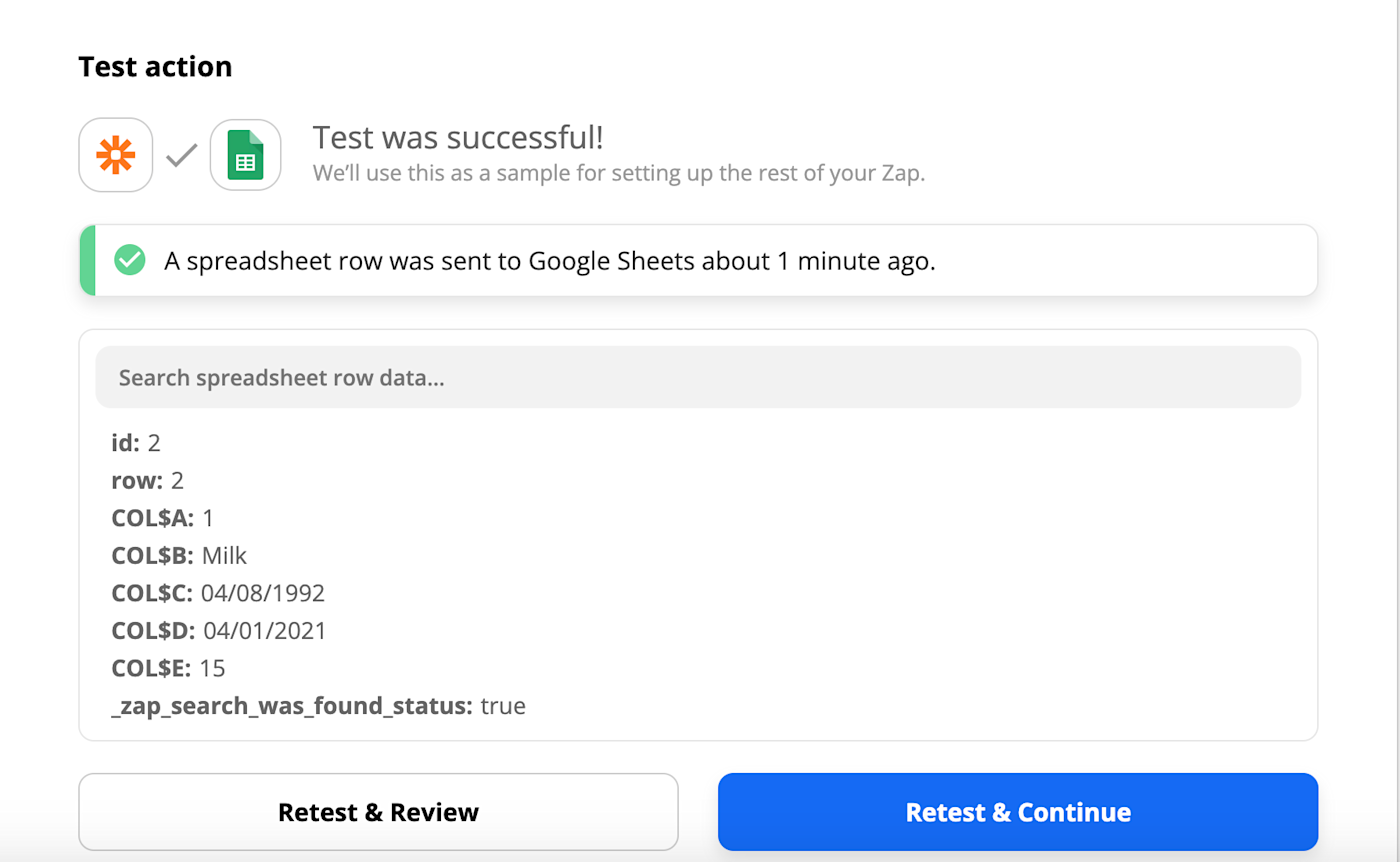
Now it’s time to test your action. When you click Test & Review or Test & Continue, Zapier will send a spreadsheet row to Google Sheets according to how you set up your step.
Set up your Formatter step
It’s time to crunch the numbers and calculate your new stock quantity. Add another step to your Zap by clicking the plus sign below your previous Google Sheets step.
Select Formatter by Zapier as your action app and Numbers as your action event. Click Continue.

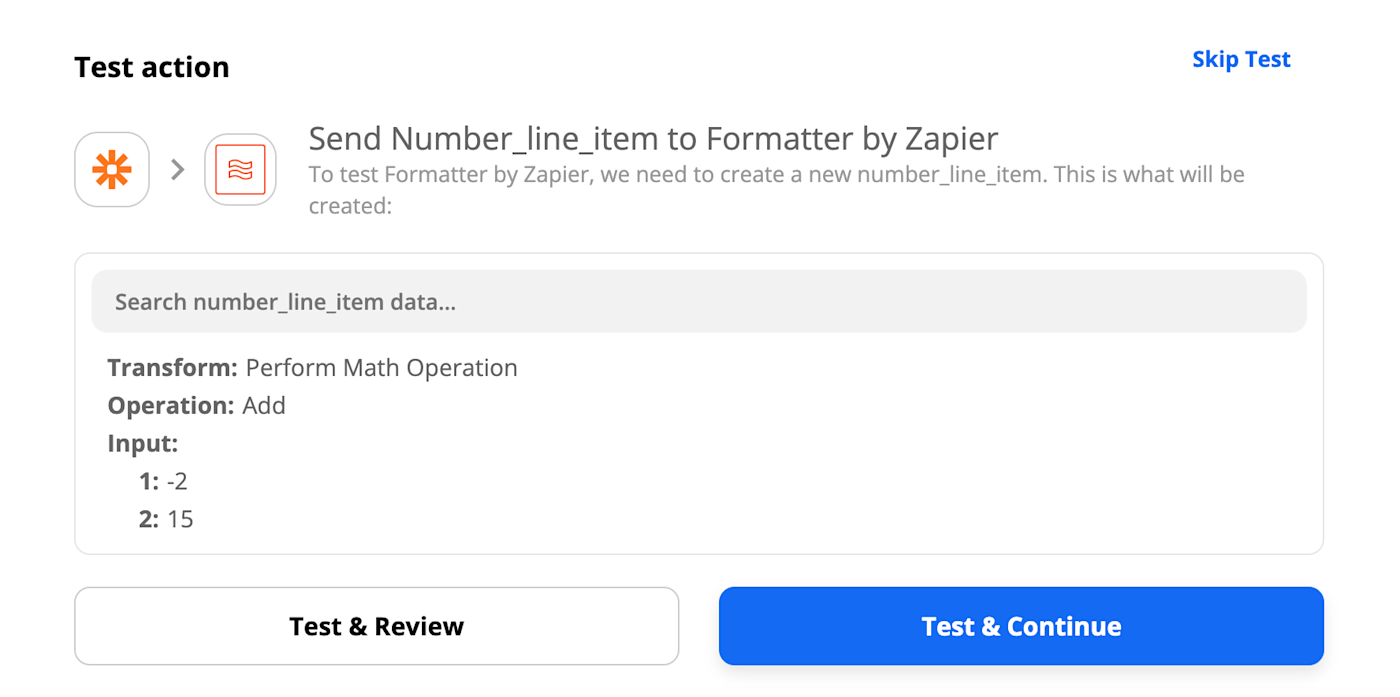
Under Transform, select Perform Math Operation. Under Operation, select Add.
Now it’s time to input the values you want to add together. Under Input, click in the first field and select the Quantity value from the dropdown of data from your previous step. In the next field, click and select the Stock value from your Google Sheet. Click Continue.

Now it’s time to test your trigger. Click Test & Continue.
Set up your Google Sheets action
Now it’s time to set up the very last action: Updating your spreadsheet row with the right stock quantity.
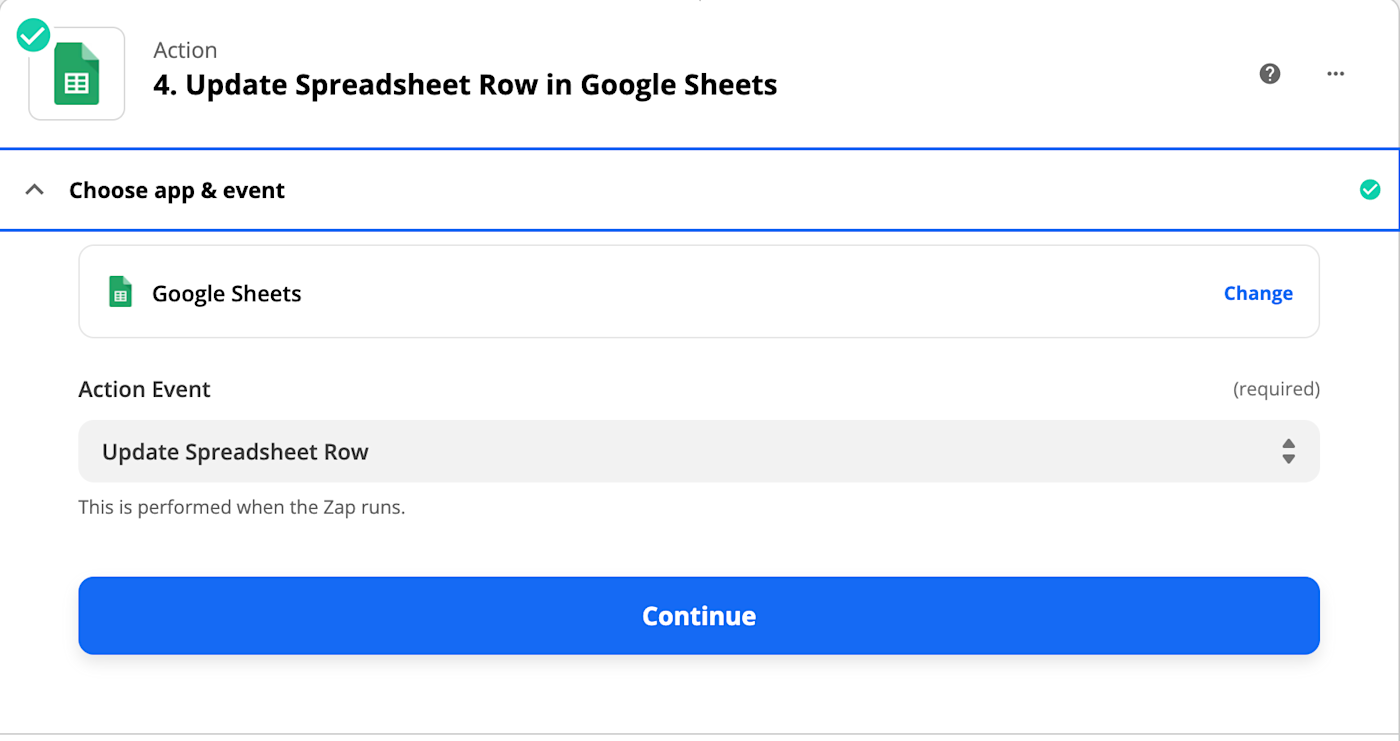
Click the + sign after your previous action step to add a new step to your Zap. Select Google Sheets as your action app and Update Spreadsheet Row as your action event. Click Continue.
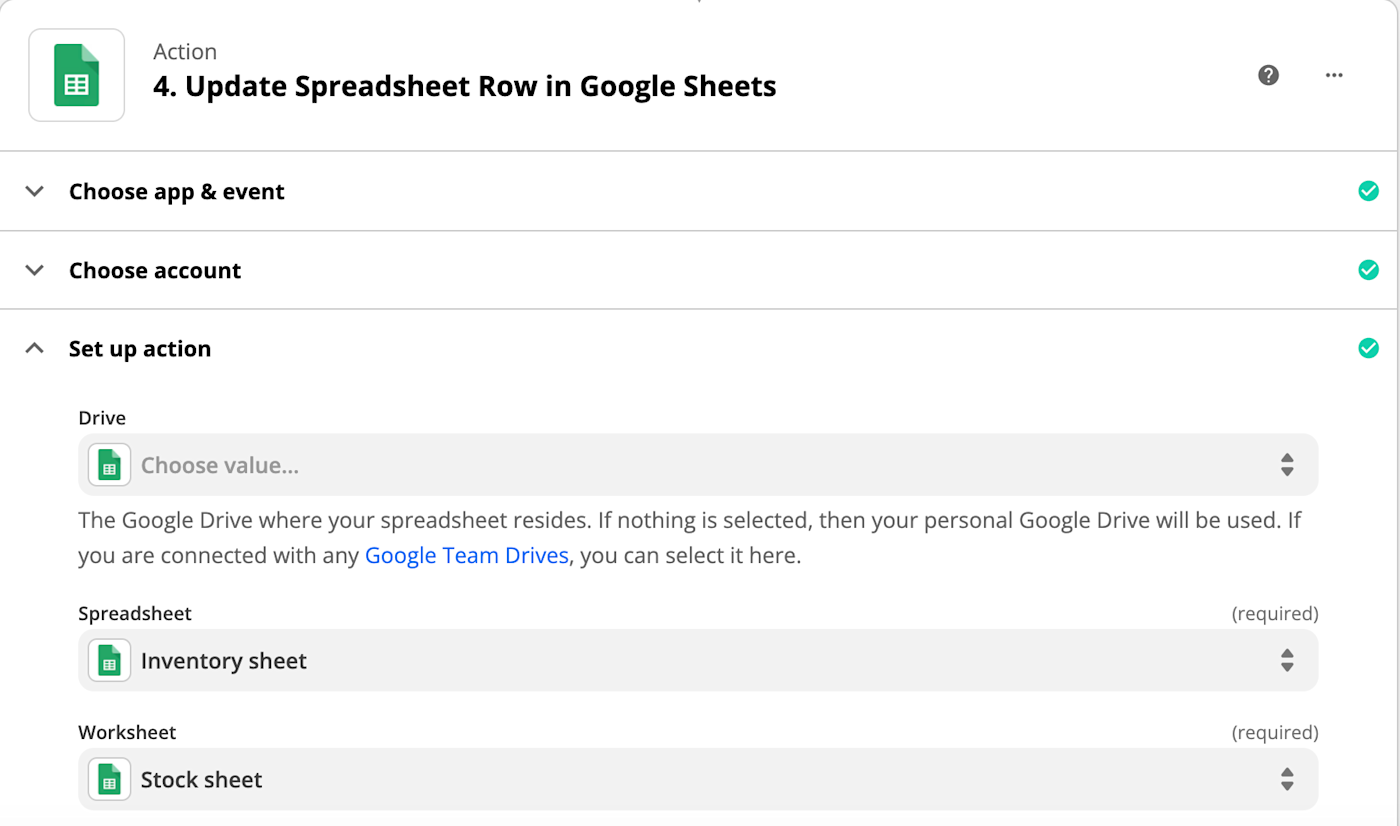
Connect your Google Sheets account to Zapier and click Continue. Under Spreadsheet, select the same inventory sheet from your previous step (ours is called Inventory Sheet). Under Worksheet, select your stock sheet tab.
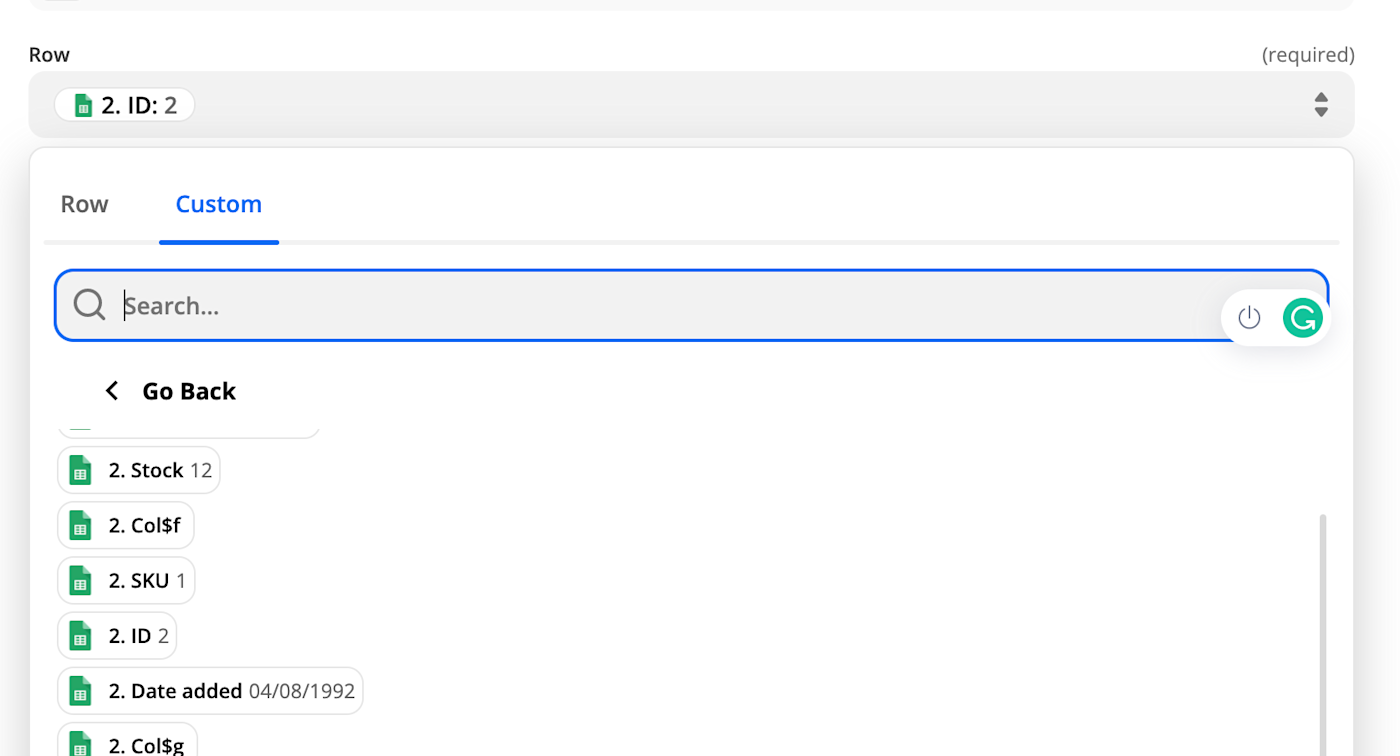
Now, under Row, click on Custom and select Lookup Spreadsheet Row in Google Sheets.

Select the ID value from your first Google Sheets step.
Now, scroll down to the last field. Click in the Stock field and select the Output value from your Formatter step. That will add the new quantity to your spreadsheet to keep your inventory up to date.
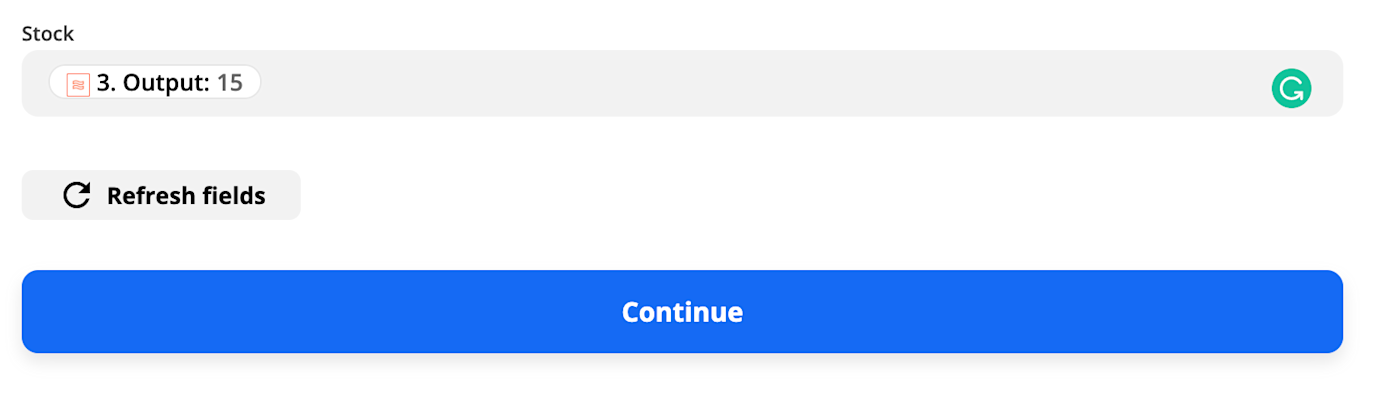
Click Continue.
Once you’ve tested the Zap, click Turn on Zap.
Share the form with your team. Now, whenever you need to update inventory in Google Sheets, just fill out that form, and your inventory will be updated automatically.
New to Zapier? It’s a tool that helps anyone connect apps and automate workflows—without any complicated code. Sign up for free.
This article was originally published in May 2017, written by Matt Guay, and was updated in March 2022 by Elena Alston.
Need Any Technology Assistance? Call Pursho @ 0731-6725516


