We all have our reasons for loving Google Docs. (Mine is that it keeps my computer desktop clean—thanks for asking!) And while Google Docs isn’t generally known for its looks, it has a whole load of great features that help you add some flair to your documents.

So let’s cut to the chase: here are a few of my favorite Google Docs formatting tips.
Power up your Google apps with automation
-
Add a signature
-
Use subscript or superscript
-
Create a border
-
Strike through text
-
Generate a table of contents
-
Change the background color
-
Add an image border
-
Add new fonts
1. How to insert a signature in Google Docs
If you’re dealing with a legal document, you should probably use an eSignature app. But if you’re just trying to add a signature to your document to make it look fancy, you can do that directly within Google Docs.
-
Pop the cursor where you want the signature to appear.
-
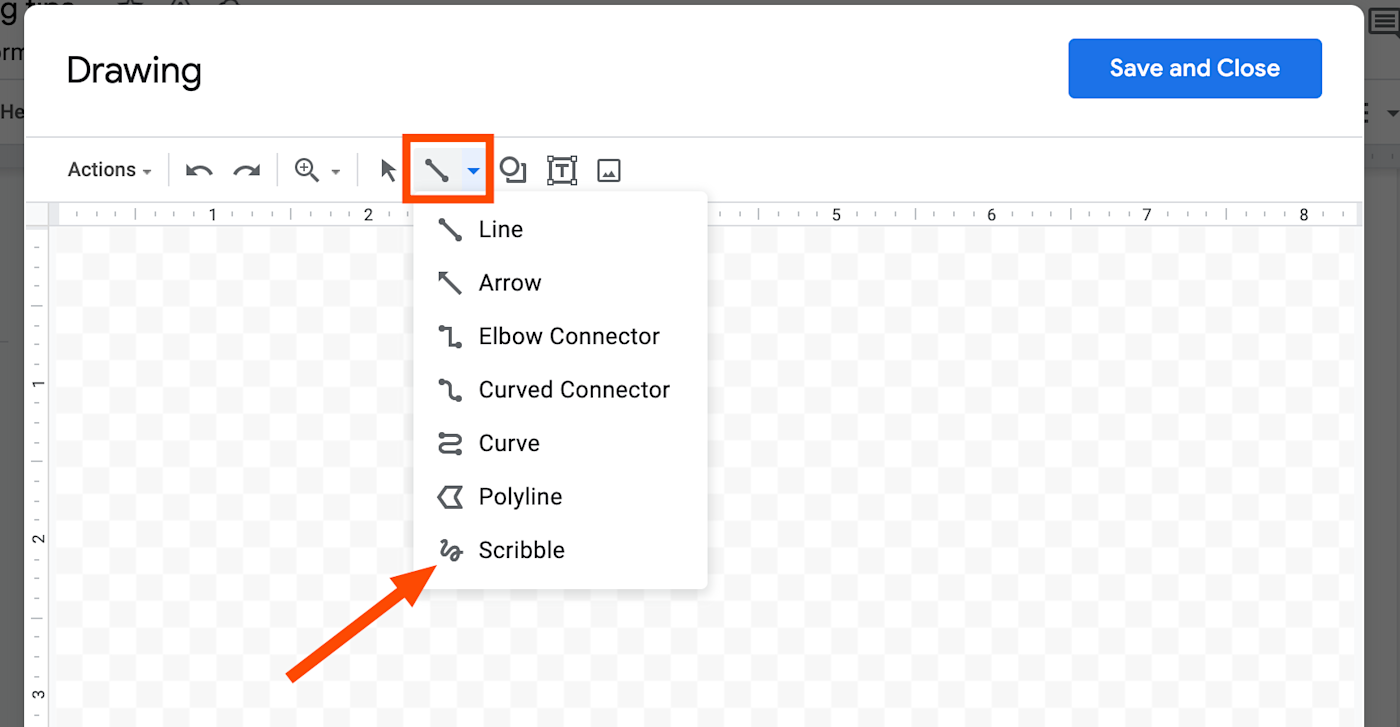
Go to Insert > Drawing > New.
-
Click the line icon, and select Scribble.
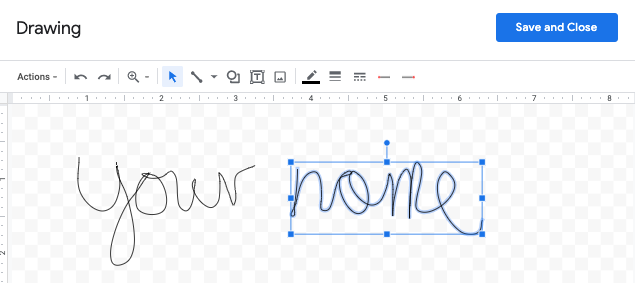
It’s not the easiest task in the world to draw your signature using a trackpad or mouse—as you can see from my questionable example below—but Google Docs lets you select to edit just a small section or letter rather than the whole thing. That way, you don’t need to keep writing and rewriting until you get it exactly right.
This drawing feature is great for signatures, but you can use it to draw anything you want within your document.
For example, if you want to create a timeline in Google Docs, you might use Line, Arrow, or Elbow Connector instead of the scribble, so you have some nice, clean lines to work with.
2. How to do subscript or superscript in Google Docs
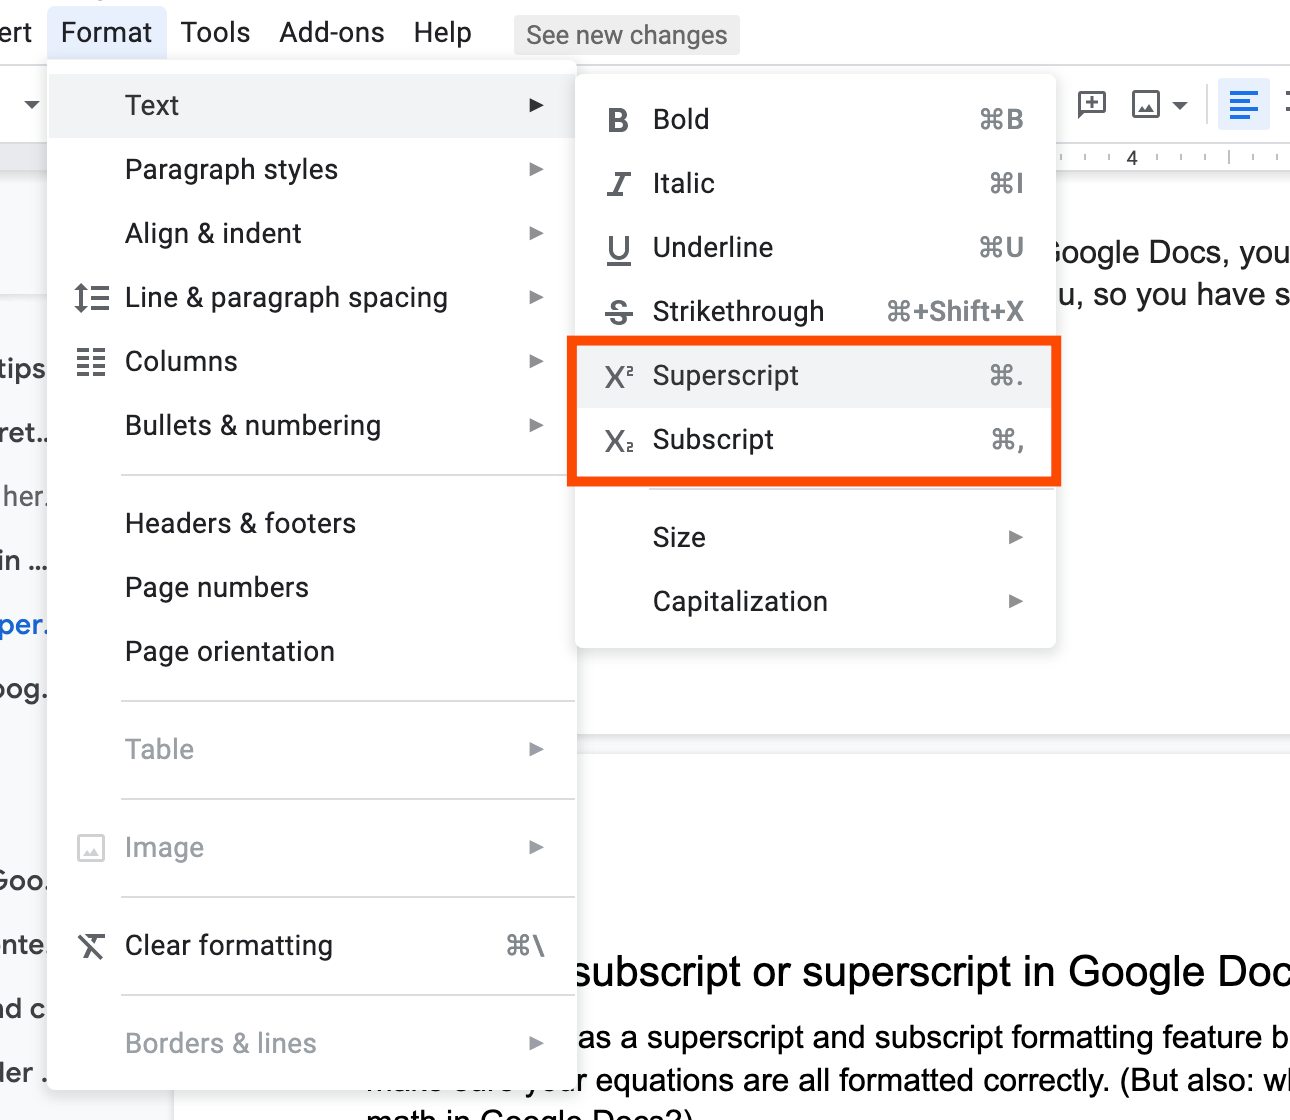
Google Docs has a superscript and subscript formatting feature built in, so you can make sure your equations are all formatted correctly. (But also: why are you doing math in Google Docs?)
-
Highlight the text you need to translate to superscript or subscript.
-
Go to Format > Text > Superscript or Subscript.
Or you can highlight the text you want to edit and use these keyboard shortcuts:
-
For superscript:
Ctrl+.orcommand+. -
For subscript:
Ctrl+,orcommand+,
3. How to add a border in Google Docs
If you’re thinking Google Docs doesn’t have the option to create a border around your document, you’d be… kind of right. It doesn’t have a specifically-designed feature for creating borders like Microsoft Word does, but there are a couple workarounds.
Option 1:
-
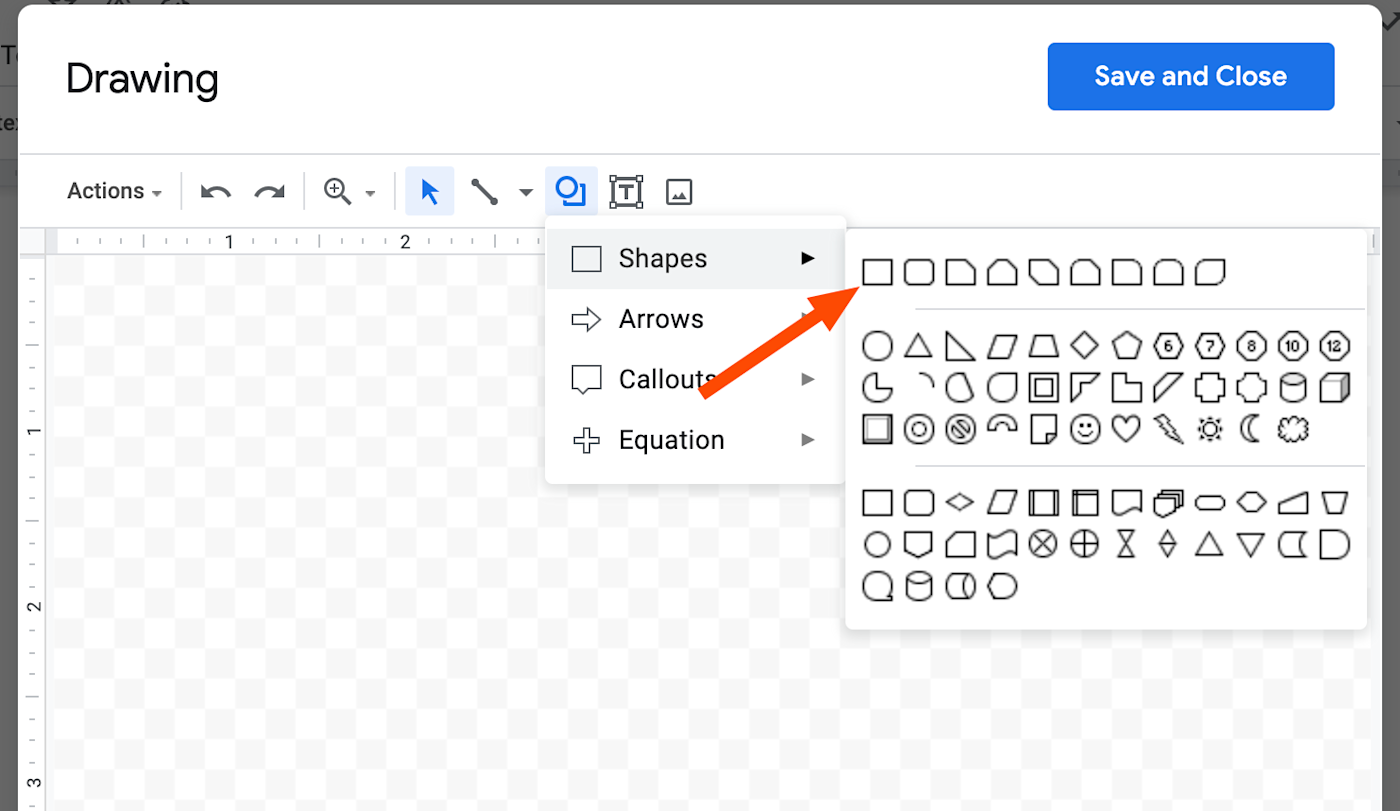
Go to Insert > Drawing > New.
-
Choose Shapes, and select the rectangle.
-
Draw a rough rectangular shape, then click Save and Close.
-
You can then edit the size and shape of your border within the document by clicking and dragging.
Option 2:
-
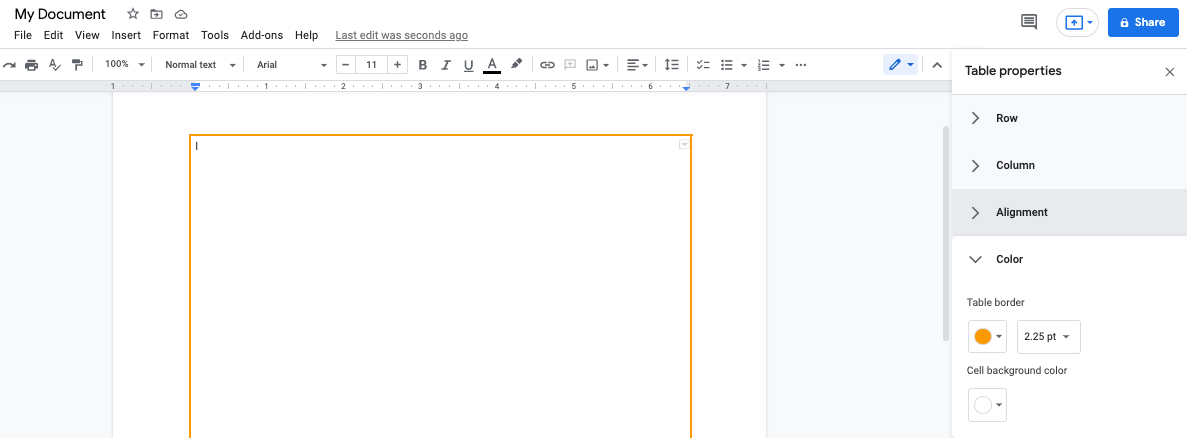
Go to Insert > Table > choose 1 x 1 cell.
-
This will add a box that you can then click and drag to fill the whole page.
-
Edit the style of the border by going to Format > Table > Table Properties. There, you can change things like thickness and border color.
-
To create more space between the border and the text, use the option to add padding.
4. How to strikethrough on Google Docs
For italics, bold, or underlined text, there’s an obvious button in the Google Docs toolbar. To strike through text in Google Docs, you need to dig a little deeper.
-
Highlight the text you want to strike through.
-
Go to Format > Text > Strikethrough.
Or you can use the keyboard shortcut Ctrl + Shift + X or command + shift + x.
5. How to make a table of contents in Google Docs
If you’re creating a long document, save on the endless scrolling by using the table of contents Google Docs feature.
-
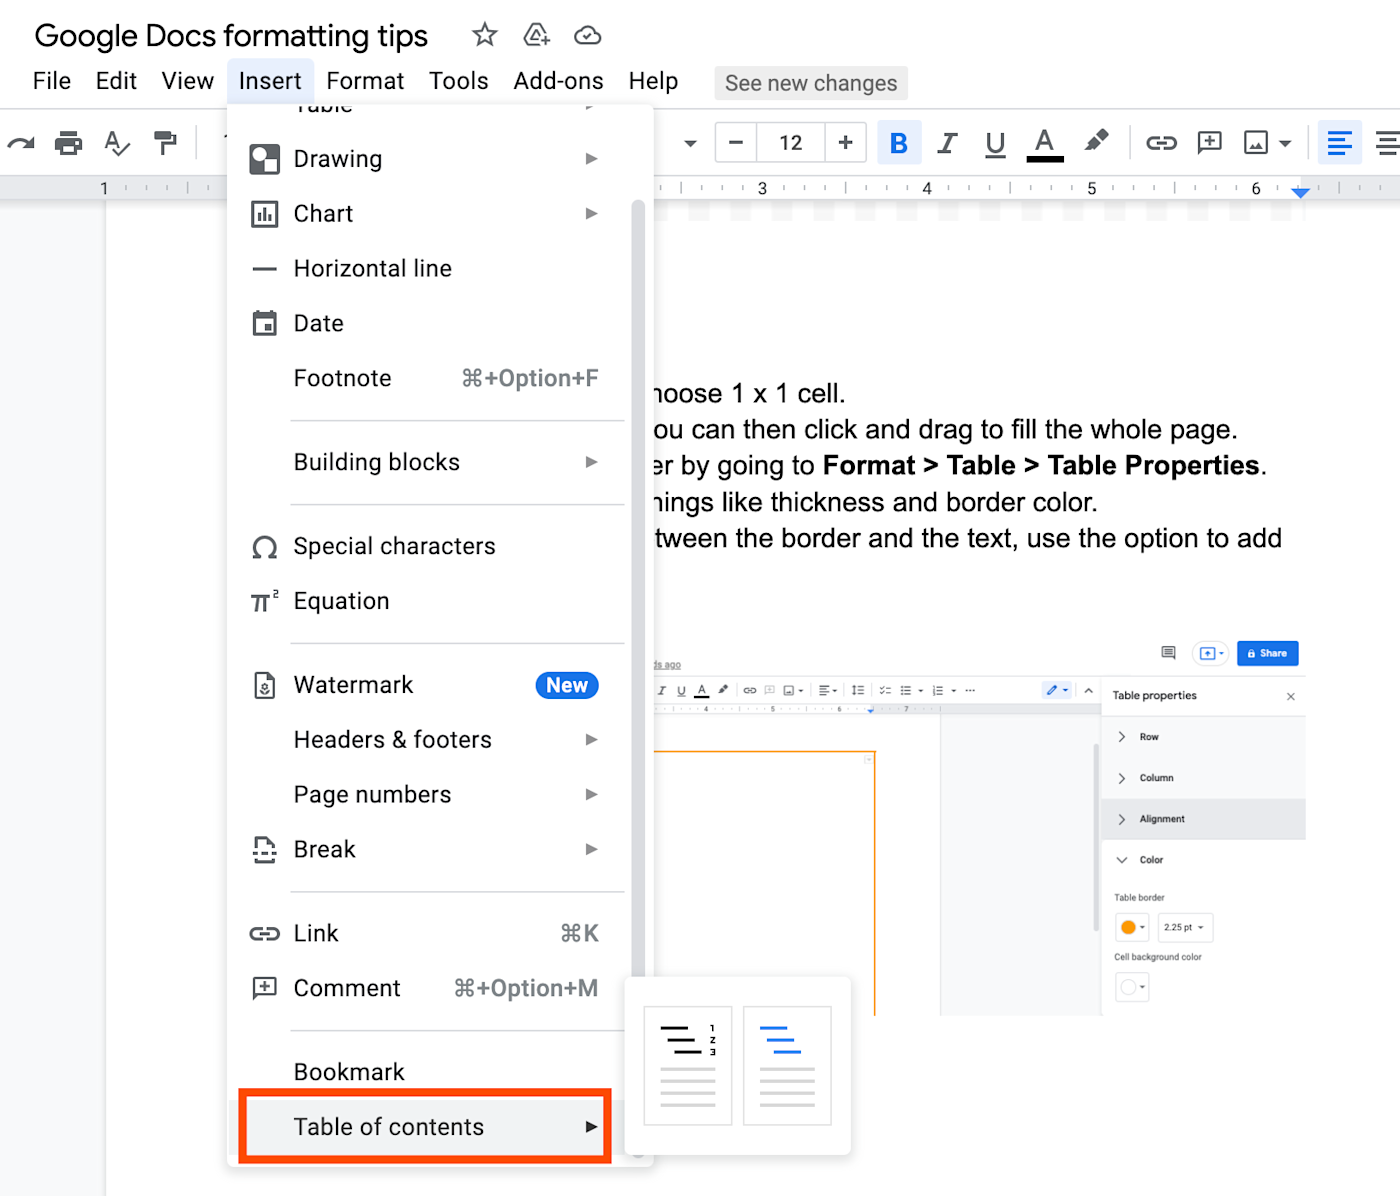
Place your cursor wherever you want your table of contents (probably the beginning of the doc?).
-
Go to Insert > Table of contents.
-
Choose what type you want: either with page numbers or with anchor links that will let readers click to jump to a particular page or section.
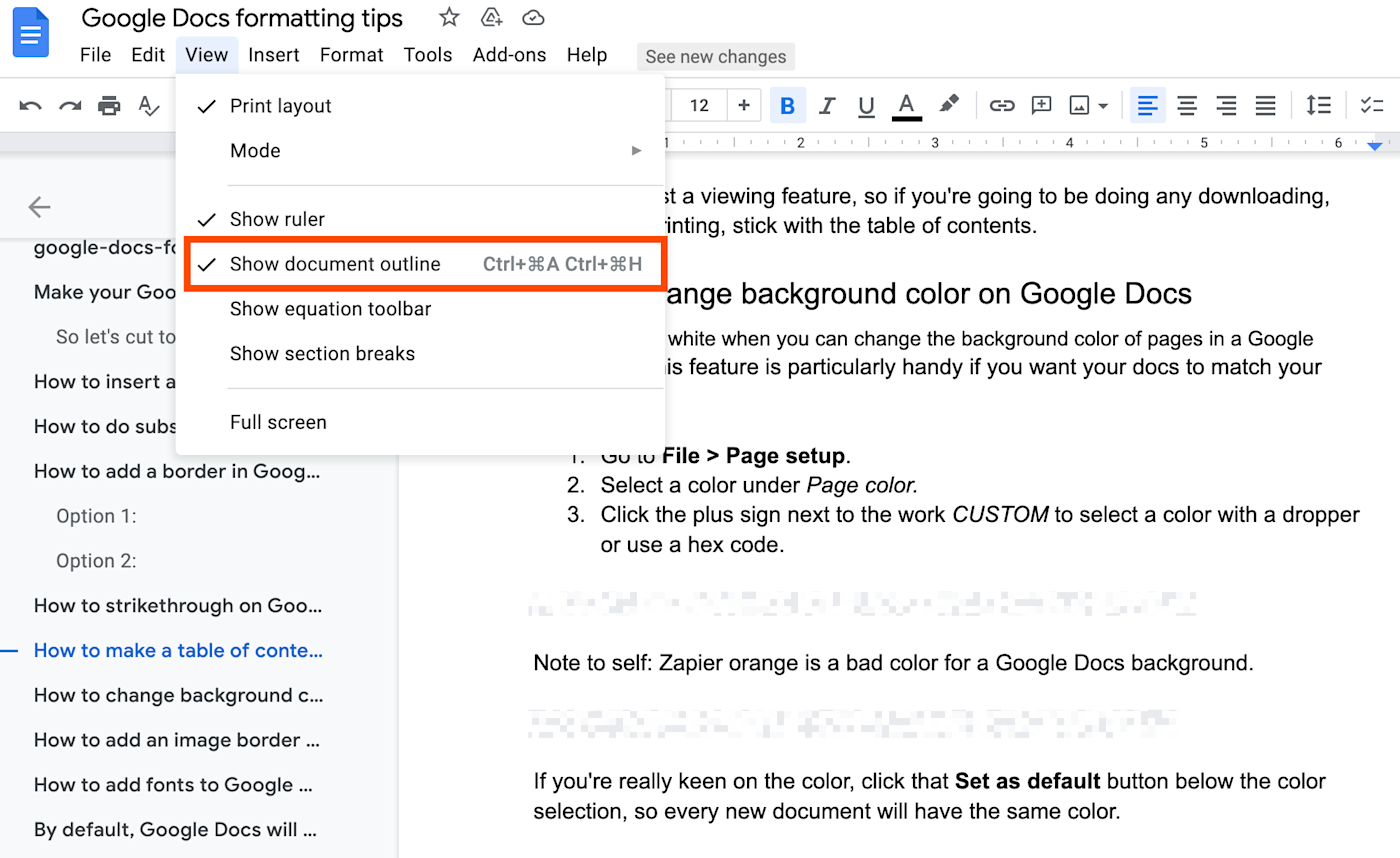
Another option is just to use the outline feature, which appears as a nice little summary side panel that stays with you as you scroll. To add the outline view, go to View > Show document outline.
This one’s just a viewing feature, so if you’re going to be doing any downloading, PDFing, or printing, stick with the table of contents.
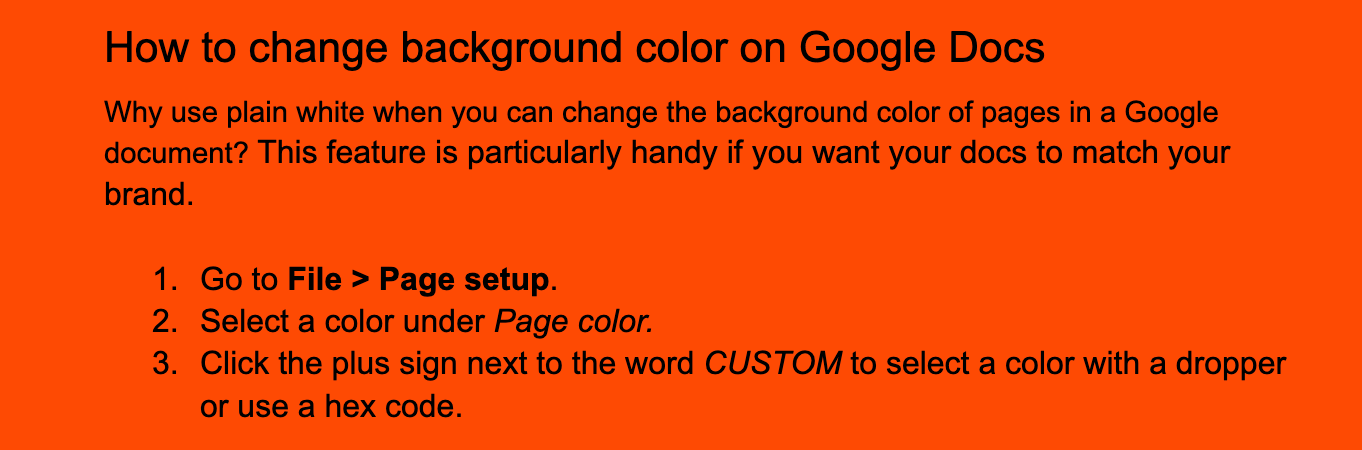
6. How to change background color on Google Docs
Why use plain white when you can change the background color of pages in a Google document? This feature is particularly handy if you want your docs to match your brand.
-
Go to File > Page setup.
-
Select a color under Page color.
-
Click the plus sign next to the word CUSTOM to select a color with a dropper or use a hex code.

Note to self: Zapier orange is a bad color for a Google Docs background.
If you’re really keen on the color, click that Set as default button below the color selection, so every new document will have the same color.
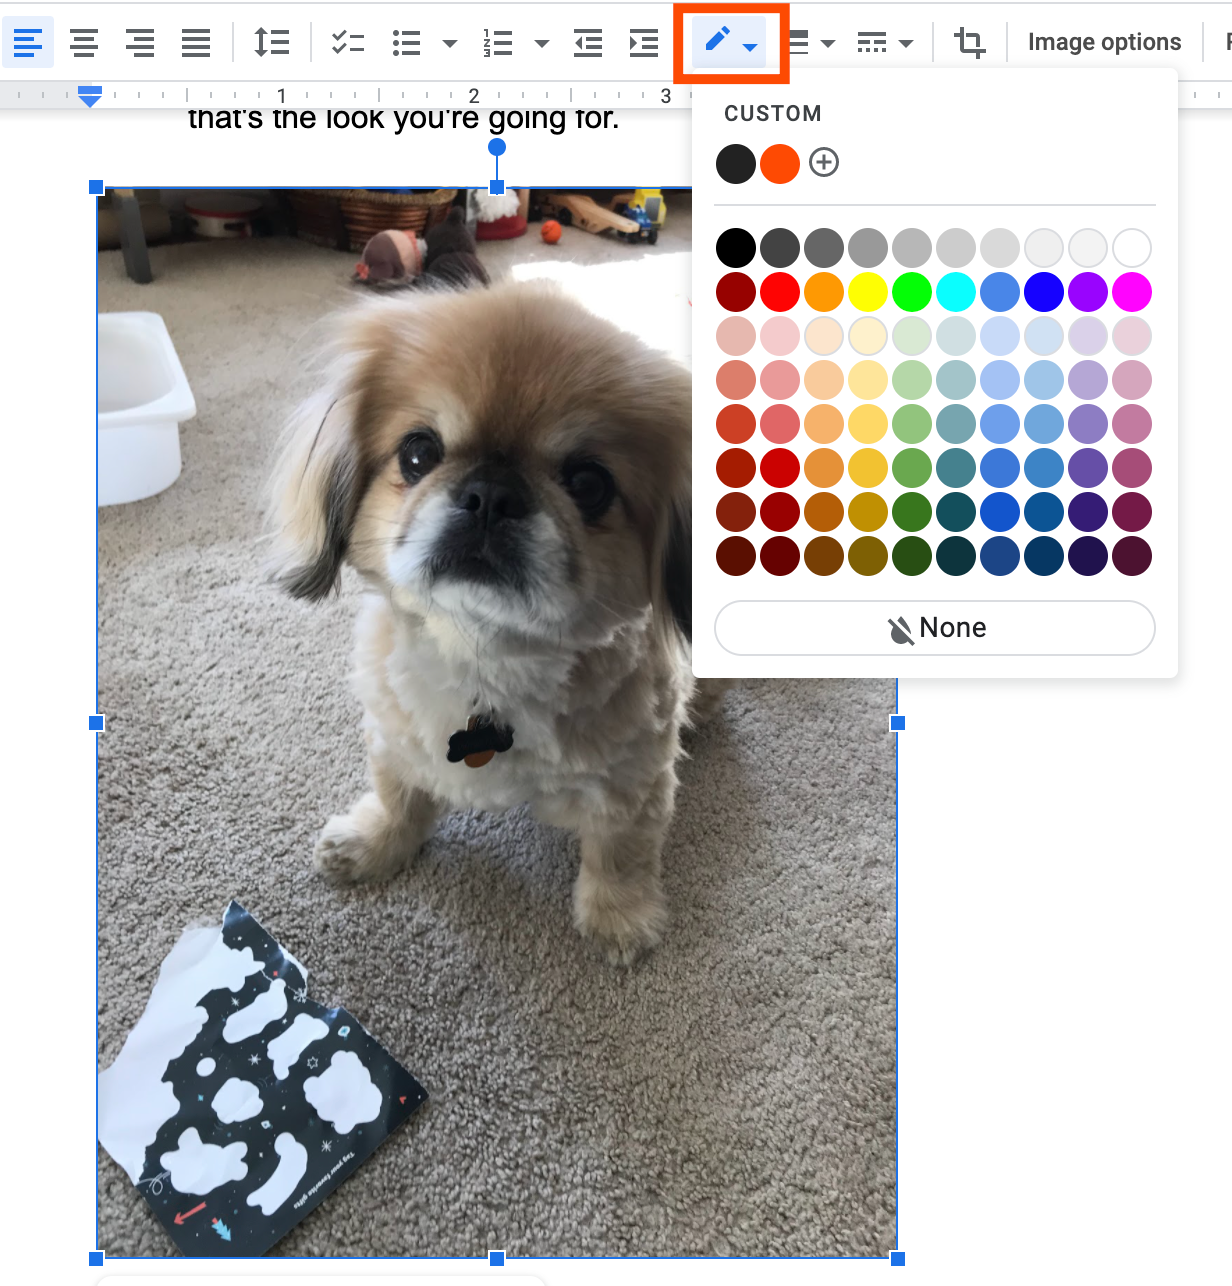
7. How to add an image border in Google Docs
If you want your images to stand out in Google Docs, add an image border around them.
-
Select the image, and click the highlighter icon in the toolbar. (You’ll notice if you hover over it that it becomes a Border color tool instead of a Highlight color tool when an image is selected.)
-
This will bring up a whole selection of colors you can choose from. If you have a particular color you use for branding, click the + button to add your hex code.
-
You can also change the thickness of the border or make the line perforated, if that’s the look you’re going for.
While you’re at it, take a look at a bunch of other great tips for editing images in Google Docs.
8. How to add fonts to Google Docs
By default, Google Docs will choose Arial as your font when you’re creating a document. I like it, but it’s not for everyone. And you might even have some specific fonts you use in your brand guidelines. To add new fonts to Google Docs:
-
Go to the fonts menu and select More fonts.
-
Search for the name of the font you’re looking for.
-
Select it, and it’ll appear under the My fonts panel on the right.

That will automatically update the font dropdown, so you can easily select the fonts you want to use in future.
Keep an eye out for new formatting features
Clearly, there’s a whole lot more to Google Docs formatting than meets the eye. And Google is constantly developing Google Docs—so next time you see that blue See what’s new button pop up to promote a new feature, fight your instincts to click that big X, and take a look at what’s available.
Need Any Technology Assistance? Call Pursho @ 0731-6725516


