
Whether you use Gravity Forms to generate leads or survey existing customers, you want to make sure that information is in your source of truth—your Customer Relationship Management (CRM) tool.

Instead of manually adding each new contact to your CRM, we’ll show you how to create a Zap—our word for the automated workflows you create with Zapier—that will automatically create leads in Salesforce from any Gravity Forms submissions. You’ll have one less thing to think about, and your sales team will be able to reach out to your leads much faster.
Salesforce is a premium app—available on Zapier’s paid plans. Learn more about premium apps.
Before you begin
If you’ve never connected your Gravity Forms account to Zapier before, log in to your Gravity Forms account now. In the left-hand sidebar, click on Forms, then navigate to Settings. Click on Rest API. Make sure your API access is enabled, then click Add Key.
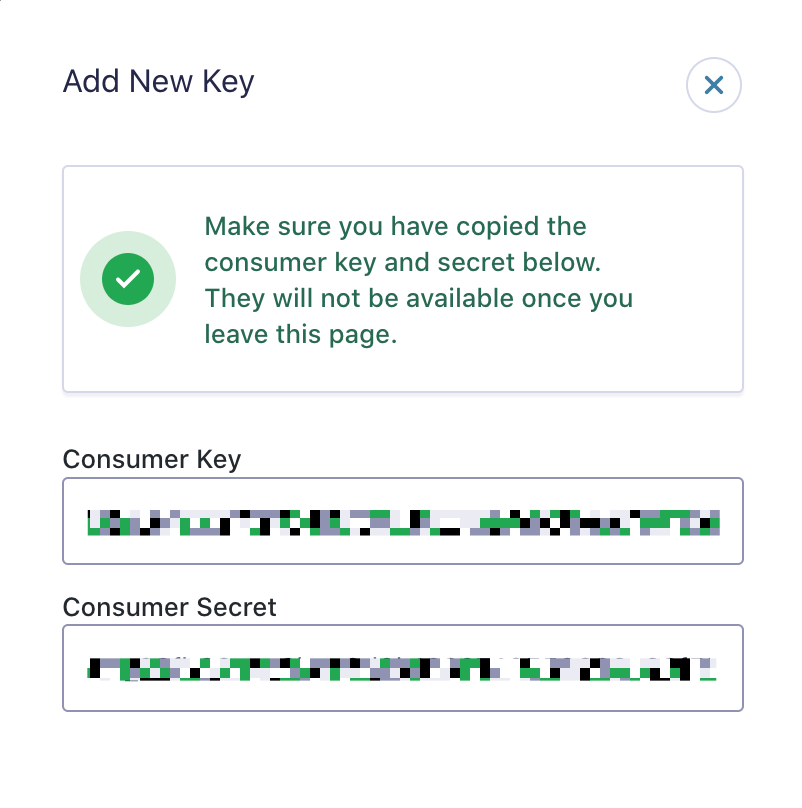
Enter a description, and select a user account with permissions to view and edit entries. Select the Read/Write permission. Save the new key and copy the Consumer Key and Consumer Secret somewhere safe. (You’ll need these keys later on when you’re connecting your Gravity Forms account to Zapier.) Save the REST API settings.
Now we can begin creating your Zap.
Option 1: Get started quickly with a Zap template
If you’d rather have someone else do the heavy lifting, we have a template to help you get started quickly. Click on the Zap template below, and you’ll be guided through setup. You’ll need to create a Zapier account if you don’t already have one.
Here’s how it works:
-
Click on the Zap template.
-
Connect your Gravity Forms account, confirm the form, and enter a Gravity Forms unique name.
-
Connect your Salesforce account and pick which Salesforce object you want to create (lead).
-
Select the Salesforce fields you want to edit, then map the fields from Gravity Forms into Salesforce.
-
Test your workflow and turn it on.
Option 2: Create your own Zap
If you’d like more control over the information in your Zap or want to add additional actions such as filters, you can click here to create a new Zap from scratch in the Zap editor.
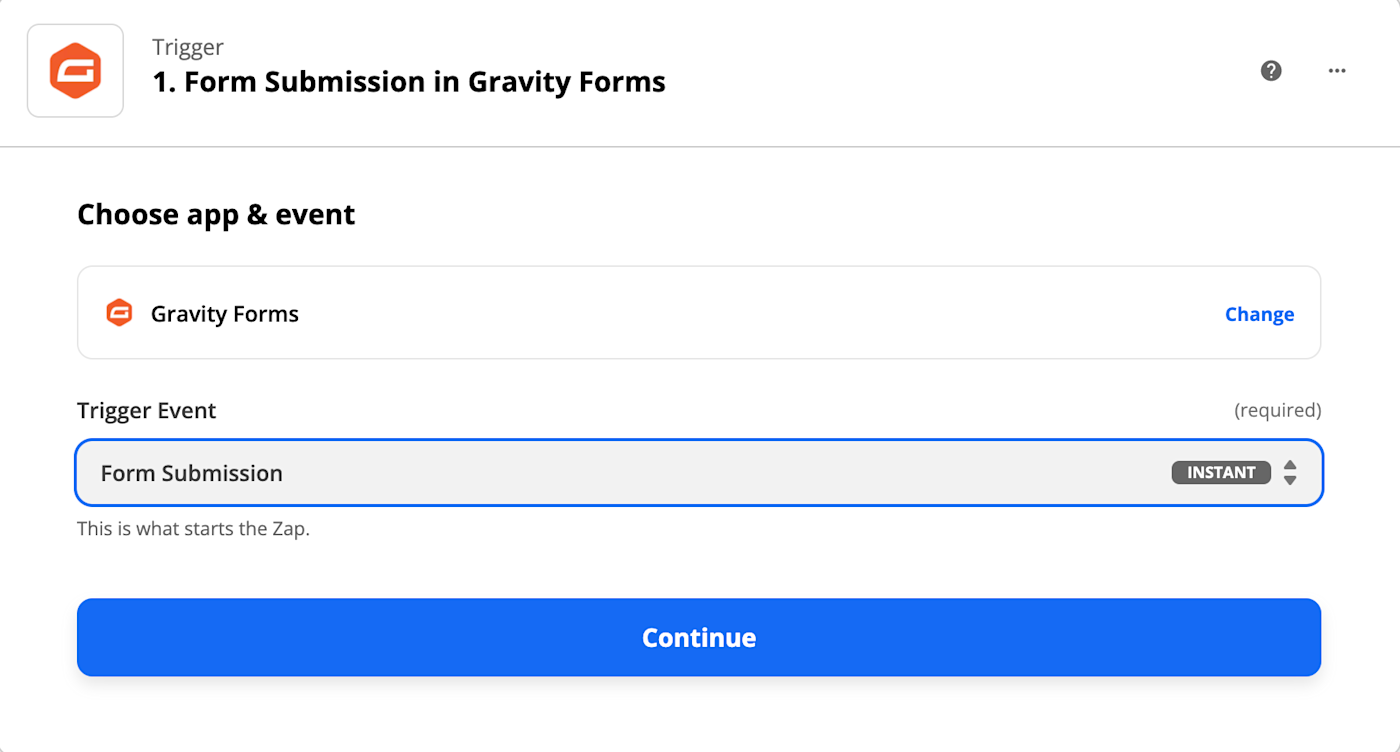
Set up your Gravity Forms trigger
First, set up your trigger—the event that starts your Zap. Search for and select Gravity Forms as the trigger app and Form Submission as the trigger event. Click Continue.
Connect your Gravity Forms account to Zapier and click Continue.
If you haven’t connected your Gravity Forms account to Zapier before, Zapier will open a separate window and ask you to fill in the Site URL, Consumer Key, and Secret Consumer Key—which you saved before—to grant you access.
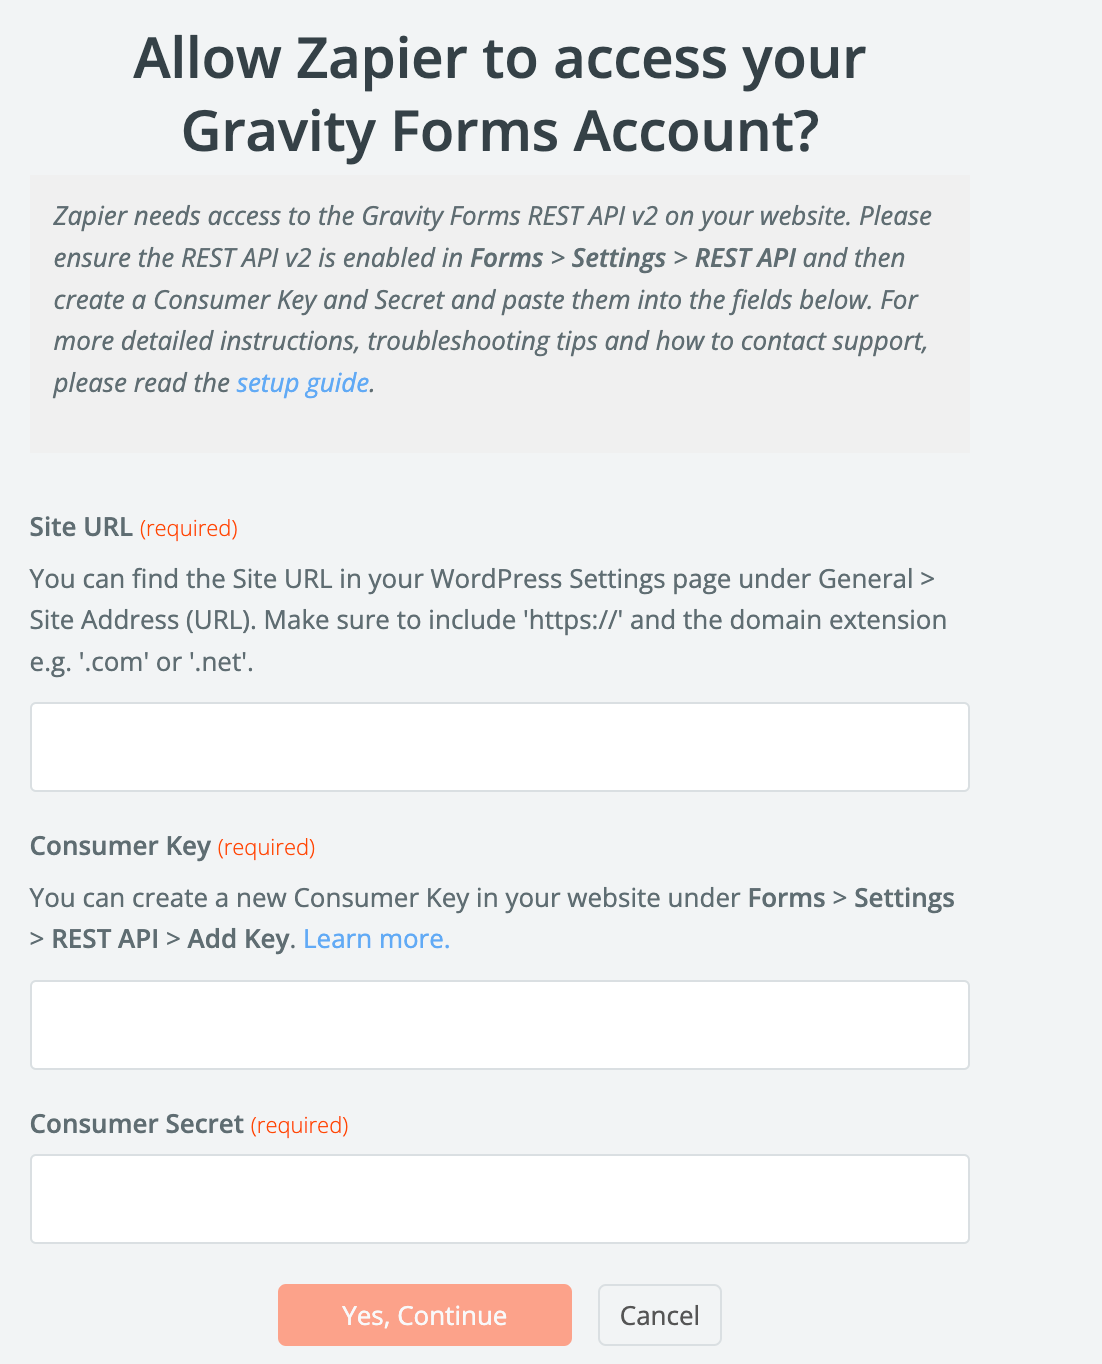
Click Yes, Continue.
Once you’ve connected your Gravity Forms account, it’s time to set up your trigger by selecting which Google form you want to link to Salesforce. You can also choose whether or not to use admin field labels. You also need to enter a unique name under Unique Name so Gravity Forms knows where to send submissions.
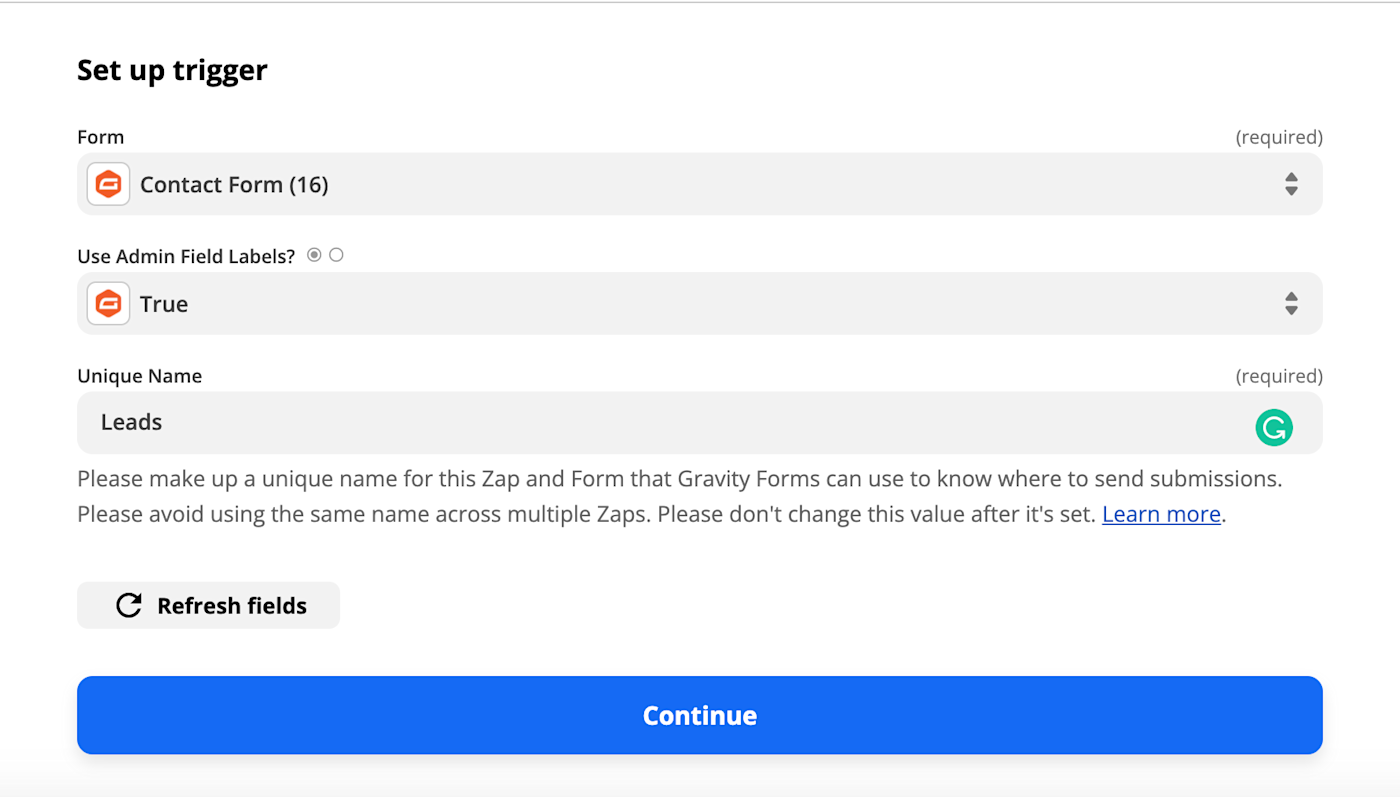
Once you’ve chosen your options, click Continue.
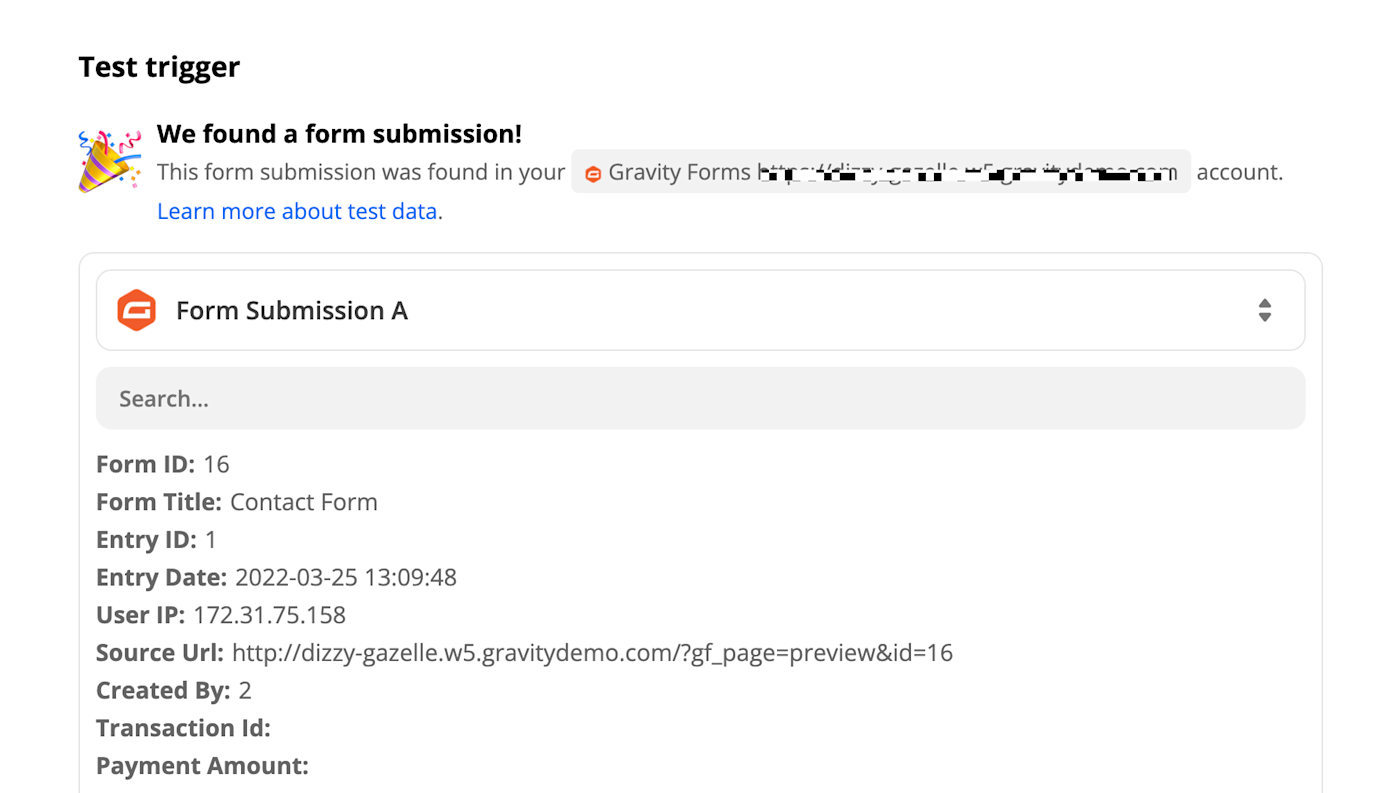
Next, click Test trigger so Zapier will pull the most recently submitted form submission. Click Continue.
Set up your Salesforce action
In this next step, you’ll set up the action—the event your Zap will perform once it’s triggered. Search for and select Salesforce as your action app, select Create Lead as the action event, and click Continue.

Next, connect your Salesforce account to Zapier by clicking on the dropdown menu and selecting +Connect a new account. You’ll need to give Zapier permission to access your Salesforce account. Once you’ve connected your account, click Continue.
Now you need to tell your Zap how to set up the Salesforce lead. You can pull in data from previous steps in your Zap by clicking inside any empty field where you want the data to go and selecting an option from the Insert Data dropdown menu. This includes your lead’s personal information (last name, first name, salutation, prefix, and title).
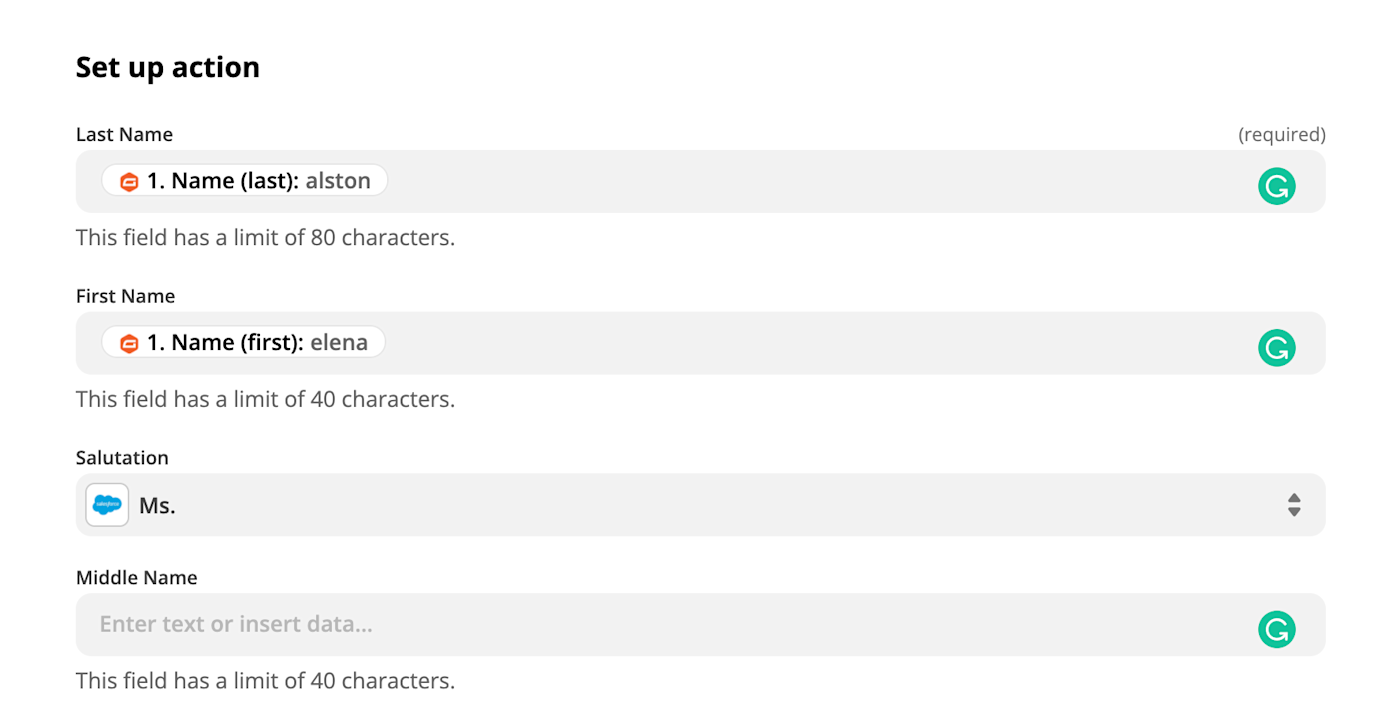
In addition, you’ll also be able to prefill other important lead information, like company name, title, company address, phone number, and email address. There are also optional fields that include lead source, status, industry, and rating.
Once you’ve finished customizing these fields, click Continue.
Test your Zap and turn it on
Next, you’ll need to test your Zap. You can skip this if you’d like by clicking Skip Test, but we always recommend testing to make sure that everything looks correct in Salesforce and is set up how you want it. Click Test & Continue. Now Zapier will send a test lead to Salesforce based on what you configured earlier.
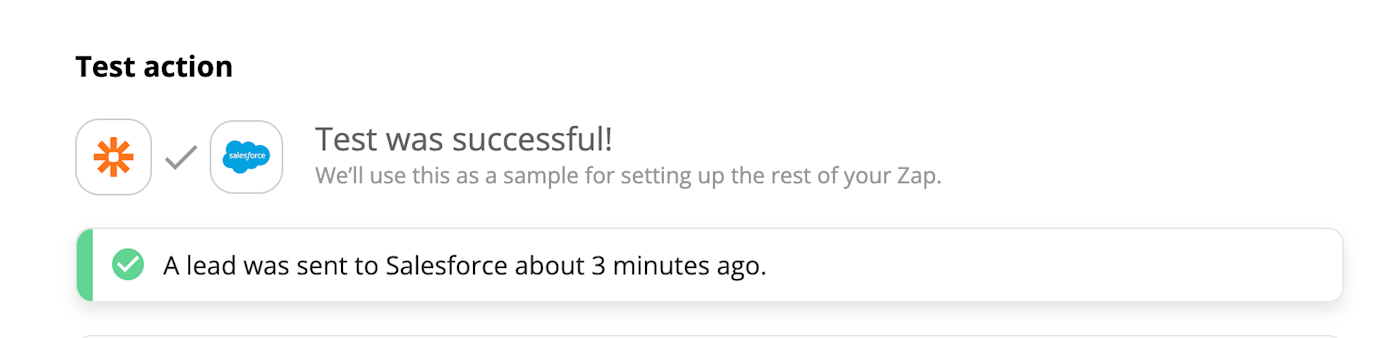
If you’re satisfied with how the lead is presented in Salesforce, it’s time to turn on the Zap! From now on, every time a contact fills out a specific form in Gravity Forms, Zapier will automatically create the lead in Salesforce. Now you can get straight to work without worrying about having to manually transfer over contact details.
New to Zapier? It’s a tool that helps anyone connect apps and automate workflows—without any complicated code. Sign up for free.
Need Any Technology Assistance? Call Pursho @ 0731-6725516


