Google Forms makes it simple to collect any information you need, whether it’s appointment information or vacation requests. But getting that information into your Google Calendar can be a pain if you take the manual route. Sure, you could upload a CSV file to your calendar, but why not save time by taking the direct route?

Power up your Google apps with automation
With Zapier, you can. In this tutorial we’ll show you how to create a Zap—the automated workflows you create with Zapier—that will automatically create new Google Calendar events from Google Form submissions.
You’ll need a Zapier account to use the workflows in this piece. If you don’t have an account yet, it’s free to get started.
Before you begin
To get started, you’ll need to have a Google Form created. Be sure that this form captures all the information you want on your calendar, most importantly start and end dates for the event.
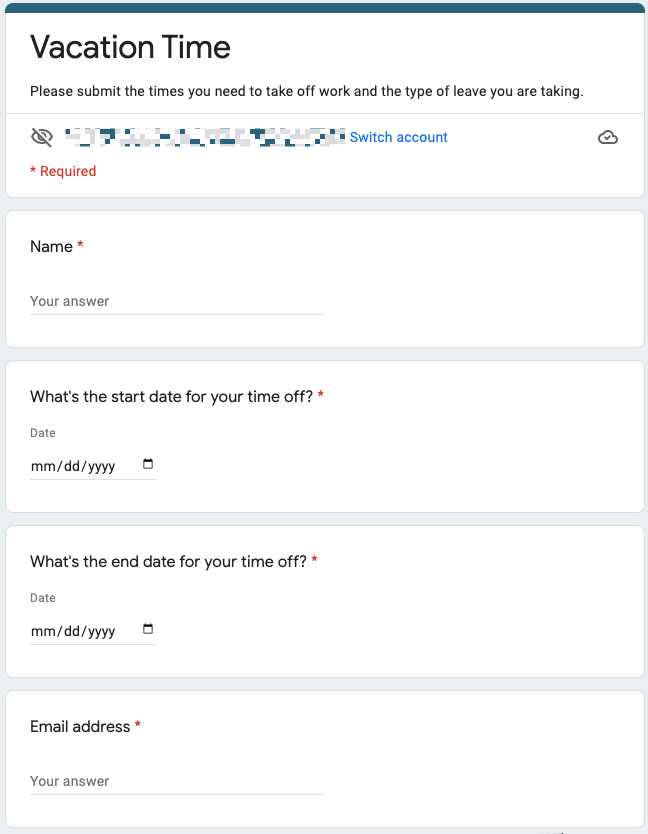
For capturing your event start and end dates, make sure your Google Form includes the date question type, which will display as a calendar picker.

This will ensure your dates are in a format that Google Calendar will understand later on in this tutorial. (If it’s not in the correct format, your Zap might fail or Google Calendar will create events for the wrong times.)
The Start Date and End Date fields you’ll encounter when you set up your Zap will only accept specific date and time formats. You can find a list of those formats here. If you use the incorrect format, Google Calendar may try to create a calendar event at the wrong time. If you need to convert information from your Google Forms trigger into the correct format, create a Formatter step first.
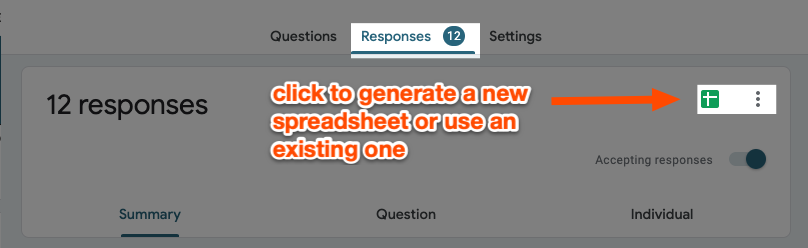
You’ll also need to set the form to capture form responses in a spreadsheet. If you haven’t done so yet, click on the Responses tab in your form, then click on the Google Sheets icon.
Finally, make sure your form has at least one submission. You’ll need this to create your Zap. You can submit a response with fake information—we recommend superhero characters—so you don’t get confused.
How to create Google Calendar events from a Google Form
We have a template to help you get started. Click the Use this Zap button below.
If you’d like to add additional actions to your Zap such as filters, you can click here to create a new Zap from scratch.
How to create this Zap from scratch:
-
Create and test your Google Forms trigger
-
Create your Google Calendar action
-
Test your Zap and turn it on
Create and test your Google Forms trigger
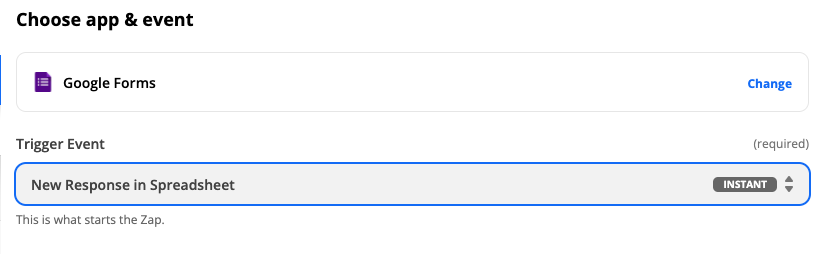
Once you’re in the Zap editor, we’ll start by setting up our trigger—the event that starts our Zap. Select Google Forms as your trigger app and New Response in Spreadsheet as your Trigger Event. Click Continue.
Next, connect your Google Forms account. If you’ve connected Google Forms to Zapier before, just click on the dropdown menu to select your account.

If this is your first time connecting your account, click +Connect a new account to sign into your Google account and give Zapier the appropriate permissions.
For each app you connect, Zapier will ask for a general set of permissions which allows you to be flexible with your Zaps. The only actions Zapier takes on your app accounts are those a given Zap needs to accomplish what you’ve set up.
Once you’ve connected your account, click Continue.
Next, select the specific spreadsheet associated with your Google Form and the worksheet that contains your form responses.
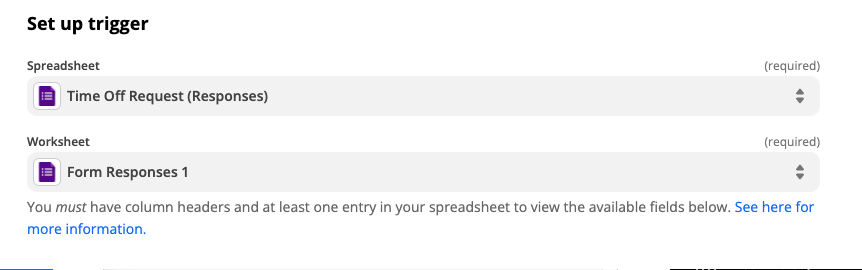
Click Continue.
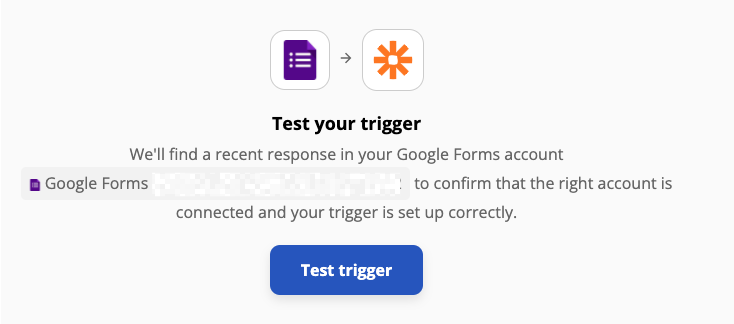
Now we’ll test our trigger. Zapier will look for a submission to your Google Form, which we’ll use to set up the rest of our Zap. Click Test trigger.
If Zapier finds a Google Form submission, you’ll see a success message as well as some information from that form response.
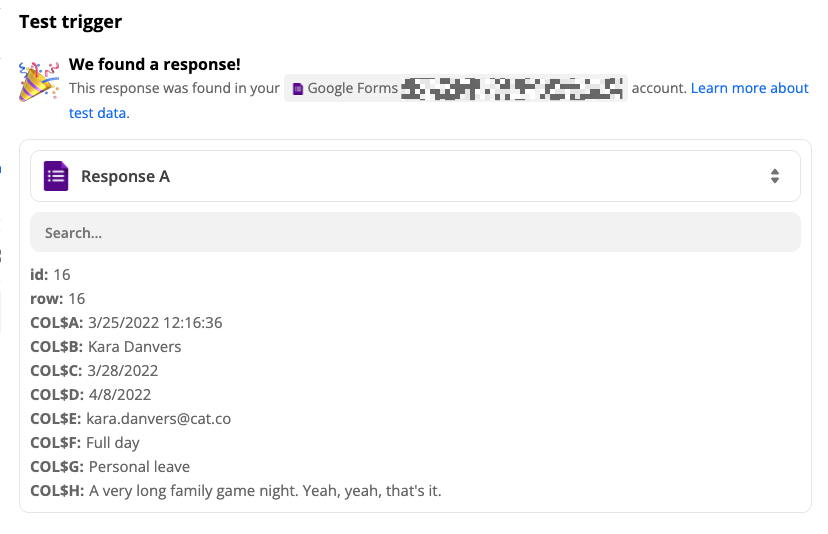
If everything looks accurate, click Continue.
Create your Google Calendar action
Now it’s time to set up our action—the event we want our Zap to perform once it’s triggered.
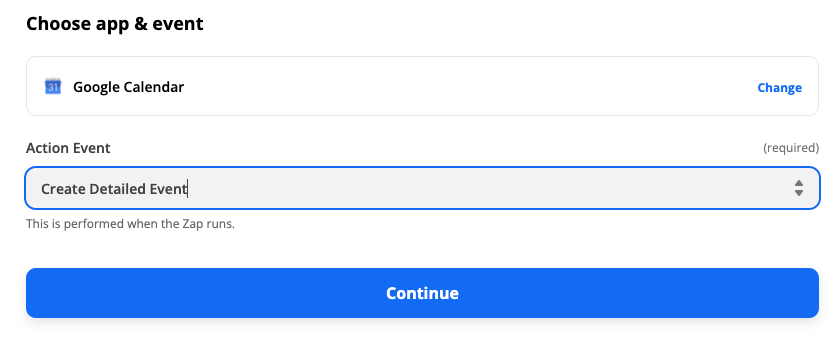
Select Google Calendar as your action app and Create Detailed Event as your Action Event. Click Continue.
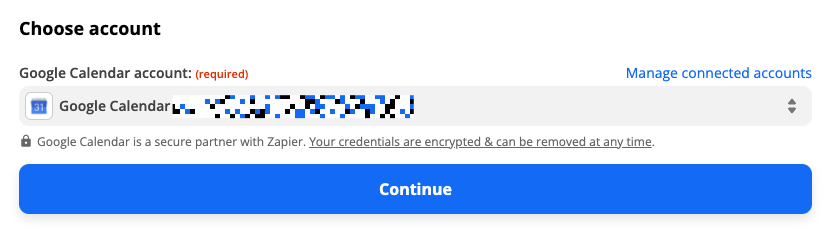
Next, connect your Google Calendar account to Zapier if you haven’t done so before. Or if you have, select your account from the dropdown menu and click Continue.
Now we’ll set up how we want our Google Calendar event to look.
Under Calendar, select the Google Calendar you want to create an event in. For example, you might have a specific calendar for employee vacation time.
Next, you’ll map your Google Form responses to your Google Calendar event. You’ll be using information Zapier found when you tested your trigger earlier.
Click inside the Summary field. You’ll see a dropdown menu of data options from your Google Forms trigger. Select the data you want to use for your calendar event title.
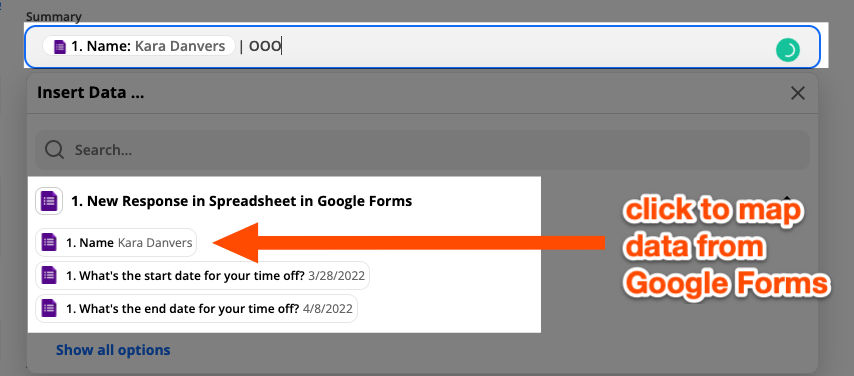
When you map information from your Google Forms trigger—such as a name—what you see in the editor is a placeholder. These placeholder values will only be used by your Zap when you test it. But once your Zap is turned on, each new calendar event will be different according to the latest Google Form submission. (We call these dynamic values.)
In our out-of-office calendar example, I want to include the name of the employee so I’ve selected that dynamic value here. You can also type in text, which will appear the same every time your Zap runs. I’ve included some text noting that it’s an out-of-office event.
Next, customize your event description in the Description field.

Then, map the appropriate Google Form answers for your Start Date & Time and End Date & Time fields. This will tell Google Calendar how long the calendar event needs to be.
Once you’ve set up the rest of your Google Calendar event the way you like it, click Continue.
Test your Google Calendar action
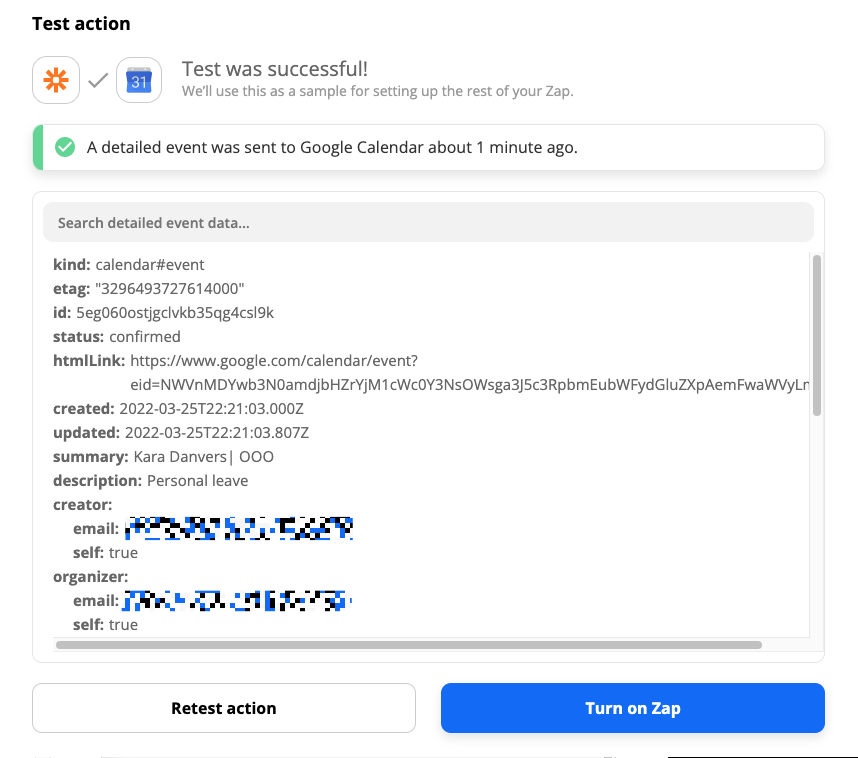
Now we’ll test this Zap. Since we want our Zap to create a Google Calendar event, our test will create an event according to how we set up our action. We do this to ensure that we’ve set up everything correctly.
If you want to skip this test, you can by clicking on the Skip Test link. However, I recommend going through with the test, especially since you’re working with dates. Click Test & Review.

You’ll see a success message if Zapier was able to create a Google Calendar event.
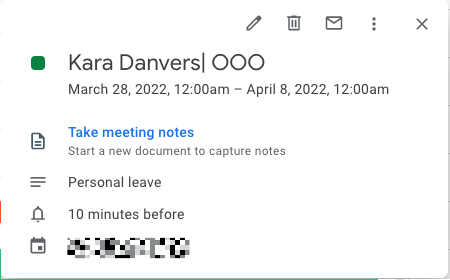
Let’s open the Google Calendar event to see how it looks.
If you need to make changes, return to the Zap editor and make adjustments in earlier steps until you’re satisfied.
Once everything looks good, don’t forget to turn on your Zap!
Now, whenever someone fills out your Google Form, Zapier will automatically create Google Calendar events for you.
Simplify your Google Calendar with automation
This tutorial is just one way you can automatically create Google Calendar events. Try these Google Calendar automation ideas and soon, you’ll have a calendar that manages itself.
This article was originally published in April 2021 by Justin Pot and was updated in May 2022 by Krystina Martinez.
Need Any Technology Assistance? Call Pursho @ 0731-6725516

")
