
If you’re here to learn how to delete a Trello board, hi. But also: please don’t do it.

Yes, I’m going to show you how to delete a Trello board, but I’m also going to give you a few other options—if only so you can save people like me, who know for sure you will regret it, the second-hand stress of deleting your data.
How to delete a Trello board
Connect Trello to the other apps you use most
Keep in mind: once you hit delete, there’s no coming back—your data will be gone for good. If you want to take the safer (and much more reasonable) route, skip ahead to the next sections on alternatives to deleting Trello boards.
Otherwise, here’s how to delete a Trello board:
-
Go to the Trello board you want to delete, and select Show menu.
-
Click More.
-
Select Close board… at the bottom of the dropdown list.
-
Click Permanently delete board from the screen that shows up next.
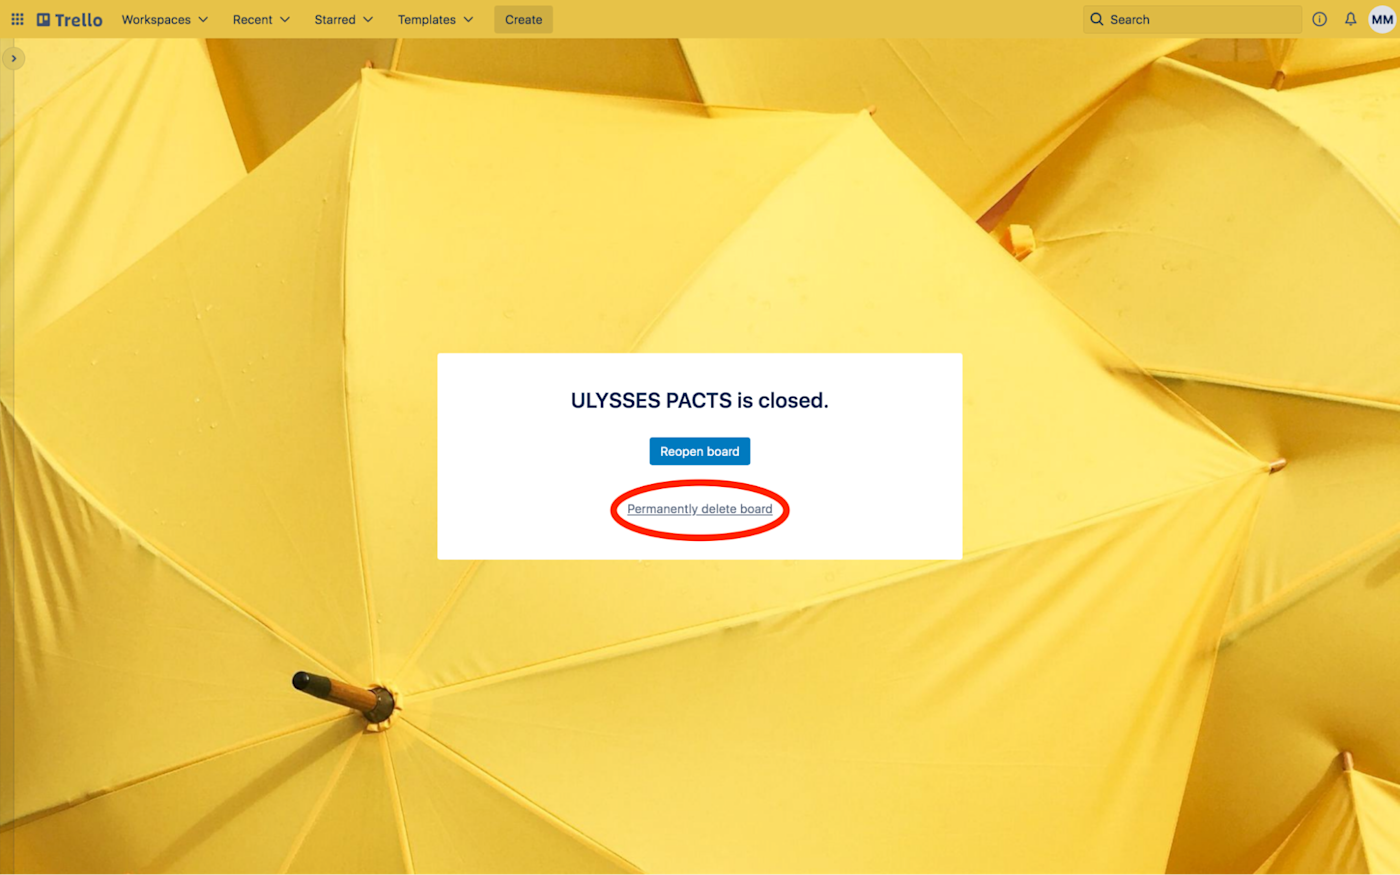
That’s it. Your board is gone forever, and I hope you don’t regret it.
A couple other notes:
-
You currently can’t delete Trello boards from the mobile app. If for some reason, you have you delete a board on the go (feels a little sketchy, but hey), log in to the web app on your mobile device, and follow the steps shared above.
-
You can’t delete Trello boards if you’re a guest in a workspace or a board member without admin privileges. You’ll have to either request admin access or ask someone else to delete the board.
Alternatives to deleting Trello boards: How to save your Trello board data
If you think there’s even a remote possibility you’ll want your board content back, here are some things you can do instead of going full-on delete.
How to close a board in Trello
Closing Trello boards is similar to archiving cards. The board won’t show up in your workspace, so you’ll lose the clutter, but it won’t be gone forever if you change your mind. To close a Trello board:
-
Head to the board you want to archive, click Show menu > More.
-
In the menu that opens, click Close board…
-
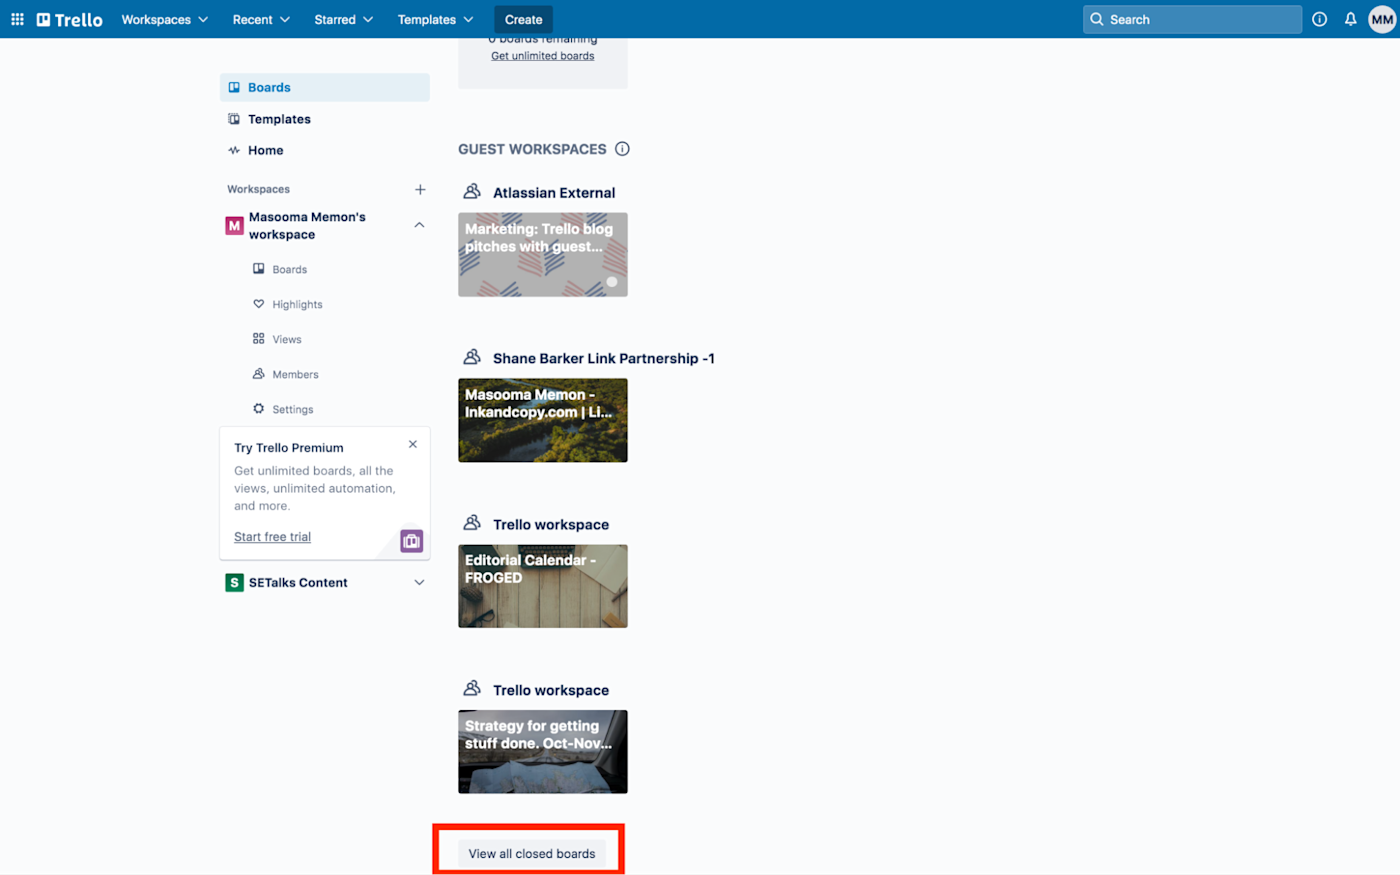
To reopen the closed board, go to your Boards page, and click View all closed boards. Then click Reopen on the one you want.
Export Trello data before deleting the board
Another option is to let the board go but preserve its content. If you’re on the free Trello plan, you’ll need to have some grip on the raw JSON data format to make it work. Otherwise, it’s going to look like gibberish. Know JSON or determined to learn it? Export your Trello data like this:
-
Click Show menu.
-
Click More, and select Print and export.
-
Now choose Export as JSON.

If you’re a premium user, you’ll also see the option to export the board in CSV format. This can open as a spreadsheet, breathing sense into the board’s contents. In either case, though, you’ll be importing raw data—not the board itself. You can use it to recreate a Trello board or grab whatever info you’re looking for, but any re-importing will have to be manual.
Back up Trello data with a Chrome extension
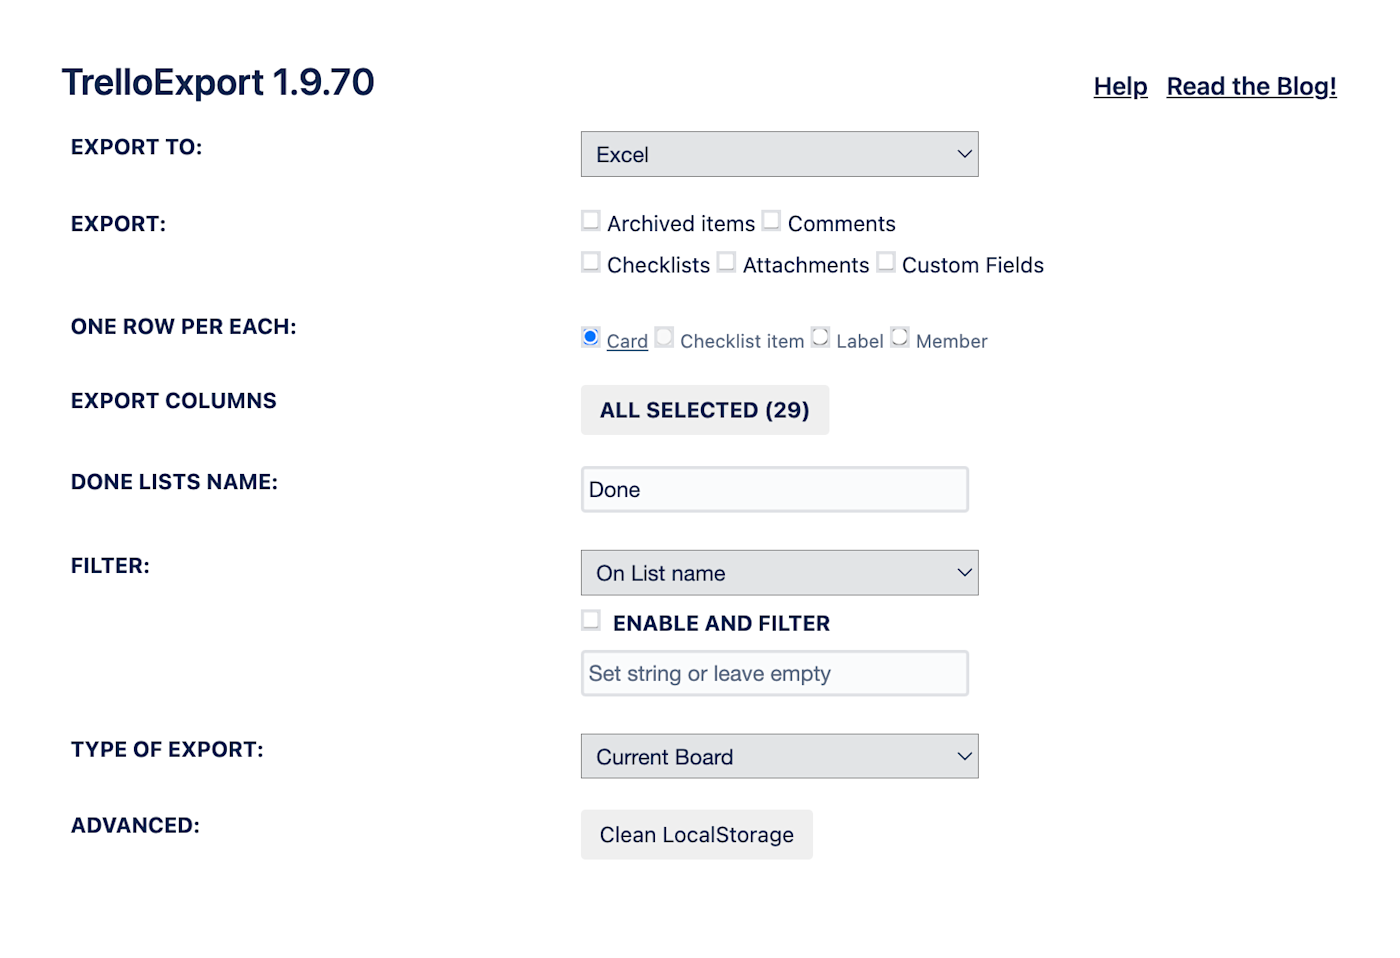
The TrelloExport extension speeds up the data-saving process.
Once you’ve installed the extension, go through the same steps you’d take to export data without the extension: Show menu > More > Print and export. This time, you’ll see another option: TrelloExport. Click it to save data in your preferred format (Excel, HTML, CSV, or Markdown).
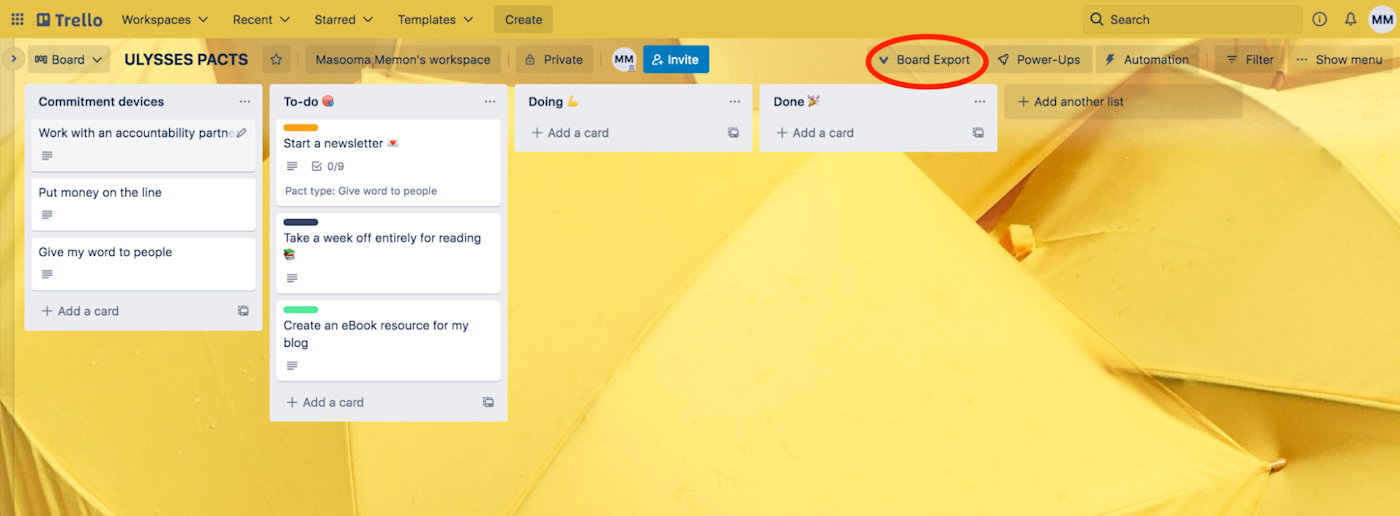
Use the Board Export Power-Up to save your Trello board
Yes, there’s yet another option: the Board Export Power-Up. This one will save everything on the Trello board: the cards, activity log, comments, checklists, advanced lists, members, due dates, and whatever other details you choose. The Power-Up saves it all in easy-to-read PDF, Excel, CSV, or image format.
Board Export is definitely the most readable way to save your Trello board data. It also lets you:
-
Save time by only selecting what you need to save from your Trello board—not the whole enchilada.
-
Export data to share information with stakeholders who either don’t use Trello or you don’t want seeing a specific board.
-
Engage stakeholders by exporting and sharing data in whatever format they prefer.
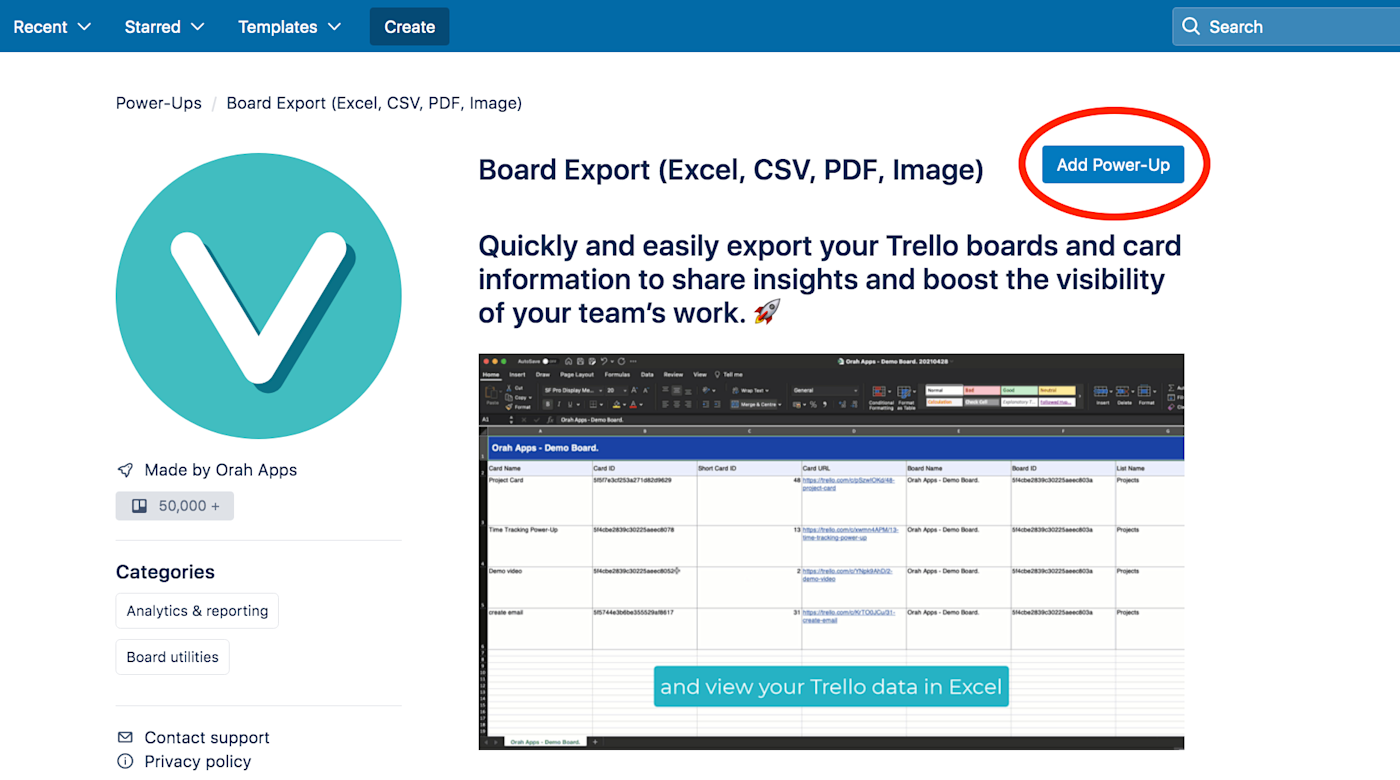
To set it up, go to the Board Export Power-Up page, and click the blue Add Power-Up button.
Now select your board from the dropdown menu, and click Add to add the Power-Up to a Trello board. Or, if you’re already on a board, simply select the Power-Ups tab at the top of your board, search for the Board Export Power-Up from the gallery, and click Add.
The Power-Up will then require you to log in with Trello and purchase it. Once you set it up, you’ll see it at the top of your dashboard.
From there, using it is pretty straightforward: go to Board Export on your Trello board, choose whatever you want to export (lists, members, etc.), and click Export. Select the format to save your data in, and you’re done—you can now access the data from the downloaded file.
Bonus: Back up your Trello board data and restore it
You can always use the data you’ve saved to recreate your Trello boards manually. But if you’re looking for a faster way to automatically restore the boards, you’ll want to use the premium Backups for Trello Power-Up.
The Power-Up automatically backs up your Trello board data.
To set up Backups for Trello, start by enabling the Power-Up—the same way as above—and authorizing access to it. Then, to restore a board: go the Power-Up on your board, and pick Vault at the top. From there, choose Advanced restore, and select the board to restore. Finally, select a date and time to restore it, and click Restore item.
Need Any Technology Assistance? Call Pursho @ 0731-6725516

")
")