If you have a business page on Facebook, reviewing customer recommendations is a great way to see what makes them tick. It’s also a great way to improve your business. Sharing positive reviews can help draw in new business while responding to negative reviews right away can help you retain dissatisfied customers who might otherwise churn.

Yet passing this information over to your sales reps so they can act on it fast means you have to constantly be on the lookout for up-to-date information. And notifying the right people at the right time is a job in itself.
Instead of manually sharing these recommendations with your team, we’ll show you how to create a Zap—our word for the automated workflows you create with Zapier—that will automatically notify your team in Slack whenever your Facebook Page gets a new recommendation.
Option 1: Get started quickly with a Zap template
Want someone else to do the heavy lifting for you? We have a template to help you get started quickly. Click on the Zap template below, and you’ll be guided through setup. You’ll need to create a Zapier account if you don’t already have one.
Here’s how it works:
-
Click on the Zap template.
-
Connect your Facebook Pages account and confirm which business page you want Zapier to watch for recommendations.
-
Connect your Slack account and select the Slack channel you want your message to be sent to.
-
Select the Slack fields you want to edit, set up the message, and tell Zapier how you want it to handle your message.
-
Test your workflow and turn it on.
Option 2: Create your own Zap
If you’d like more control over information in your Zap or would like to add additional actions such as filters, you can click here to create a new Zap from scratch.
Set up your Facebook Pages trigger
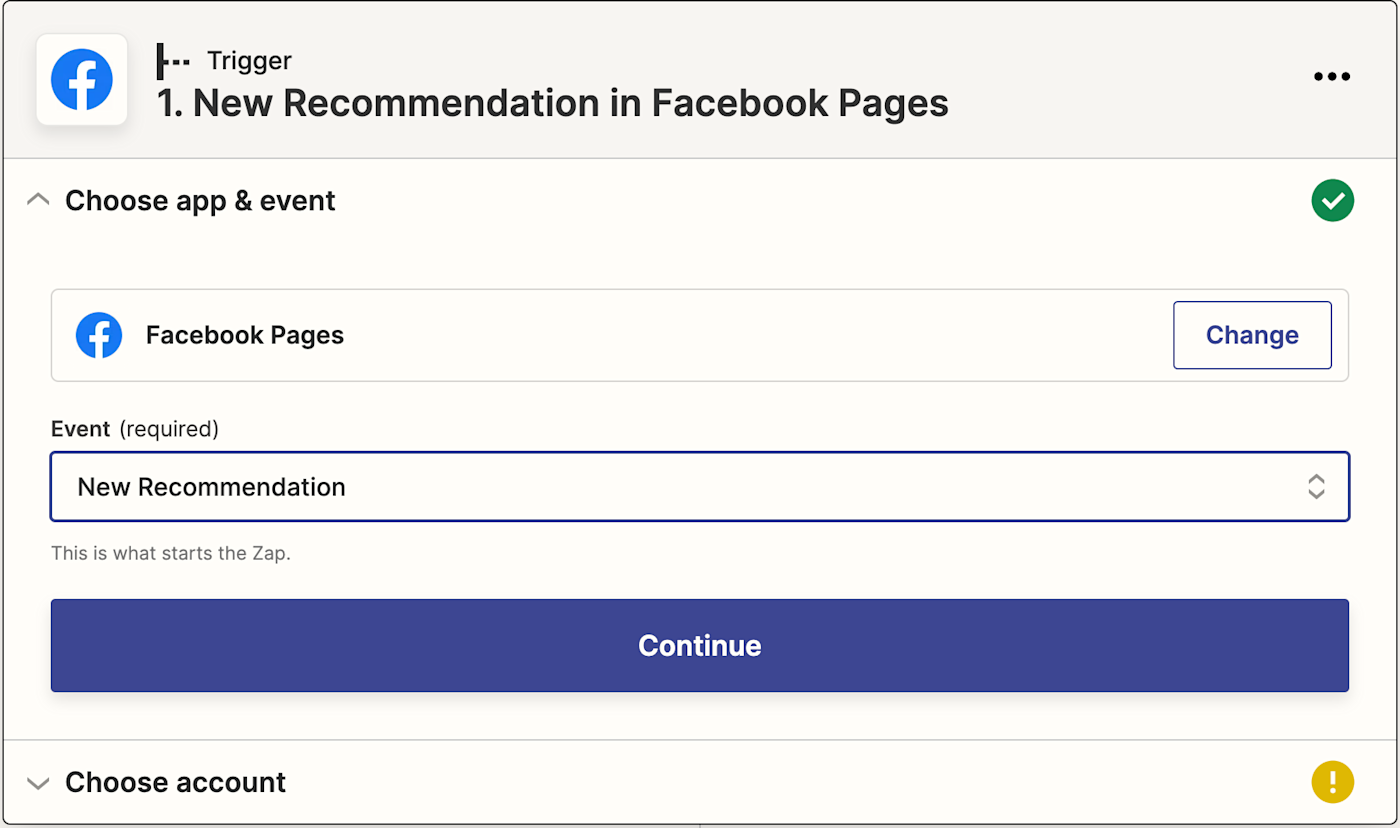
Once you’re in the Zap editor, you’ll first need to create the trigger, which is the event that will kick off your Zap. Search for and select Facebook Pages as the trigger app. Select New Recommendation as the trigger event. Click Continue.
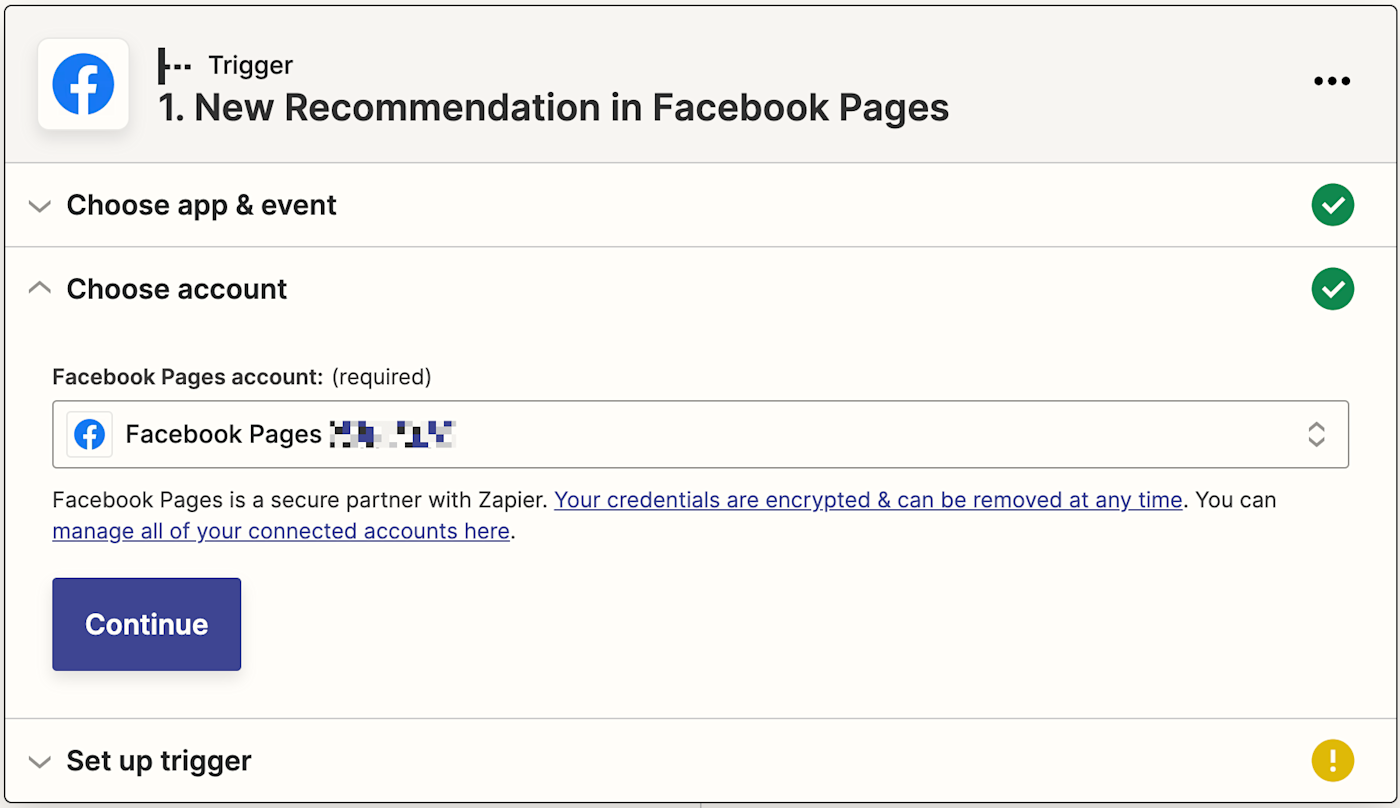
Next, connect your Facebook Pages account to Zapier by clicking on the dropdown menu and selecting +Connect a new account. You’ll need to give Zapier permission to access your Facebook account. Click Continue.
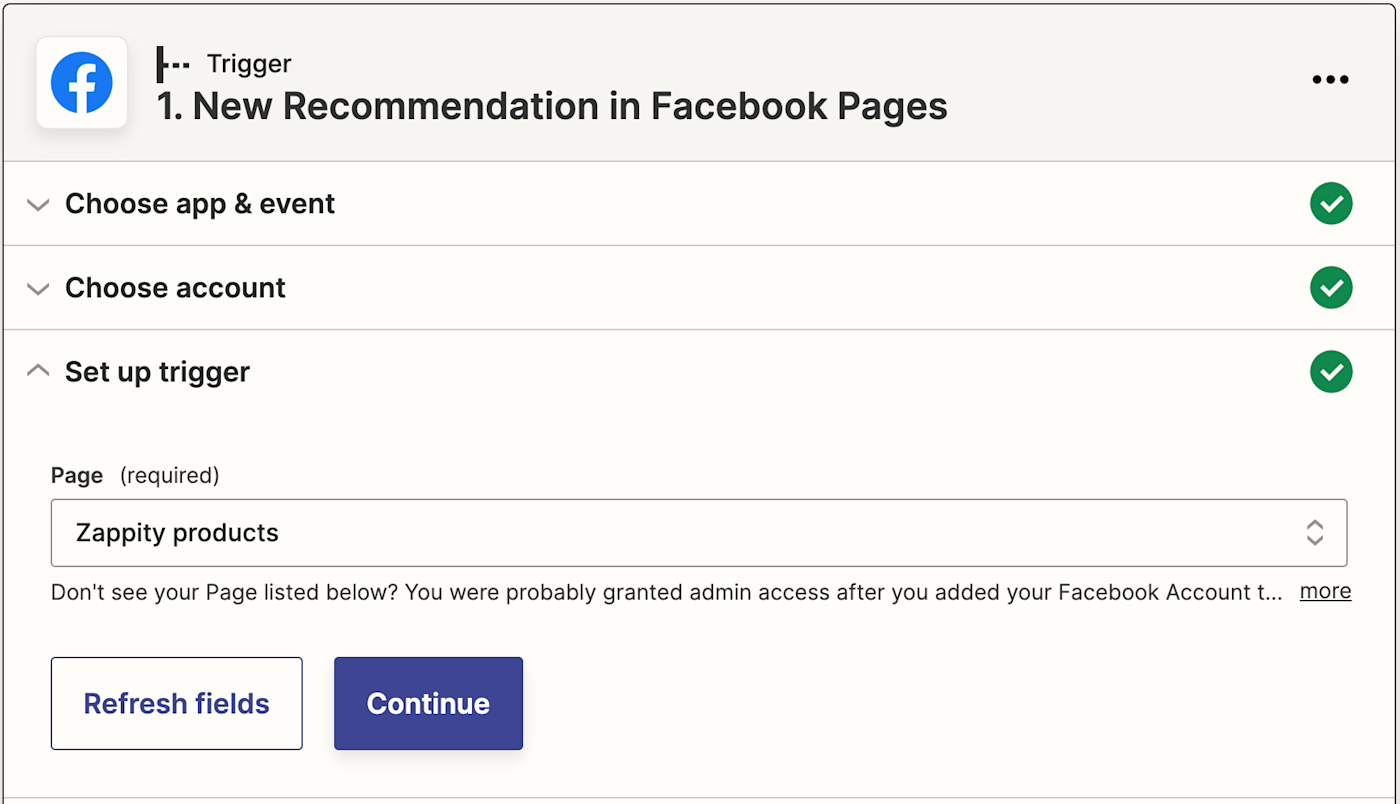
Next, it’s time to set up the trigger. In the Page field, select the business page you want Zapier to monitor for new recommendations. Click Continue.
Now, click Test Trigger so Zapier can pull the most recently added recommendation in your Facebook Pages account. Click Continue.
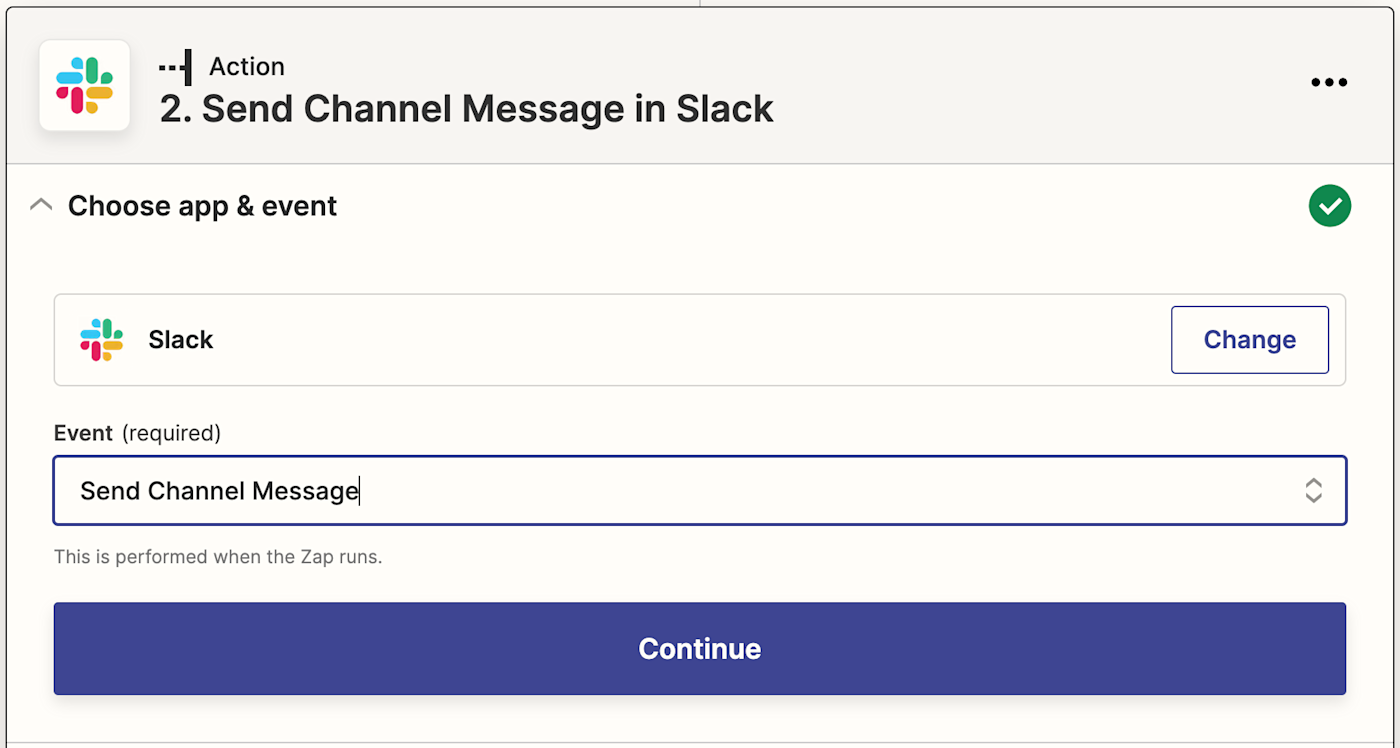
Set up your Slack action
In this next step, you’ll set up the action—the event your Zap will perform once it’s triggered. Search for and select Slack as your action app, select Send Channel Message as the action event, and click Continue.
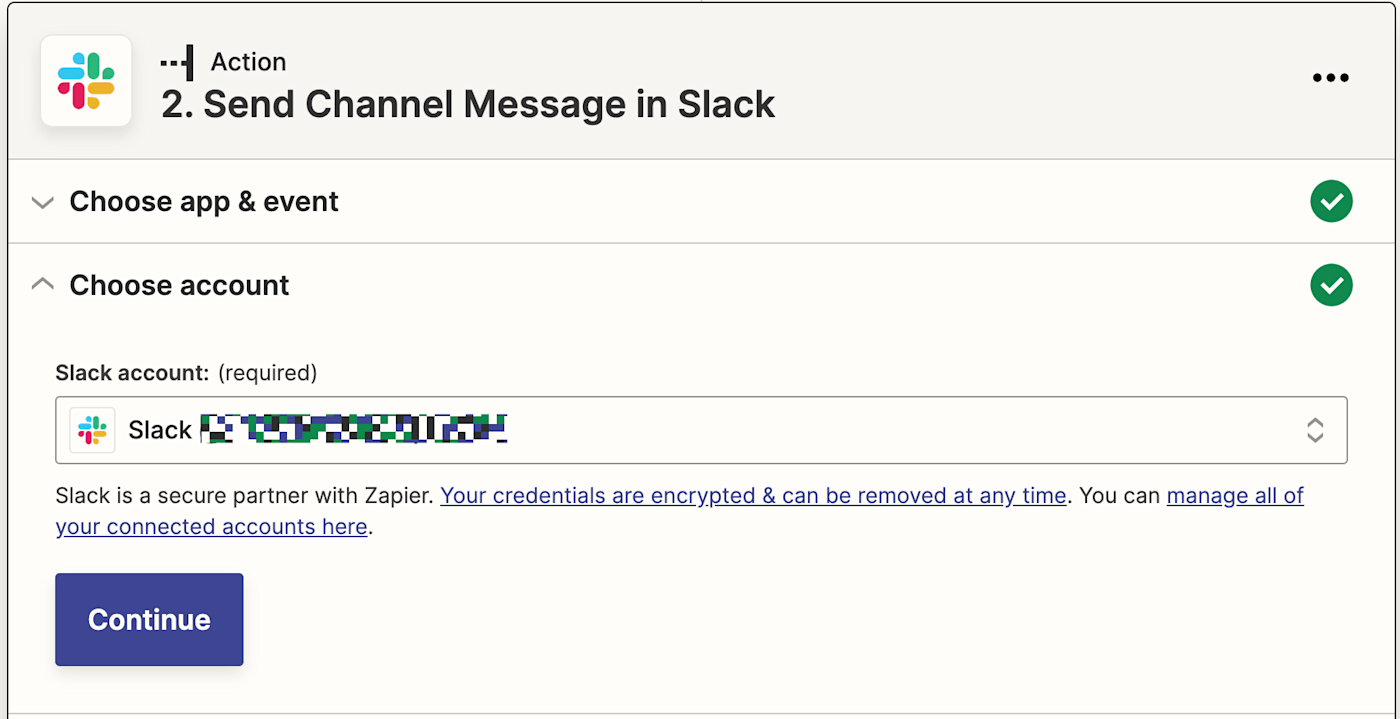
Now it’s time to connect your Slack account to Zapier by clicking on the dropdown menu and selecting +Connect a new account. You’ll need to give Zapier permission to access your Slack account. Once you’ve logged in (if you haven’t already) and connected your account, click Continue.
Set up your Slack message
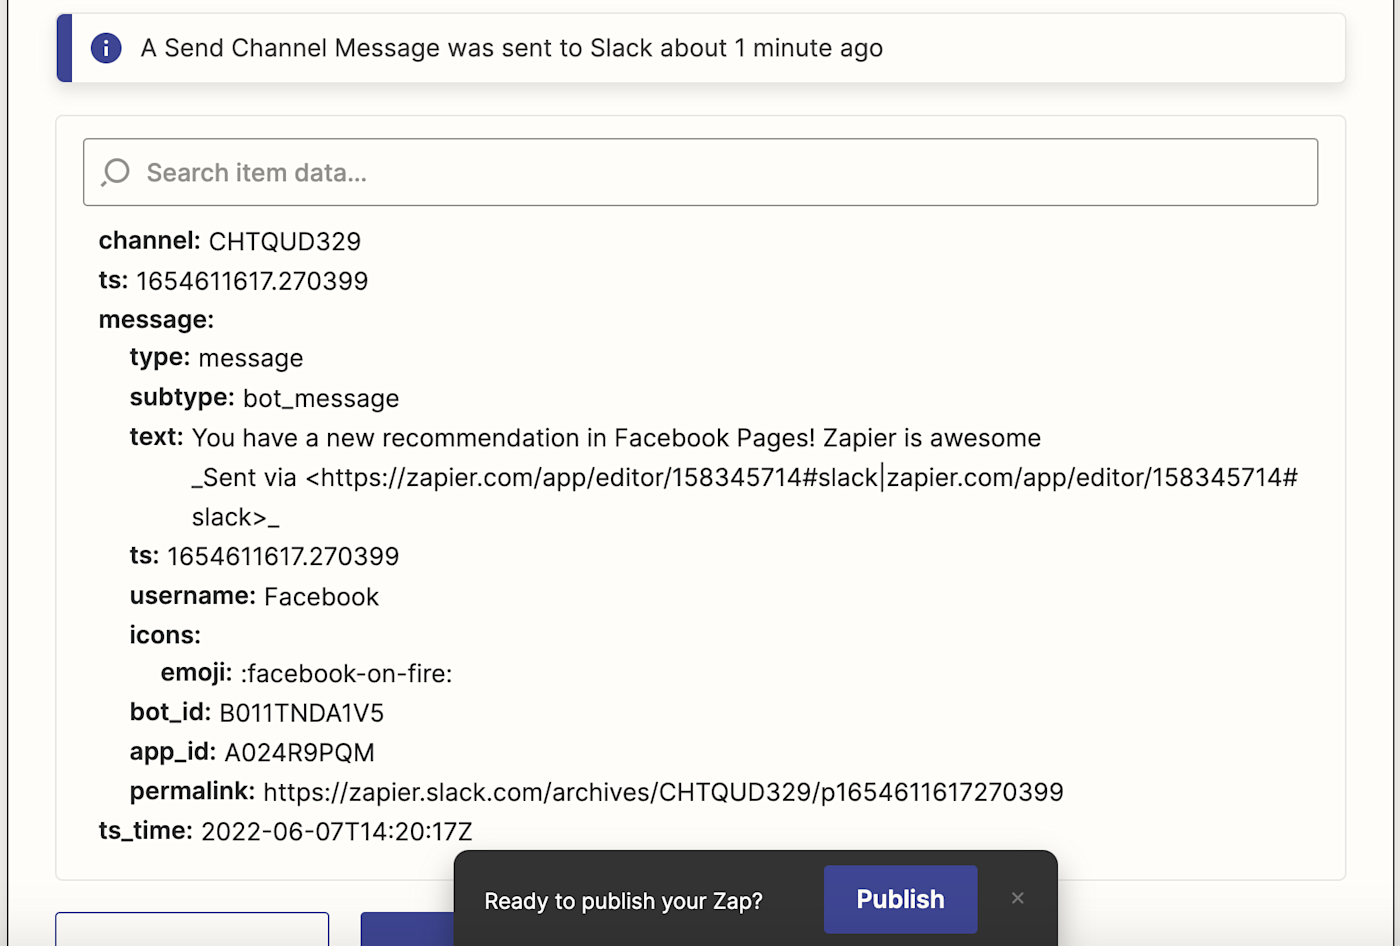
Now it’s time to set up your Slack message and tell Zapier where to send it. Choose a Slack channel from the dropdown. This channel will be where your sales team will get notified automatically whenever someone leaves you a recommendation on your Facebook Page.
Next, type out the message that you’d like to send. You can add information from previous steps in your Zap by clicking inside any empty field where you want the data to go (such as inside the Message Text field). Then select an option—or multiple options—from the Insert Data dropdown menu.
For example, you can pull in exactly what the recommendation said or what rating it had.
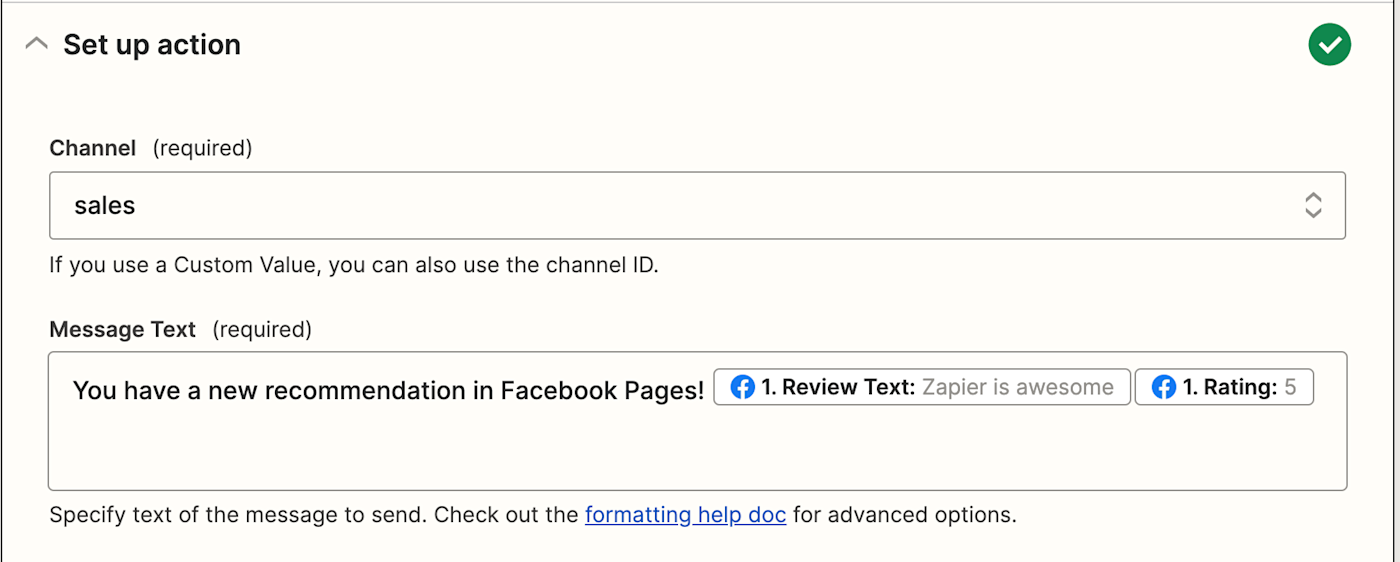
If you want to notify someone specific in the channel, you can add their Slack username to the Message Text field so they’ll be tagged in the message.
After you finish customizing your message text, you’ll have further options to set up your message. For example, if you want the message to be sent from a bot instead of your Slack handle, make sure you select Yes under Send As A Bot? You can also give your bot a name, use a Slack emoji as the bot’s icon, and include a link to the Zap itself.
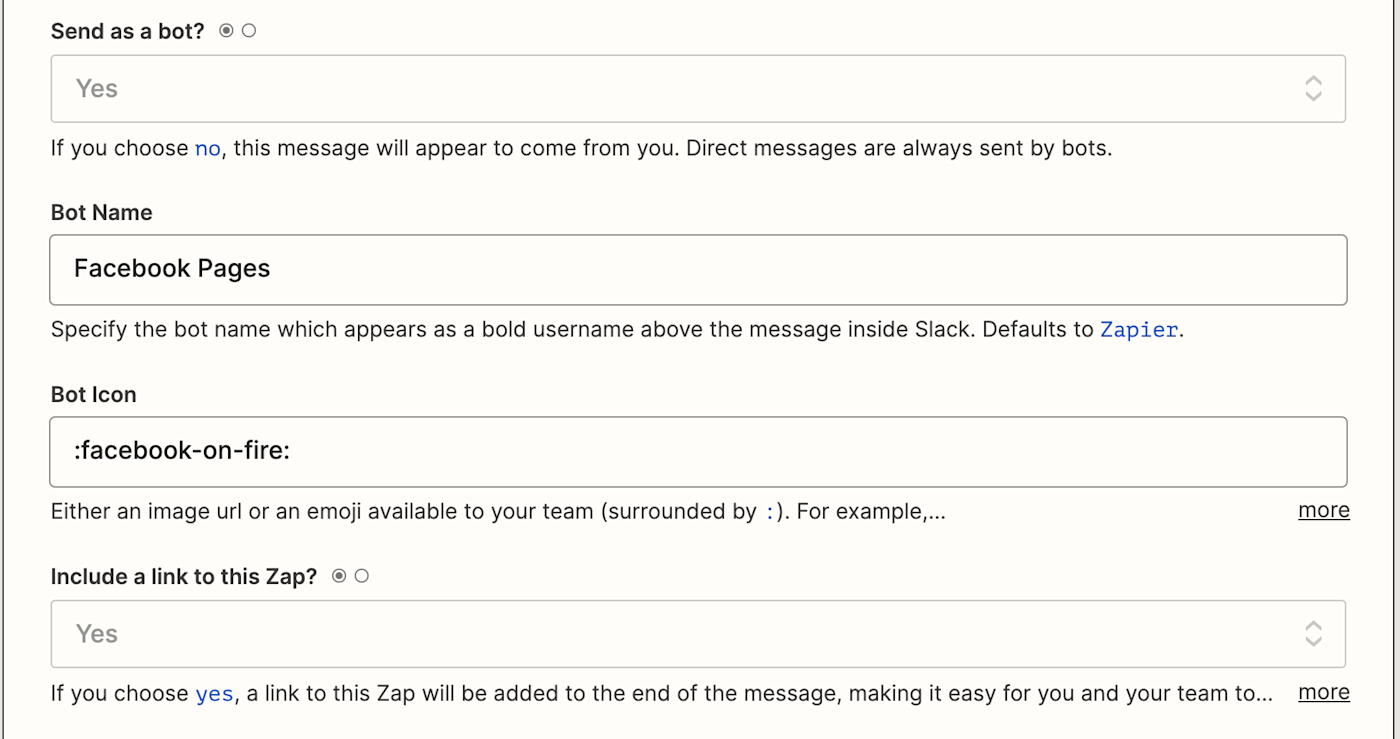
You can also attach an image by URL, auto-expand links as images or documents, or add a file.
Once you’ve finished setting up the Slack notification, click Continue.
Test your Zap and turn it on
Next, you’ll need to test your Zap. Zapier will show you a preview of the Slack channel message before it’s sent. Click Test & Continue.
Zapier will now send a test message to the Slack channel you selected with the message you’ve just set up.
If you’re happy with how the message looks in Slack, you’re ready to begin using your Zap! It will now automatically send a Slack channel message every time your Facebook Page gets a new recommendation. You can now pass important customer updates over to your sales team as soon as they come through.
Do more with filters
If you want to customize your Zap even further, you can also add a filter step between your Facebook Pages trigger step and Slack action so you only receive Slack notifications for specific recommendations.
For example, if you only want to know about positive reviews so you can reshare them on your social media as a testimonial, you can set up the Zap so that it only continues if the review rating is higher than 4. Alternatively, you could also filter negative reviews (with a rating of 1 or 2) and send them straight to your support team on Slack.
Note: You can combine both of these ideas into a multi-step Zap using Paths, available on Zapier’s paid plans. Paths let you build advanced workflows to perform different actions based on different conditions.
After your Facebook Pages trigger, add an action step and select Filter from the list of Zapier’s built-in tools. Then select Rating in the first field and (Number) Greater than or (Number) Less than in the Choose condition field, depending on how you want to filter. Then enter the appropriate rating number in the final text field.
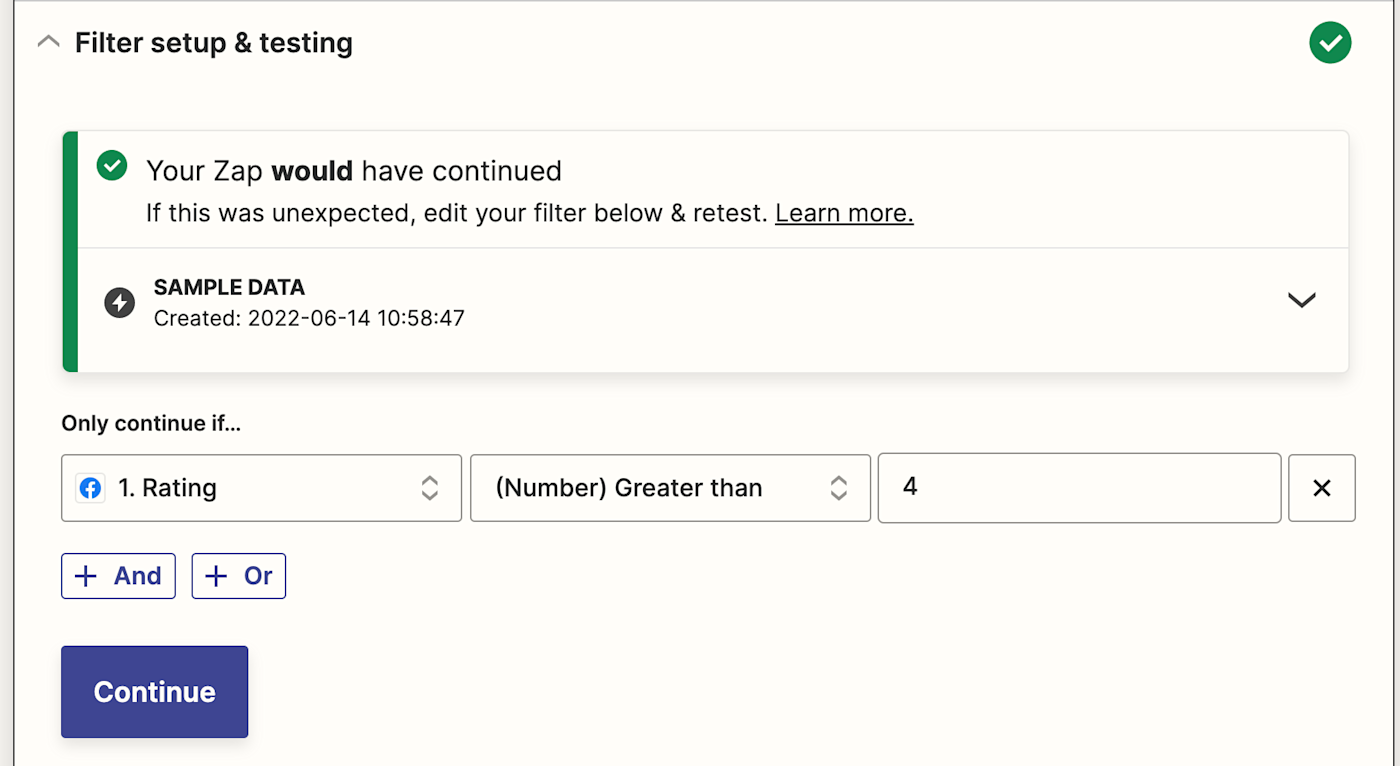
Now you’ll only get notifications for specific ratings so you can keep your team even more focused.
New to Zapier? It’s a tool that helps anyone connect apps and automate workflows—without any complicated code. Sign up for free.
Need Any Technology Assistance? Call Pursho @ 0731-6725516

")
")