If you use Google Workspace, you’ve probably noticed that Google has made Google Tasks pretty easy to use. You can easily find it in the sidebar in Gmail. And the service integrates seamlessly with team accounts, making basic task management a breeze.

But, depending on your needs, Google Tasks may be a bit too basic (like when you want to share tasks across your team). And if the other apps you use are fairly robust, like Notion, you might find Google Tasks needs a little help to keep up. Fortunately, you can bridge these gaps through the magic of automation.
Using Zapier, you can set up a Zap—our word for our automated workflows—that will automatically create a new entry in a Notion database whenever a new task is added in Google Tasks. That way, you can easily manage your and your team’s tasks in one place, leading to faster and more efficient workflows.
Zapier is the leader in no-code automation—integrating with 5,000+ apps from partners like Google, Salesforce, and Microsoft. Build secure, automated systems for your business-critical workflows across your organization’s technology stack. Learn more.
Before you begin
Before you start, you’ll need to have an active Google Tasks account with a defined list where you’ll add your tasks. You’ll also need a database in a Notion workspace with fields created for the task details you’ll want to transfer over from Google Tasks.
Option 1: Get started quickly with a Zap template
If you’re in a hurry, you can use our pre-built Zap template to get started. All you have to do is connect your accounts and customize your Zap. Create a Zapier account (if you haven’t already), and let’s get to it.
Here’s how it works:
-
Click on the Zap template.
-
Connect your Google Tasks account and choose the task list you want to send to Notion.
-
Connect your Notion account and choose the database where you want the tasks to end up.
-
Choose which Google Task data to the database and map it to the right fields in Notion.
-
Click the Send Test button to test your Zap and check your Notion database for the sample entry.
-
Once everything looks right, you’re now ready to use your Zap.
Option 2: Create your own Zap
If you want more control over the process, you can create your Zap from scratch. Don’t be overwhelmed though—Zapier’s editor makes it as simple as filling out an online form. Click here to create a new Zap.
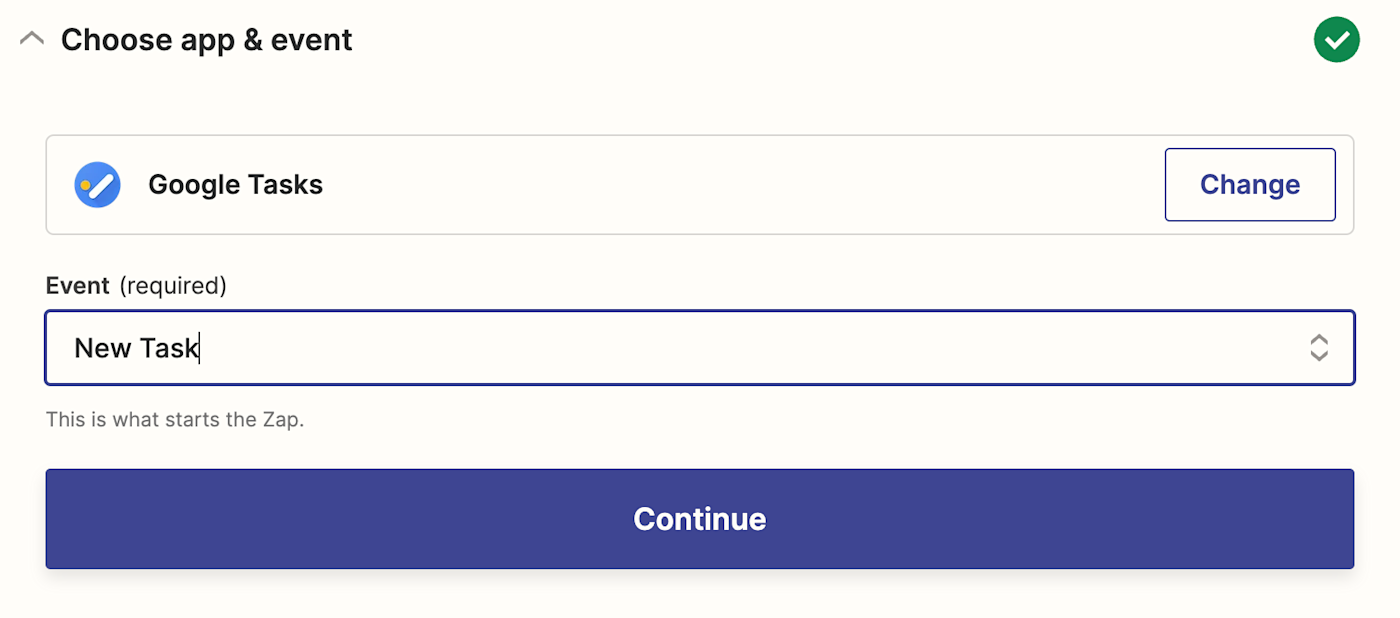
We’ll start by adding the trigger first, which is the event that starts your Zap. Search for and select Google Tasks for your trigger app and New Task for your trigger event. Then click Continue.
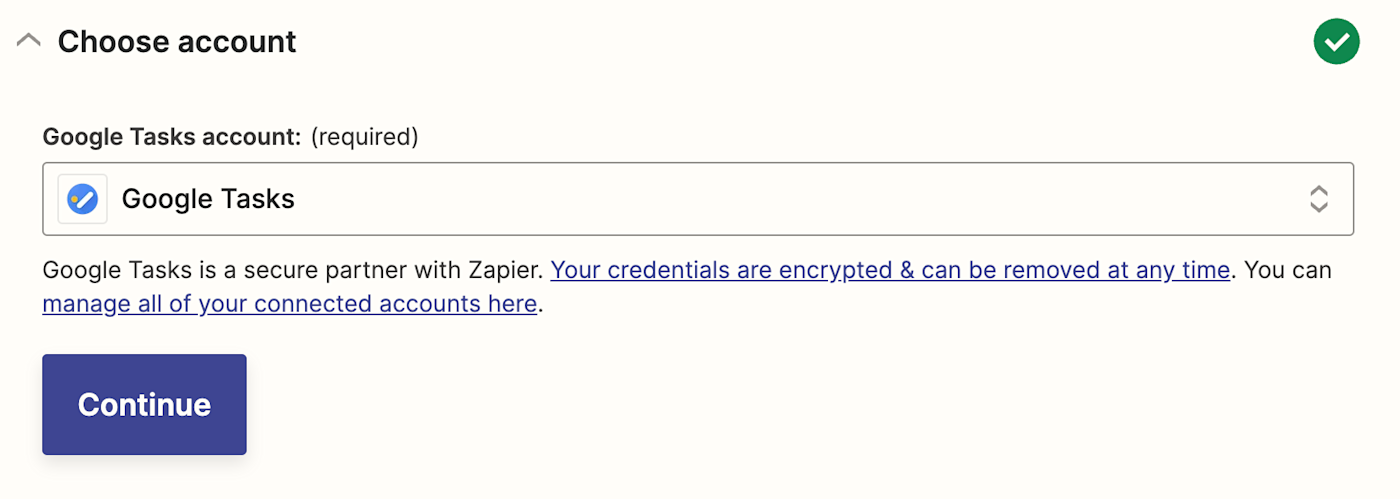
Next, connect your Google Tasks account. If you’ve linked your account already, you’ll see it in the account dropdown. If not, click the Connect a new account button to connect your Google account. Then, click Continue.
Next, choose the task list you want to add to Notion from the Task List dropdown. Then click Continue.

Next, test your trigger step by clicking the Test Trigger button. If you see one of your tasks from the list show up in the result, that’s a success, and you can click Continue to proceed to setting up your action.
If your test doesn’t look quite right, go back and adjust your trigger step until you see the correct tasks in your test results.
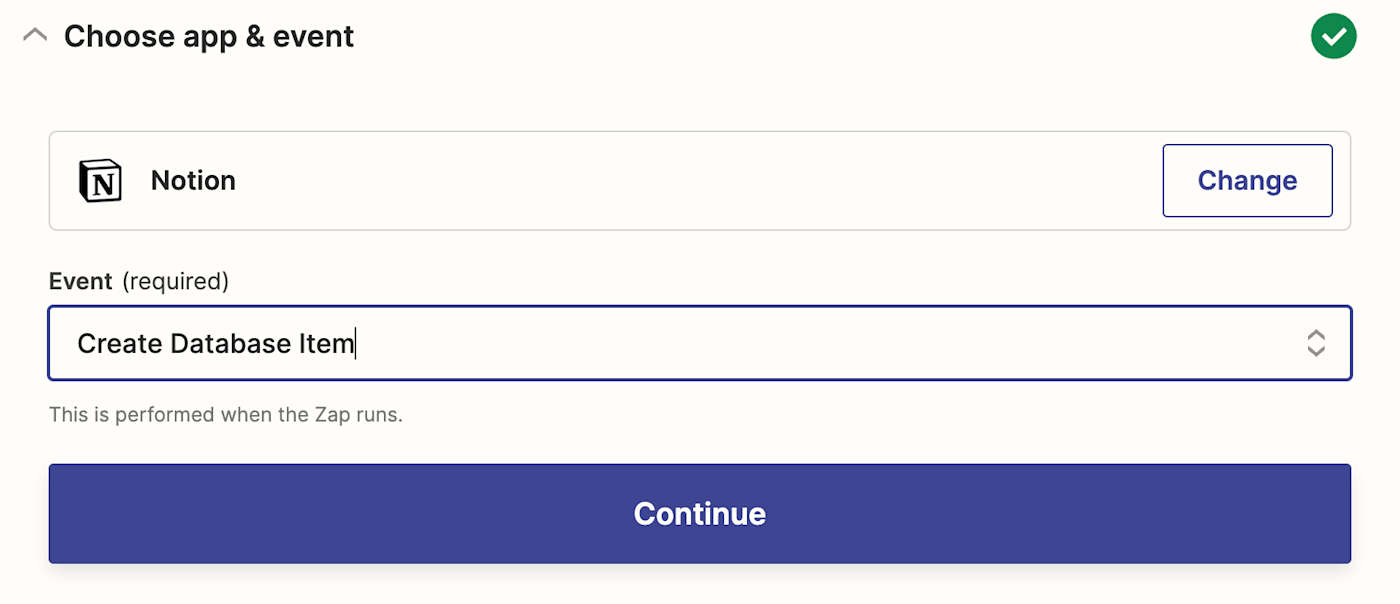
Next, we’ll set up the action. Search for and select Notion for your action app and Create Database Item for the action event. Then click Continue.
Next, connect your Notion account. If you haven’t linked your account already, you can click the Connect a new account button.
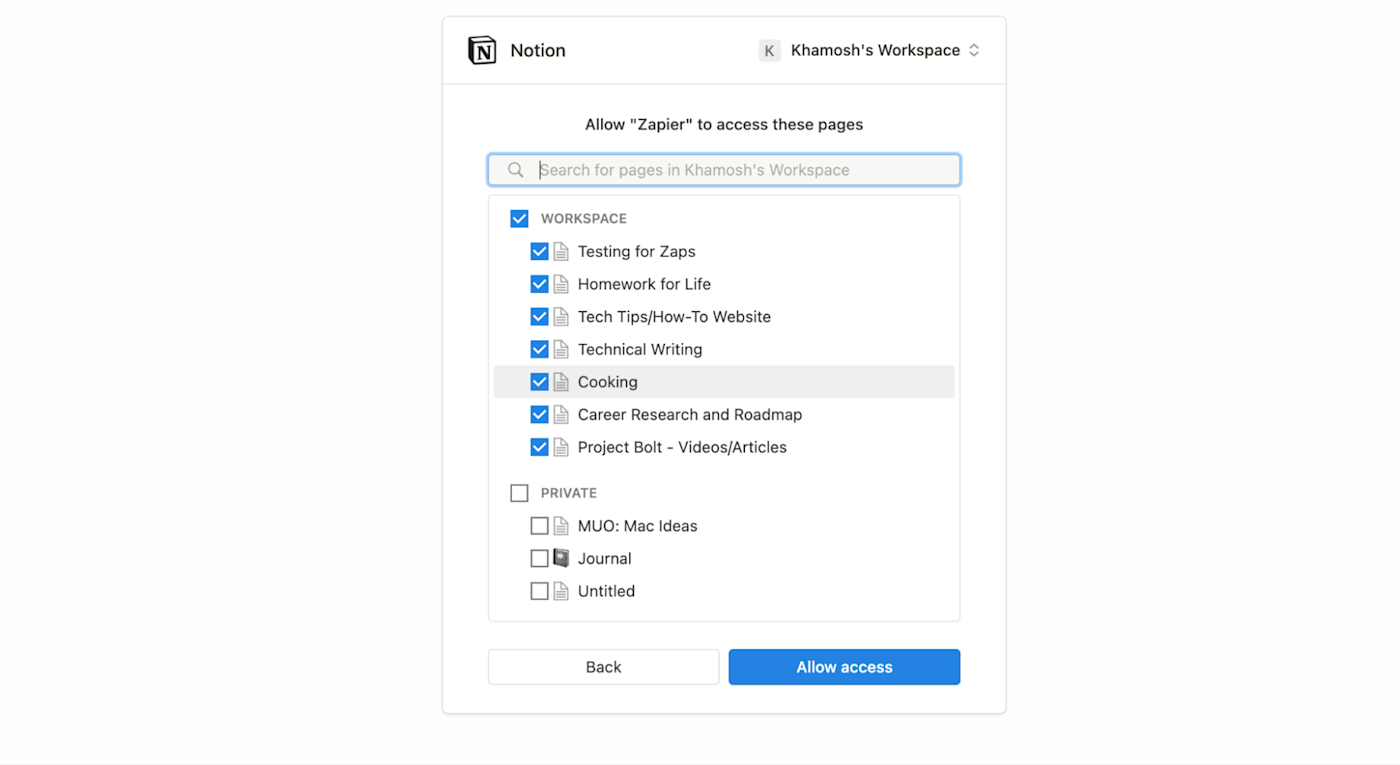
Then choose the workspaces that contain the database you want to work with and click Allow Access to connect them with Zapier.
After connecting your Notion account, click Continue.
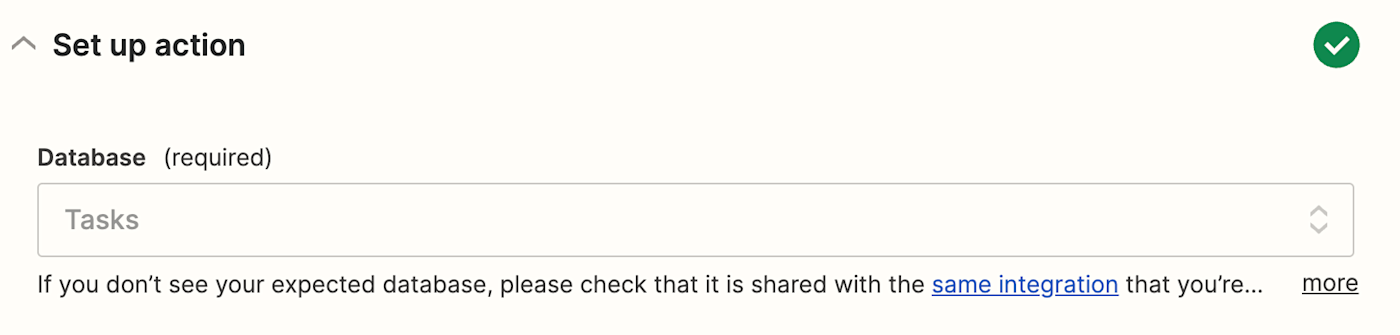
Now we get to the meat of your Zap—connecting the Google Tasks data with your database. First, choose the database from the Database dropdown.
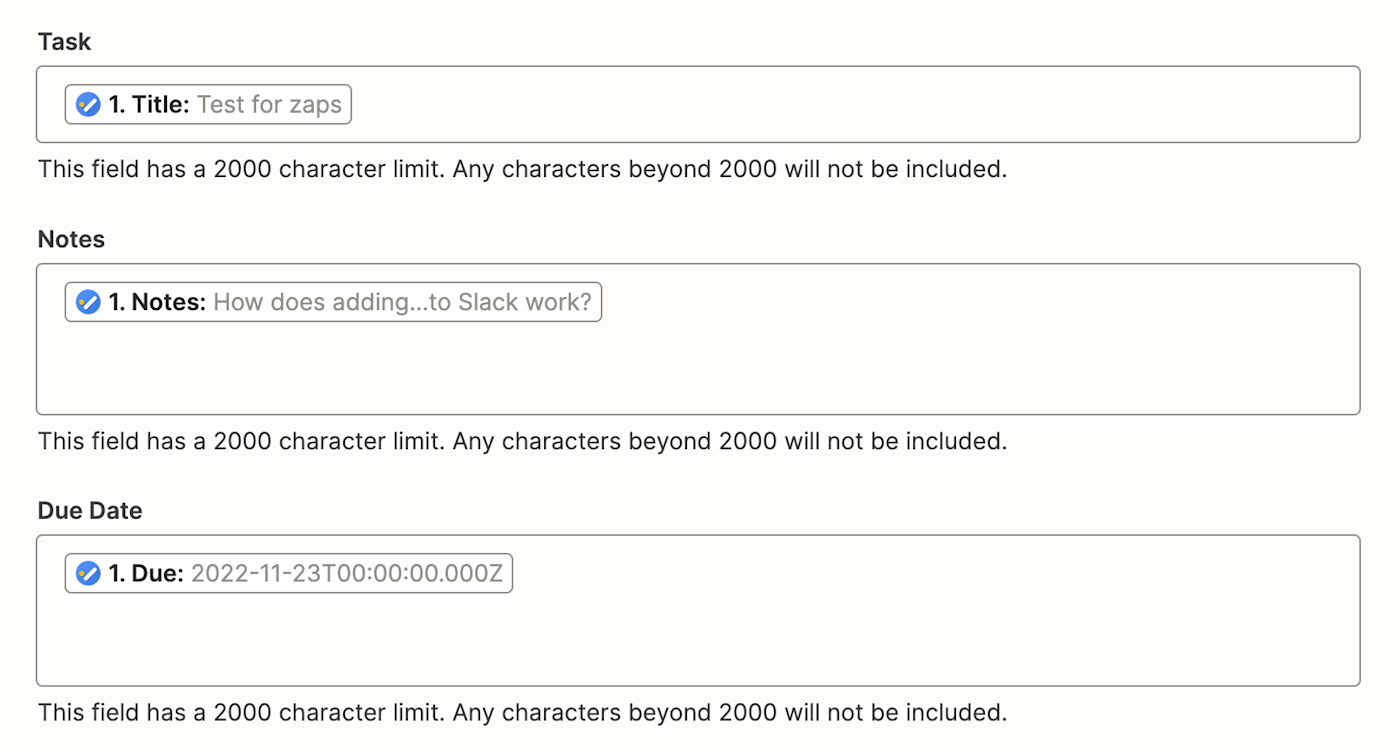
All of your Notion columns will show up in your Zap as fields. If you want to create more fields, you can go back to your Notion database, add them, then use the Refresh Fields button to update them in the editor.
For this example, I’ve added three simple columns: Task, Notes, and Due Date. You can map your Google Tasks to each Notion column by clicking in each field in your Zap and selecting the Google Task data that shows up in the dropdown.
In my example, I’ll begin by mapping the Task field with the Title data from Google Tasks. The Notes column maps with the Notes data, and for Due Date, it’s the Due option from Google Tasks.
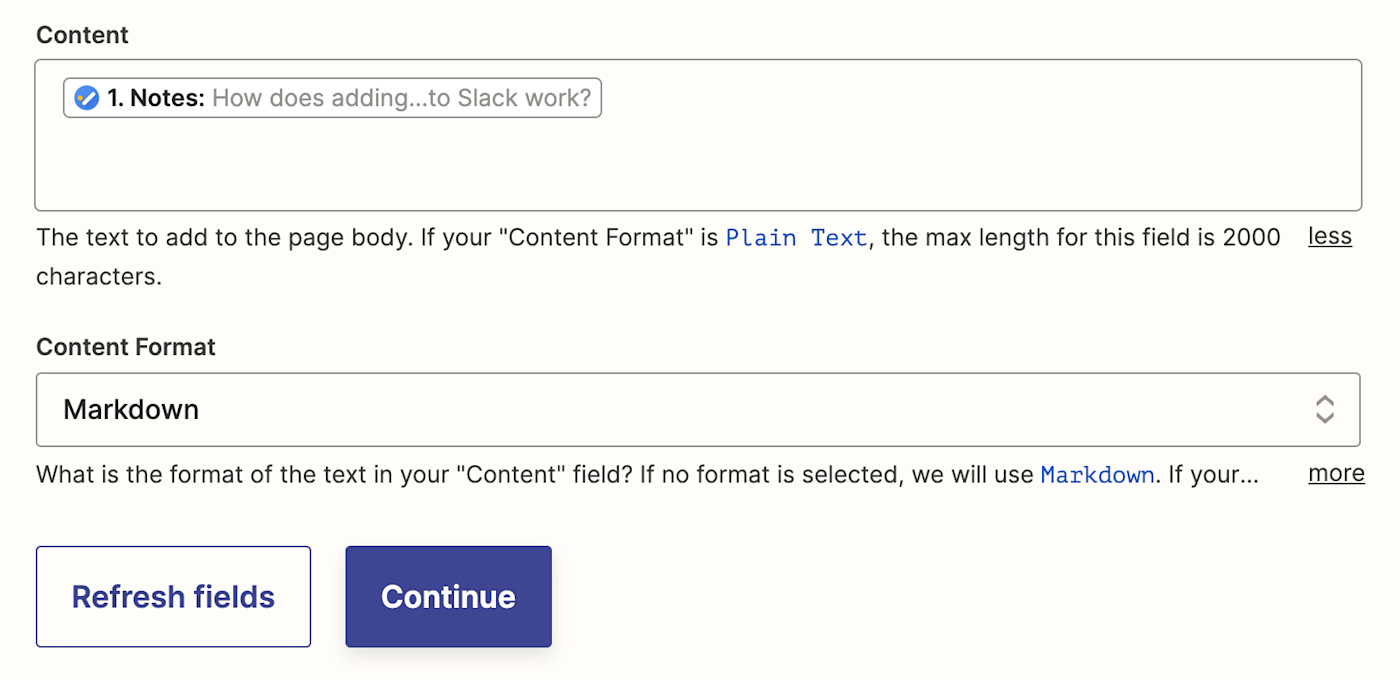
If your Google Tasks notes are fairly long, you can add the Notes section from Google Tasks to the Content section in the Notion database instead. This will show up when you expand a database entry (this feature supports both plain text and Markdown syntax).
Once you’re happy with the setup, click Continue.
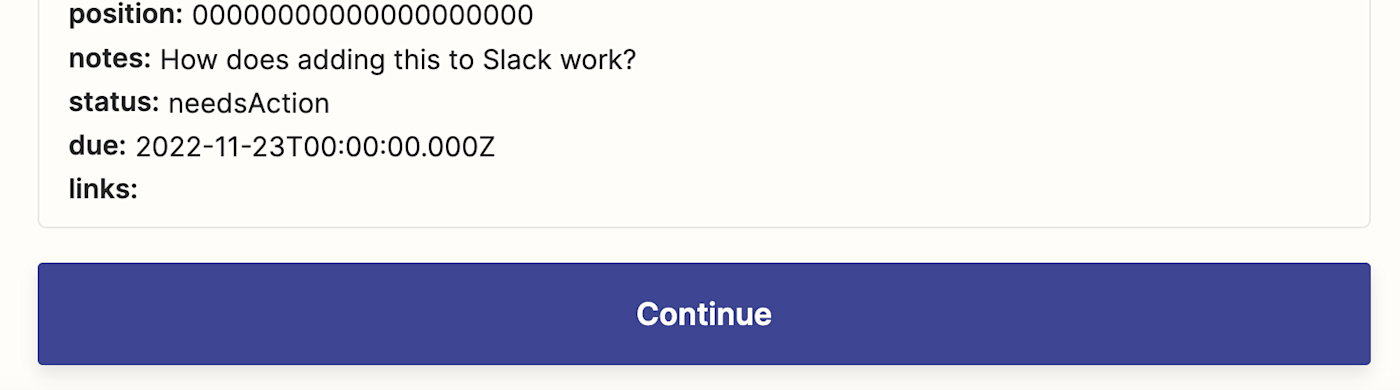
Now, test your Zap by clicking the Test action button.
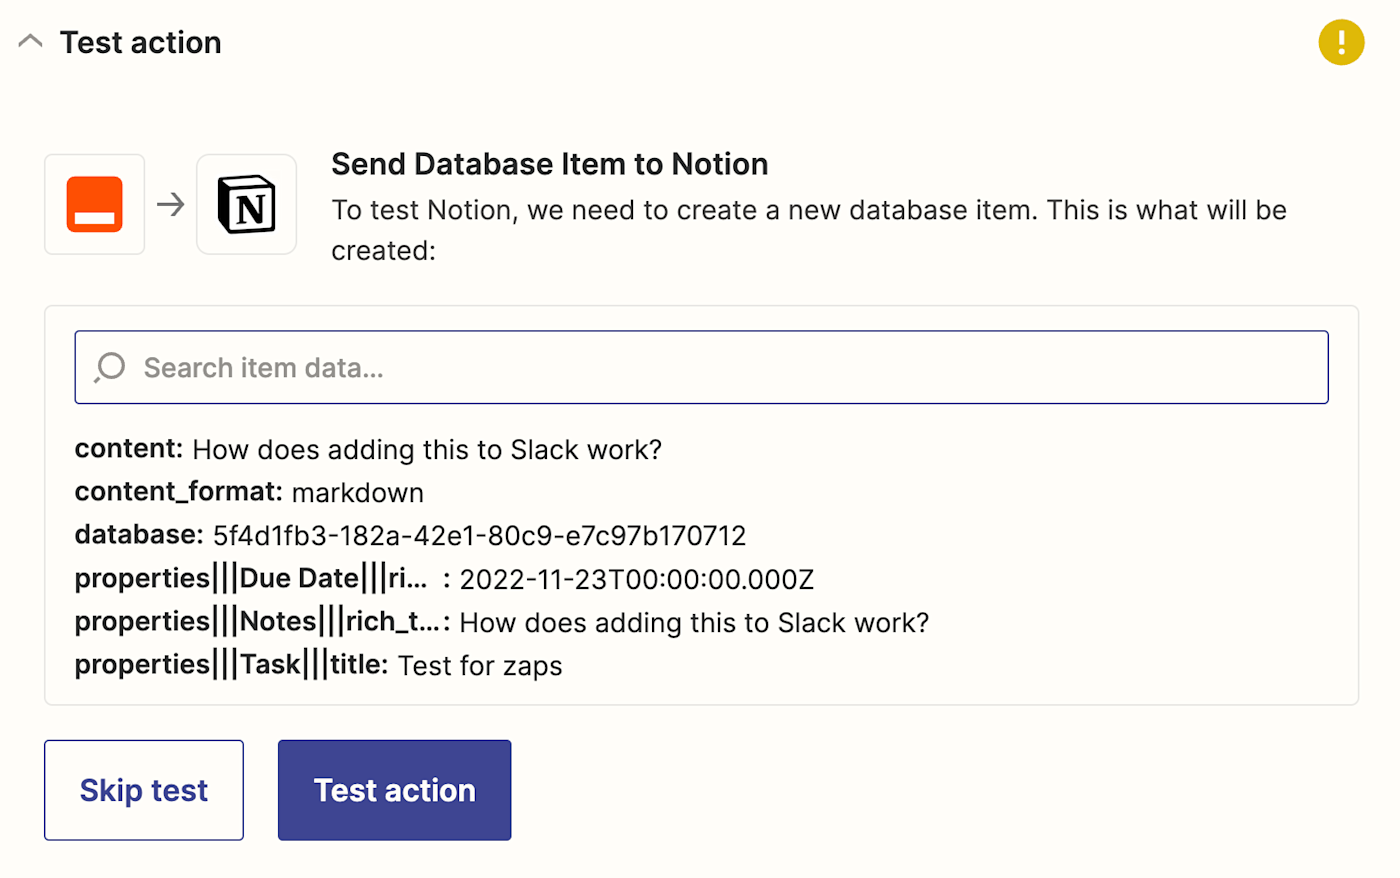
You can double check it’s working correctly by opening your Notion database and seeing if your test entry was added. For our test, the entry looks like this:
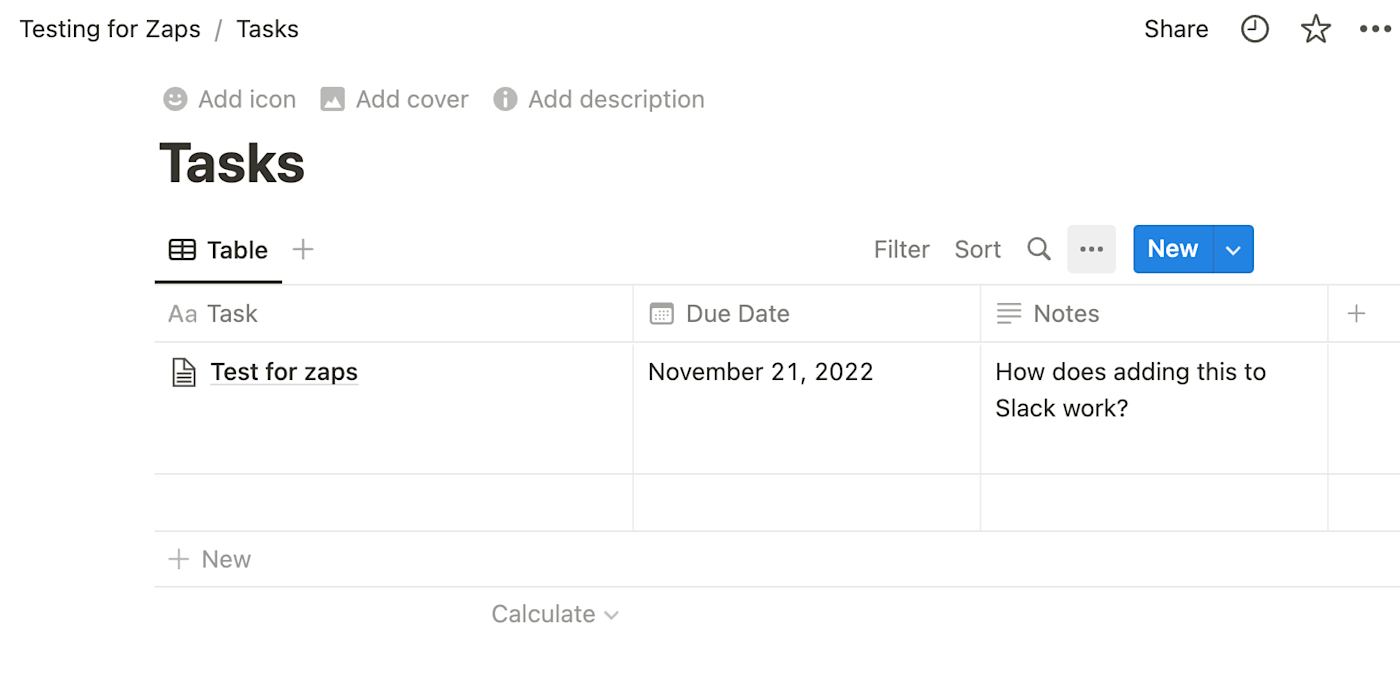
We’d call that a success! You’re now ready to use your Zap. Now any time a task is added to the particular Google Tasks list, it will automatically show up in the Notion database.
Zapier is the leader in no-code automation—integrating with 5,000+ apps from partners like Google, Salesforce, and Microsoft. Build secure, automated systems for your business-critical workflows across your organization’s technology stack. Learn more.
Related content:
Need Any Technology Assistance? Call Pursho @ 0731-6725516


