Before my kids wake up in the morning—which is frustratingly early—I try to spend some time wrapping my mind around the day. Figuring out what meetings I have, when I can set aside some focus time, and what projects I’m going to work on are first on my list.

It makes sense then that I’d integrate Google Calendar with Notion, as I pretty much use Notion as a second mind. Seeing an up-to-date calendar in Notion is a huge help when planning my day. Fortunately, integrating the two couldn’t be easier.
New to Zapier? It’s a tool that helps anyone connect apps and automate workflows—without any complicated code. Sign up for free.
Table of contents
Popular ways to integrate Google Calendar with Notion
There are plenty of ways to integrate Google Calendar and Notion. If there’s a tedious, manual task you do every day (like copying your calendar events from Google Calendar to Notion), you can easily automate it to clear up your to-do list. Here are some of the most popular ways to automate Google Calendar and Notion.
To get started with a Zap template—what we call our pre-made workflows—just click on the button, and we’ll guide you through customizing it. It only takes a few minutes. You can read more about setting up Zaps here.
Add Google Calendar events to Notion
If you’re using Notion to keep track of your tasks and plan your day, having all of your daily events there makes a lot of sense. And with Zapier, you can automatically add them to a Notion database, making it easy to map out your day without copying and pasting event information from your Google Calendar.
You can create a Zap—what we call our automated workflows—that creates a database item for new or updated Google Calendar events, making sure your Notion database is always up to date.
Create Google Calendar events from Notion
We covered how to add Google Calendar events to Notion, but what about the other way around? With Zapier, adding new Notion database items to your Google Calendar is a breeze.
With these Zaps, you can block time on your calendar for any appointment or task you add to your Notion database.
Connect Google Calendar with Notion
As you can see, there are a lot of ways to integrate Google Calendar and Notion using Zapier. For the sake of this tutorial though, we’re going to focus on one of the workflows we mentioned above—adding Google Calendar events to a Notion database. But you can use these same steps to connect Google Calendar and Notion in tons of different ways.
Before you begin
Before you create a Zap that integrates Google Calendar with Notion, you’ll need to create a Zapier account if you don’t have one already. Don’t worry, creating an account is easy and free. You’ll also need a Google account and a Notion account.
Once you’re signed in, you can create new Zaps by clicking the Create Zap button or by going to zap.new.
Step 1: Connect your trigger app
A Zap always consists of two parts:
-
The trigger: an event that starts a Zap.
-
The action: an event a Zap performs after it’s triggered. A single Zap can perform more than one action.
Depending on the workflow you’re setting up, your trigger app could be Google Calendar or Notion.
Search for and select your trigger app. In our example, we’ll select Google Calendar for our trigger app.
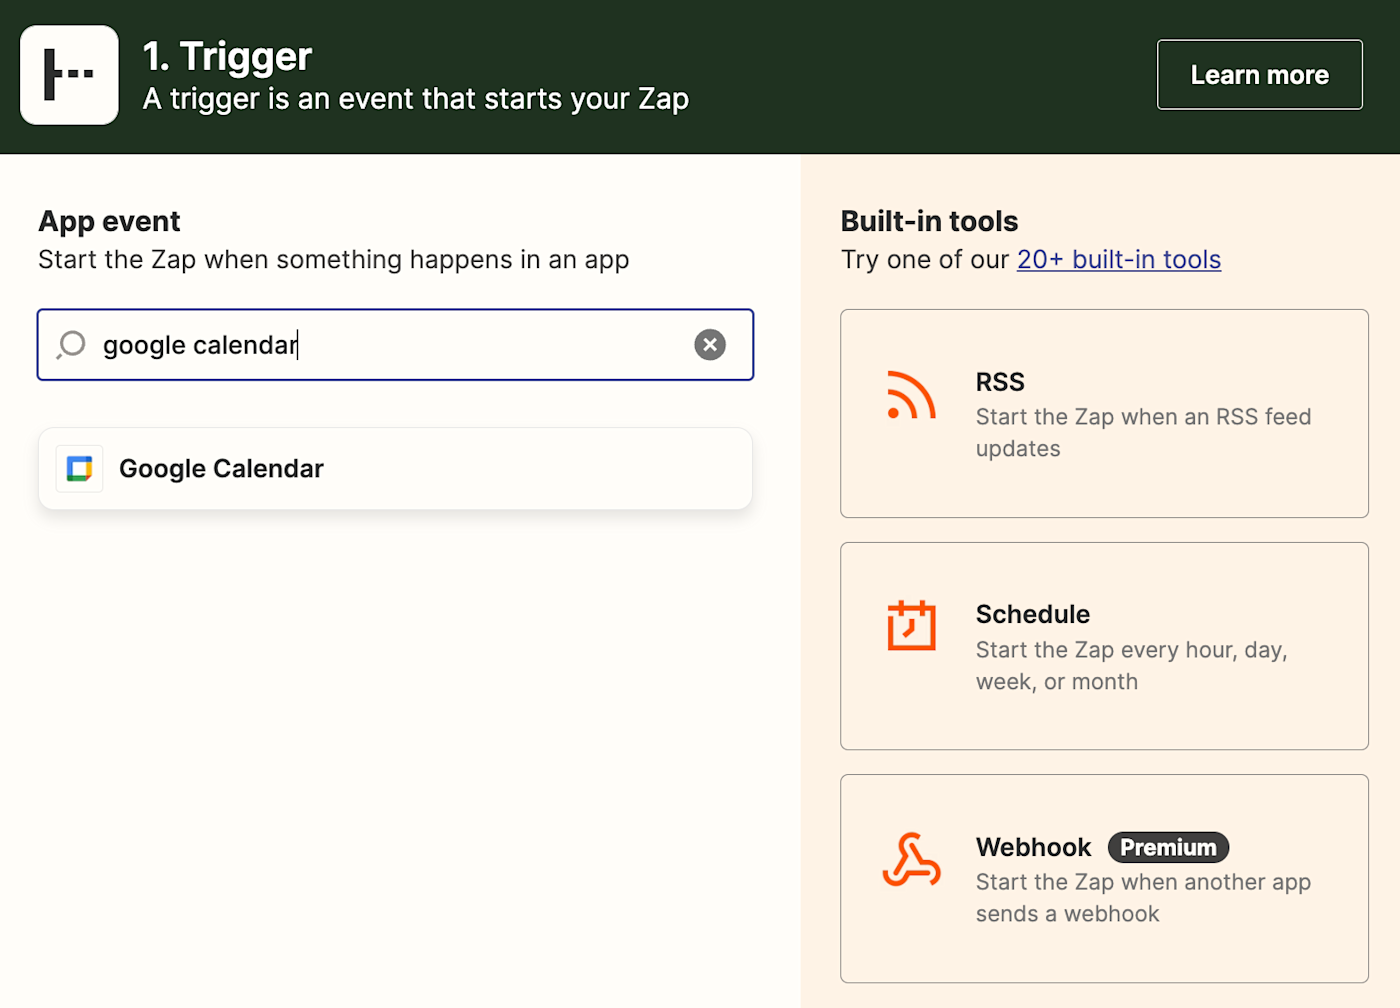
Then select your trigger event. If your trigger app is Google Calendar, your Zap can trigger when you create a new calendar or event, an event starts or ends, and more.
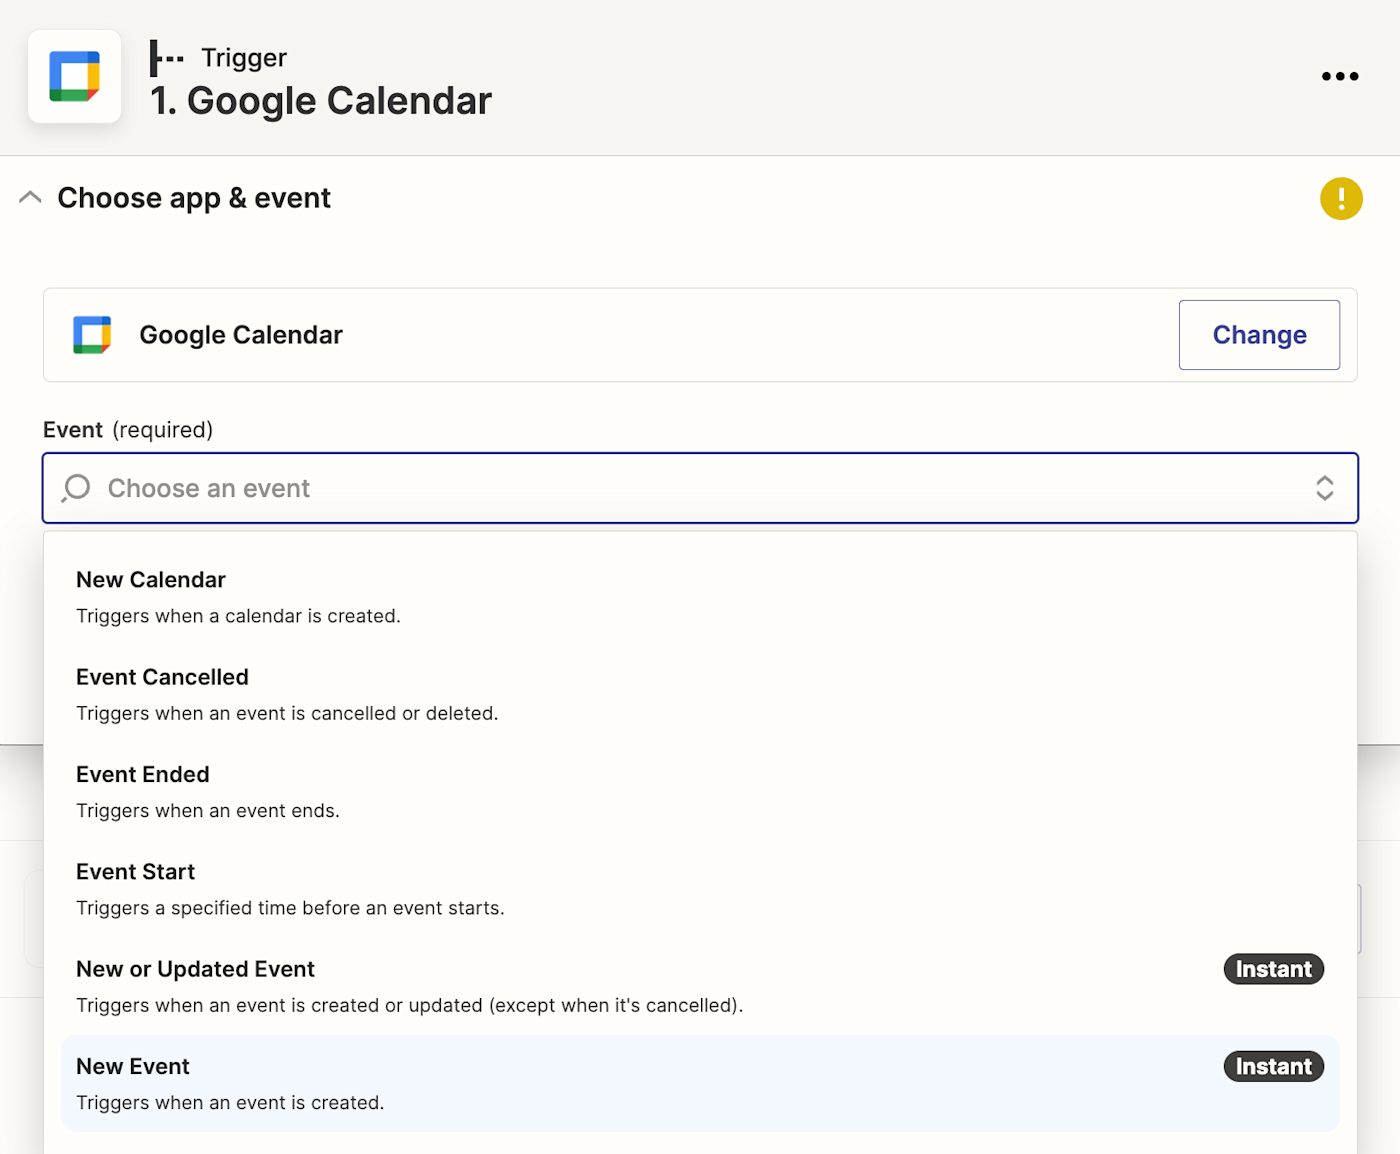
If your trigger app is Gmail, your Zap can trigger when you receive a new email, an email with a particular label, an email with an attachment, and more.
Select your trigger event and click Continue. We’re going to select New Event for our example.
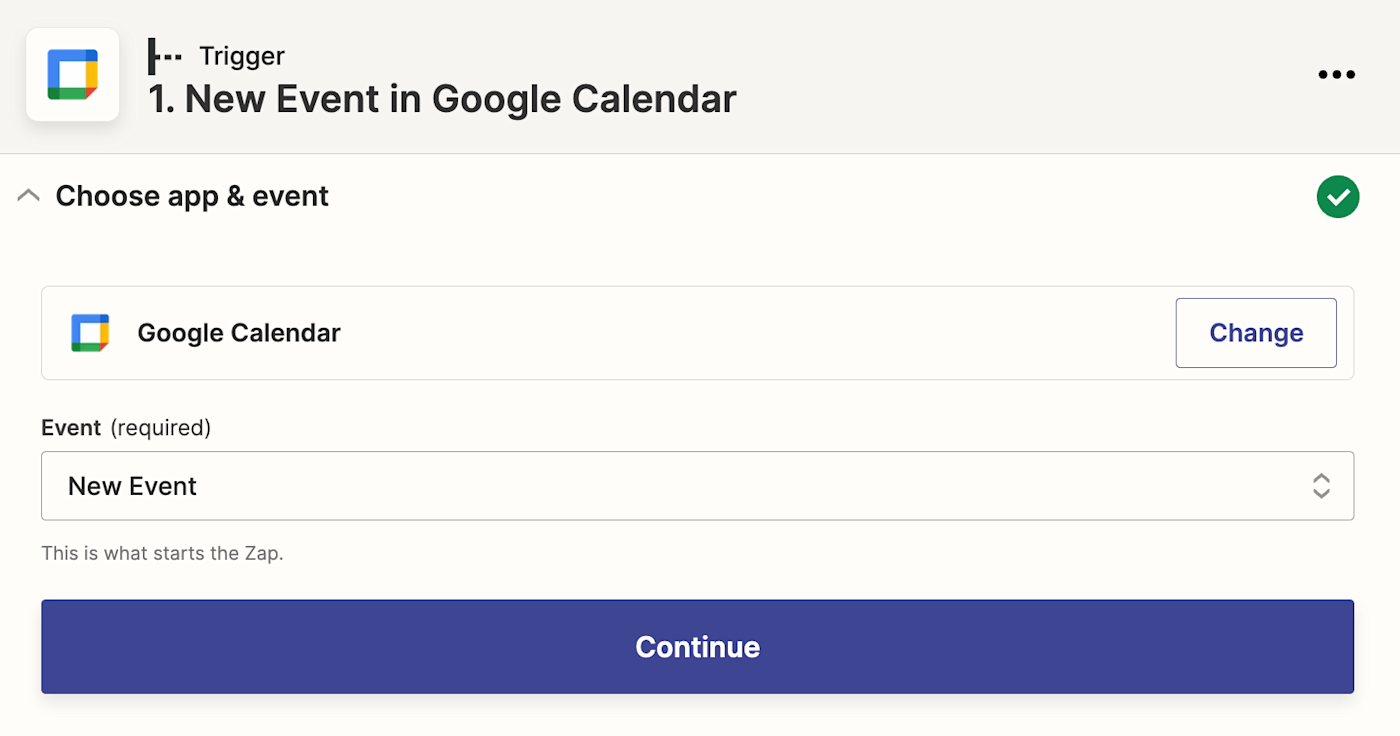
Next, connect your trigger app account to Zapier by clicking on the dropdown menu and selecting +Connect a new account. We’ll connect Google Calendar in our example. You’ll need to give Zapier permission to access your account. Once you’ve connected your account, select it from the dropdown menu and click Continue.
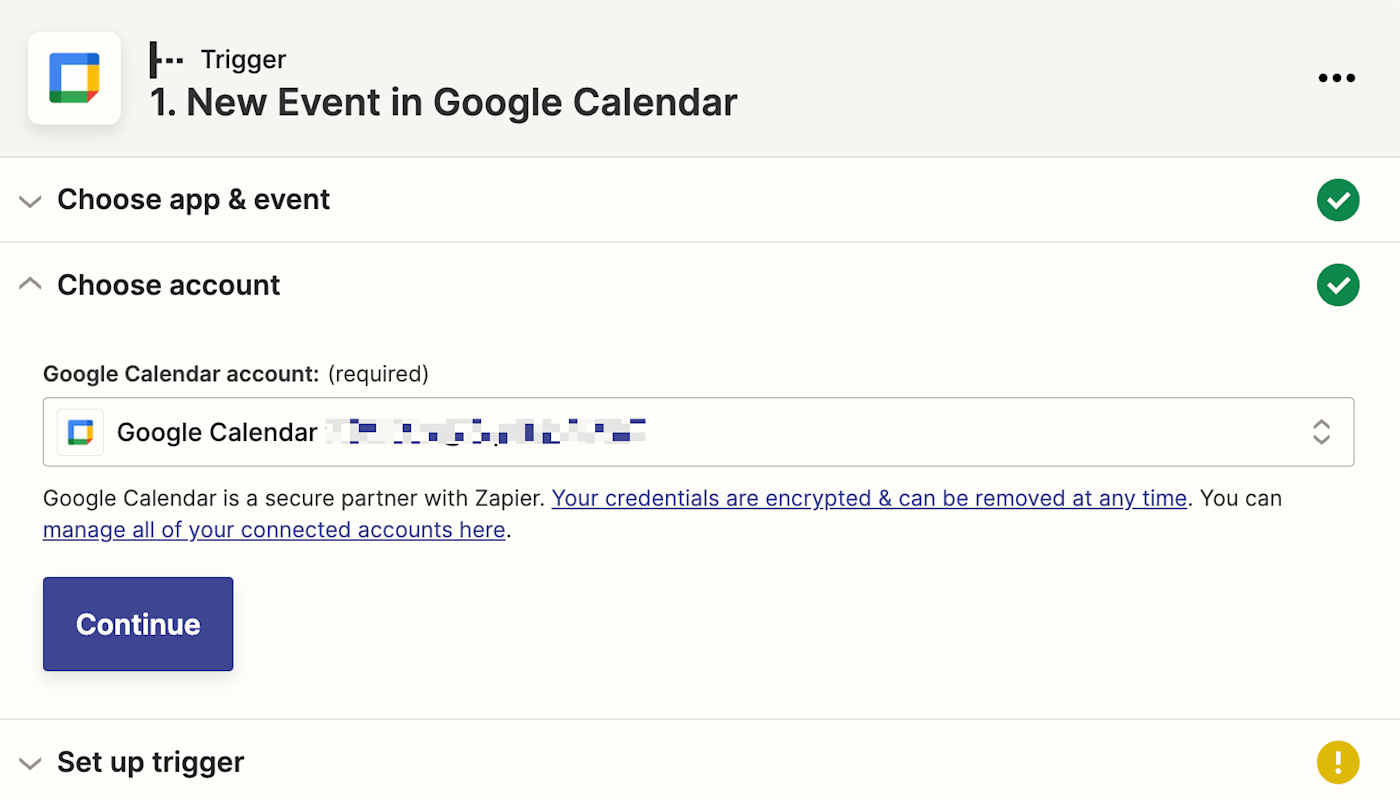
Next, set up your trigger step by filling in the trigger step fields. Depending on your trigger app and event, you’ll have different fields to customize. In our example, the only field we need to select is which Google calendar we’re going to integrate with.
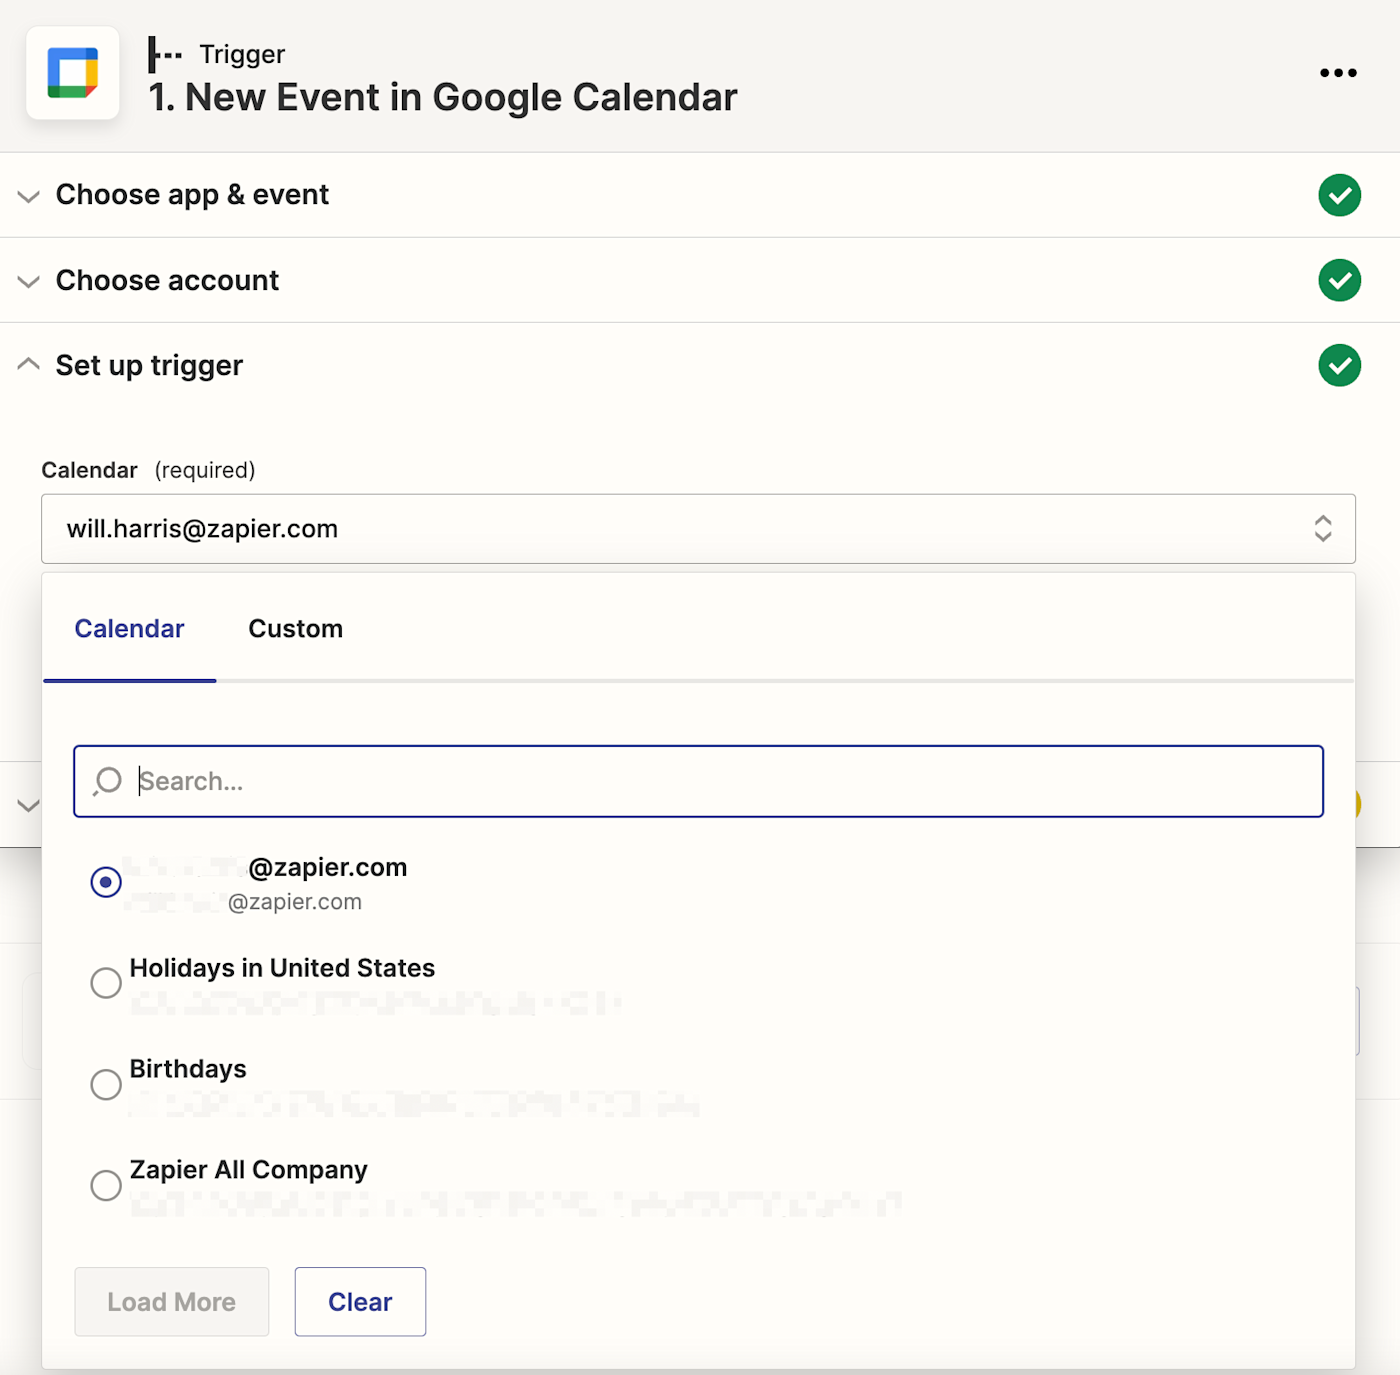
When you’re done customizing your trigger step, click Continue.
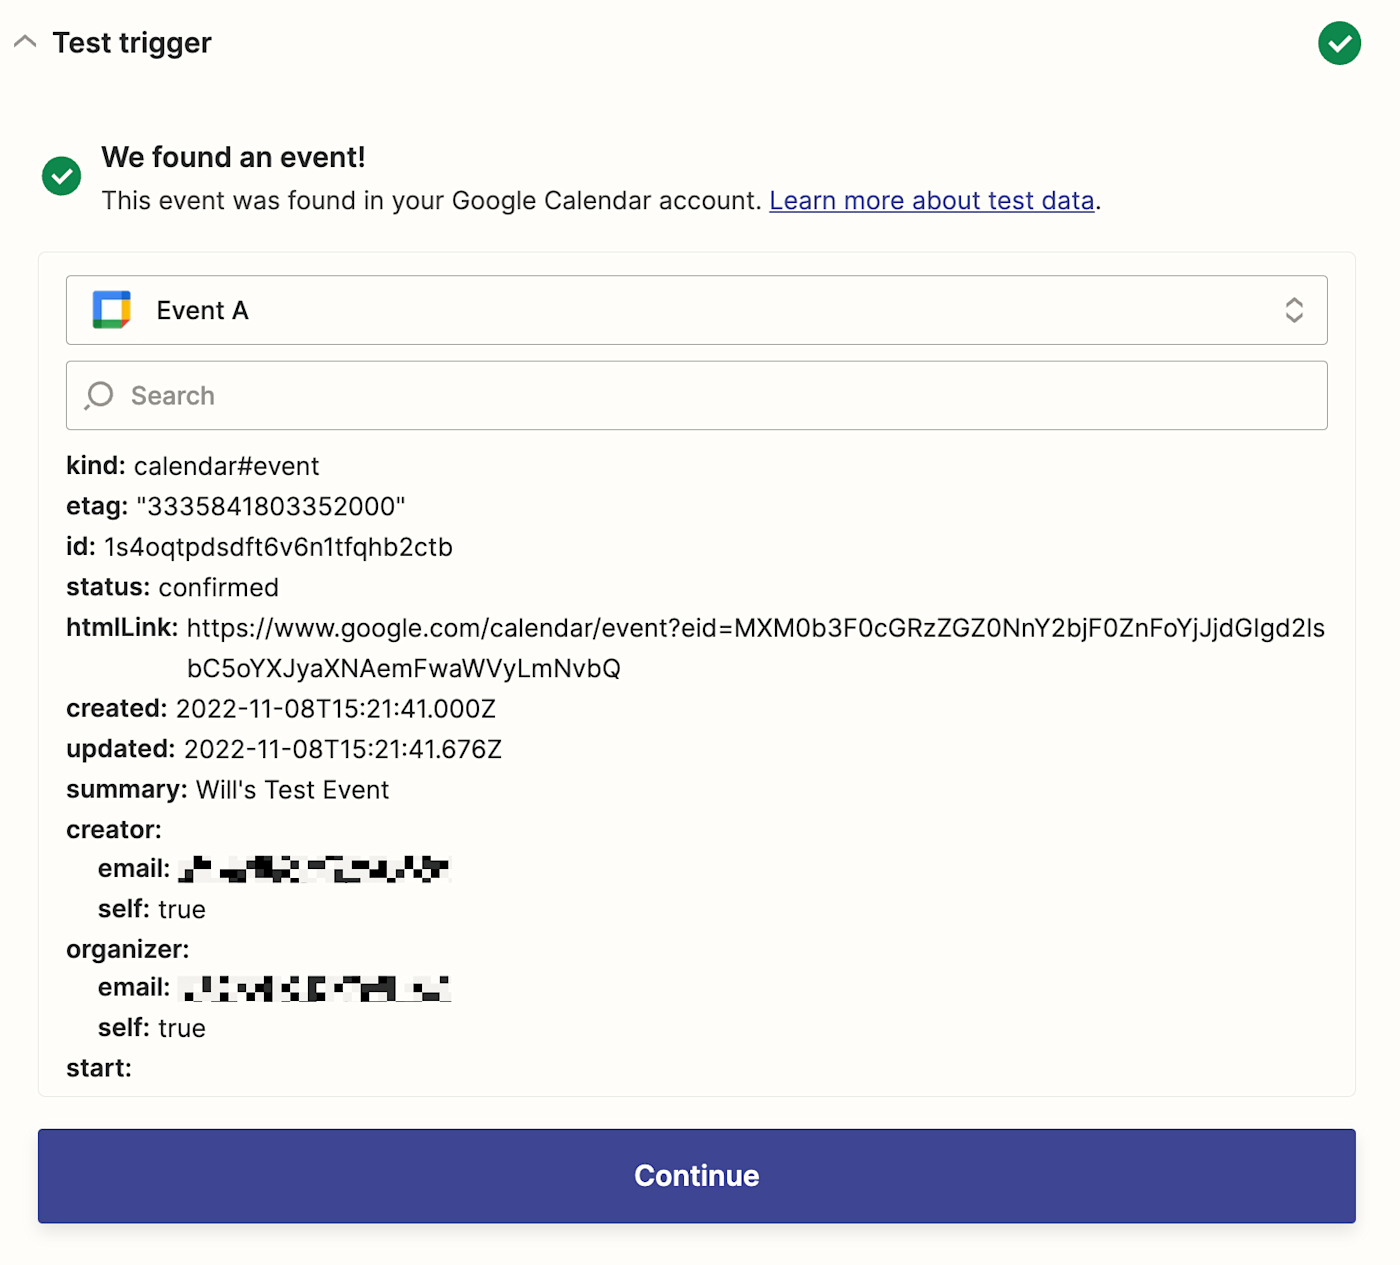
Next, click Test Trigger so Zapier will create a test event to make sure the trigger is working properly. Once the test runs successfully, click Continue.
Step 2: Connect your action app
In this next step, you’ll set up the action—the event your Zap will perform once it’s triggered. Start by searching for and selecting your action app. We’ll use Notion in our example.
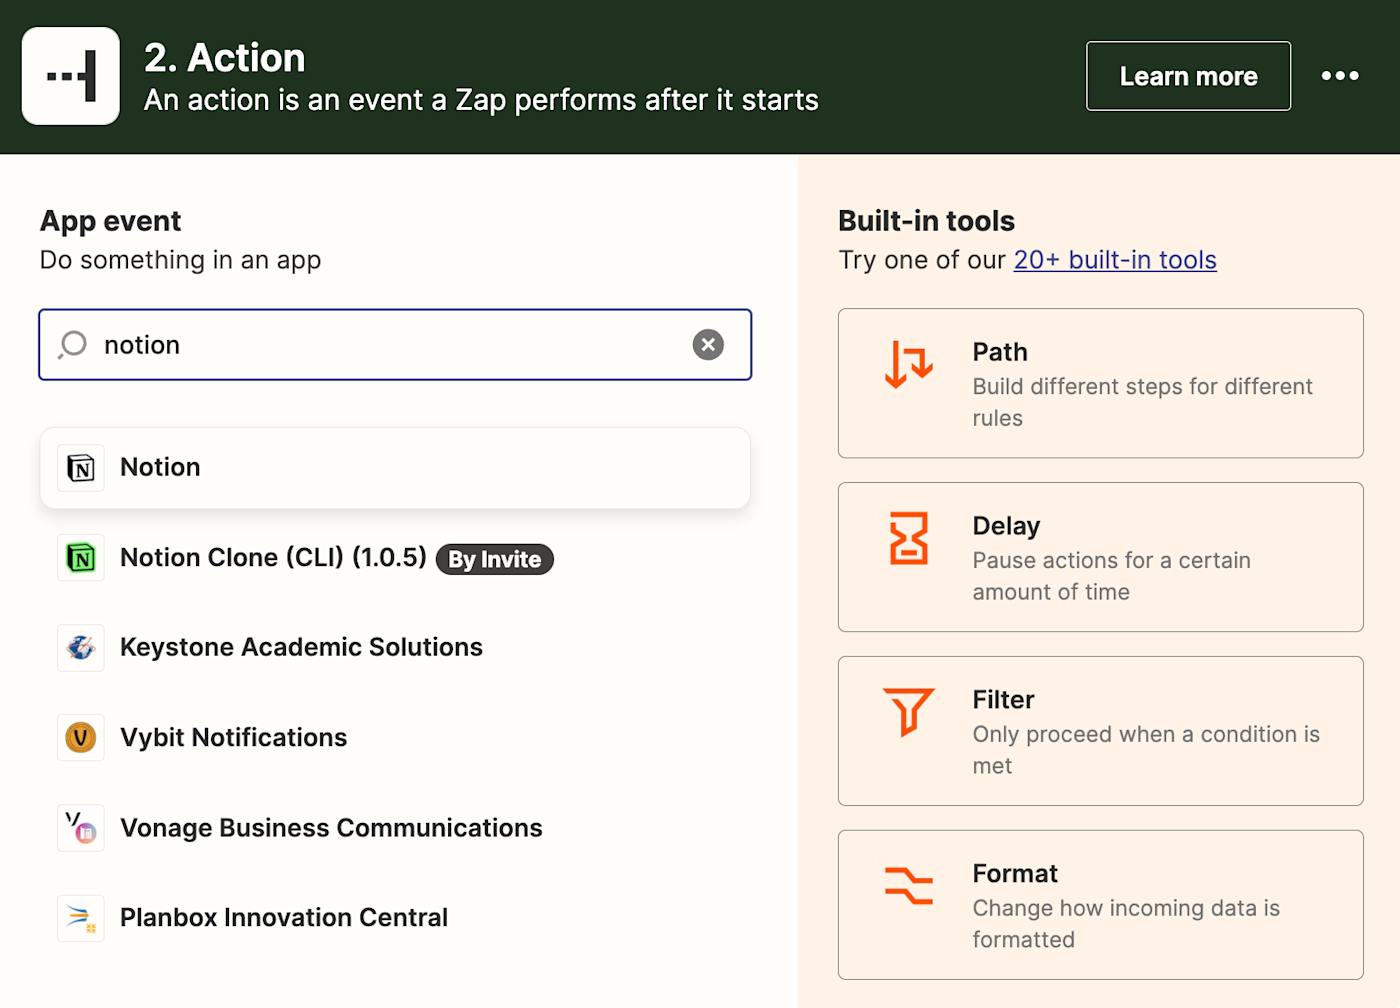
Next, choose your action event. If your action app is Notion, your Zap can create or update a database item, create a new page, or search for a page or database item.
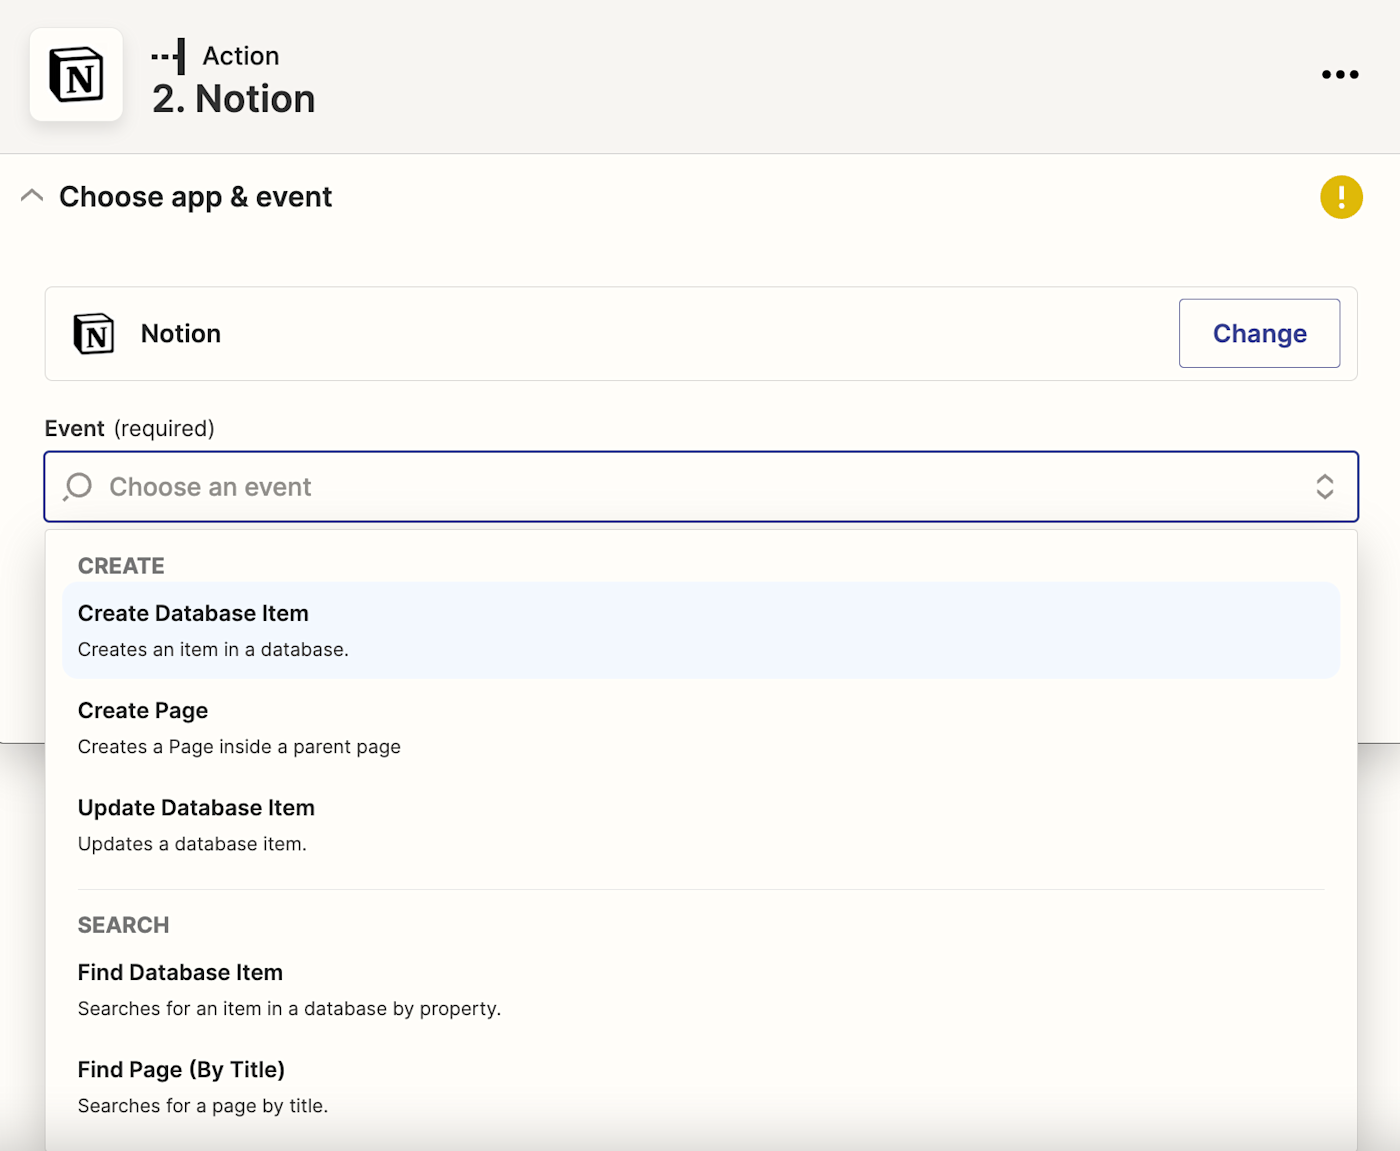
Select your action event and click Continue. We’re going to select Create Database Item for our example.
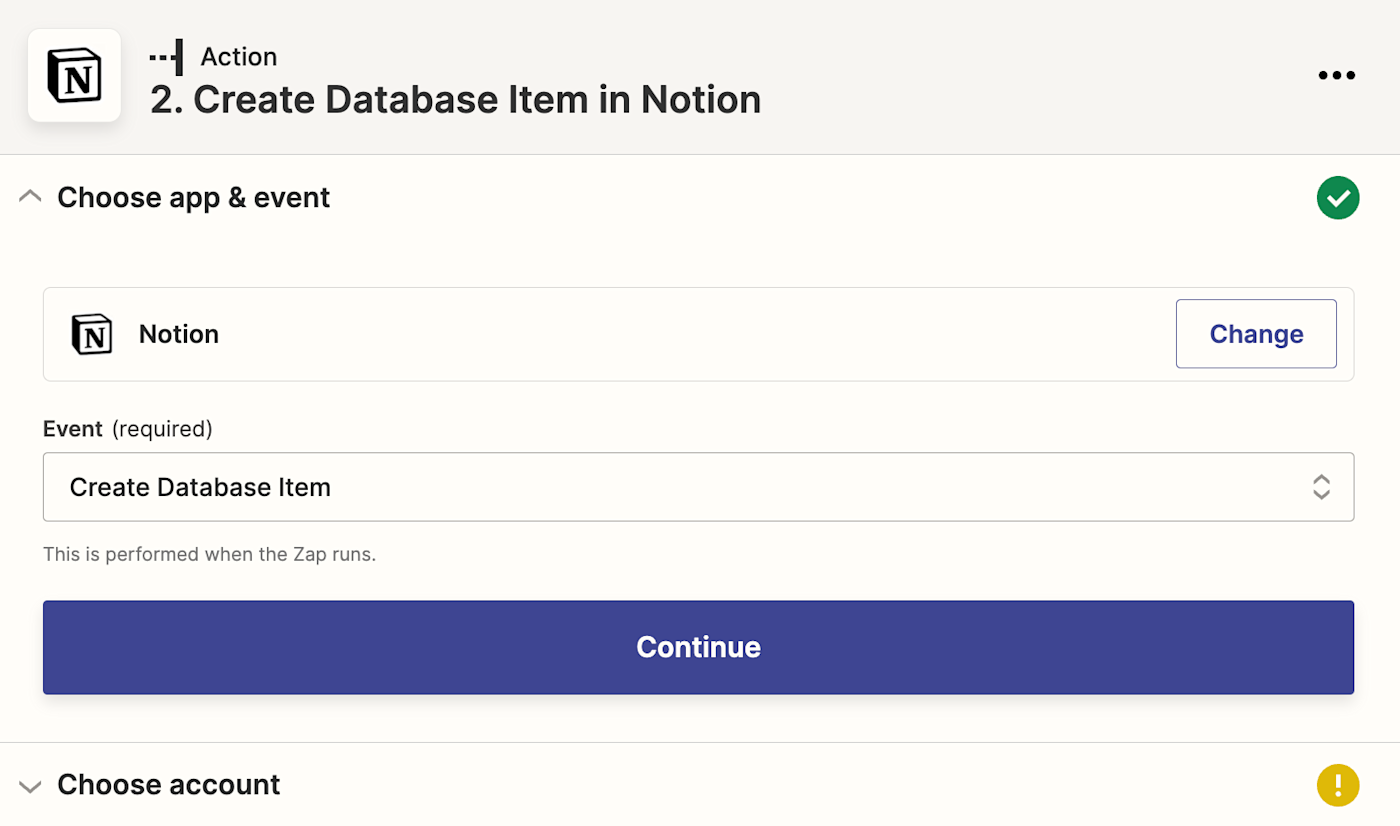
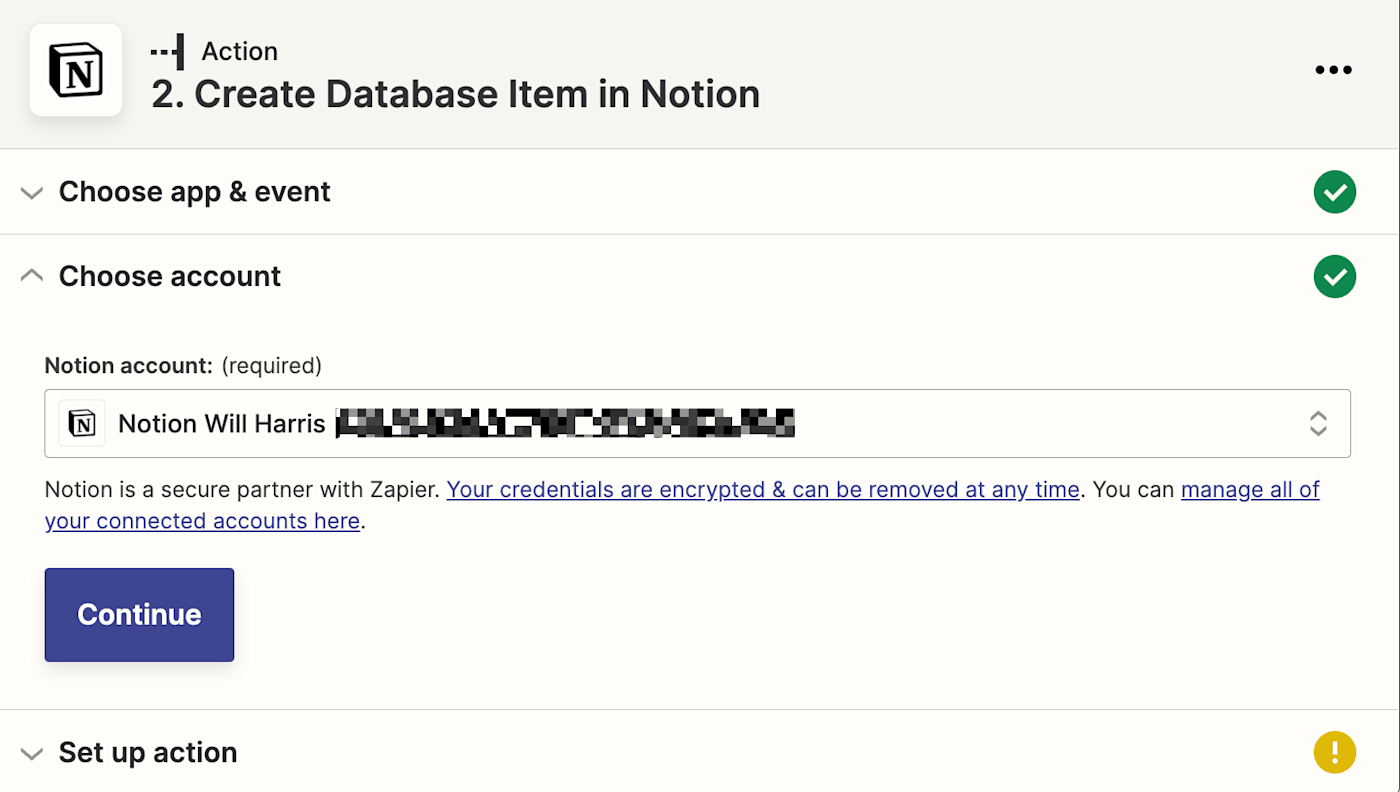
Next, connect your action app account to Zapier by clicking Sign in. In our example, we’ll connect Notion. You’ll need to give Zapier permission to access your app account. Once you’ve connected your account, select it from the dropdown menu and click Continue.
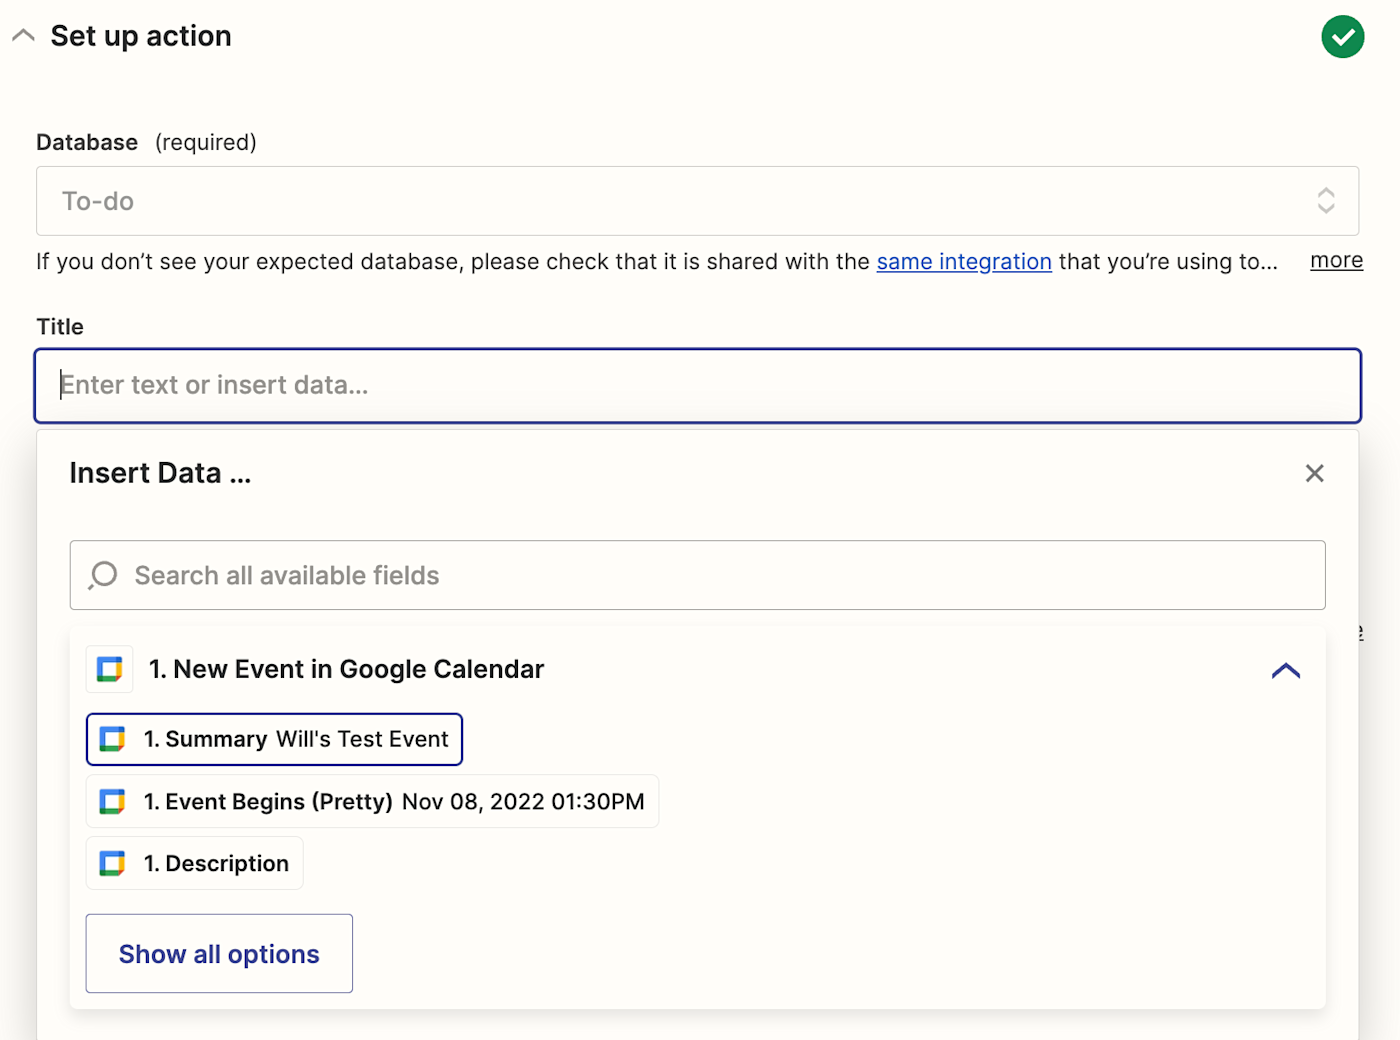
Next, set up your action by filling in the action step fields. Depending on your action app and event, you’ll have different fields to customize. In our example, the fields that show up in your Zap will be based on what fields you created in your Notion database.
You can also customize your action step with data from your trigger step. For example, to add data from your Google Calendar step—like the event summary—click in a field and select the data you’d like to use from the dropdown.
Once you’ve customized your action step how you’d like, click Continue.
Now it’s time to test your action. When you click Test & Review or Test & Continue, Zapier will send test data to your action app. In our example, Zapier will create a new database item in Notion according to how we set up the action step. We always recommend testing your Zap to check if your step looks ok. But if you’d rather skip the test, just click Skip Test in the bottom-right corner.
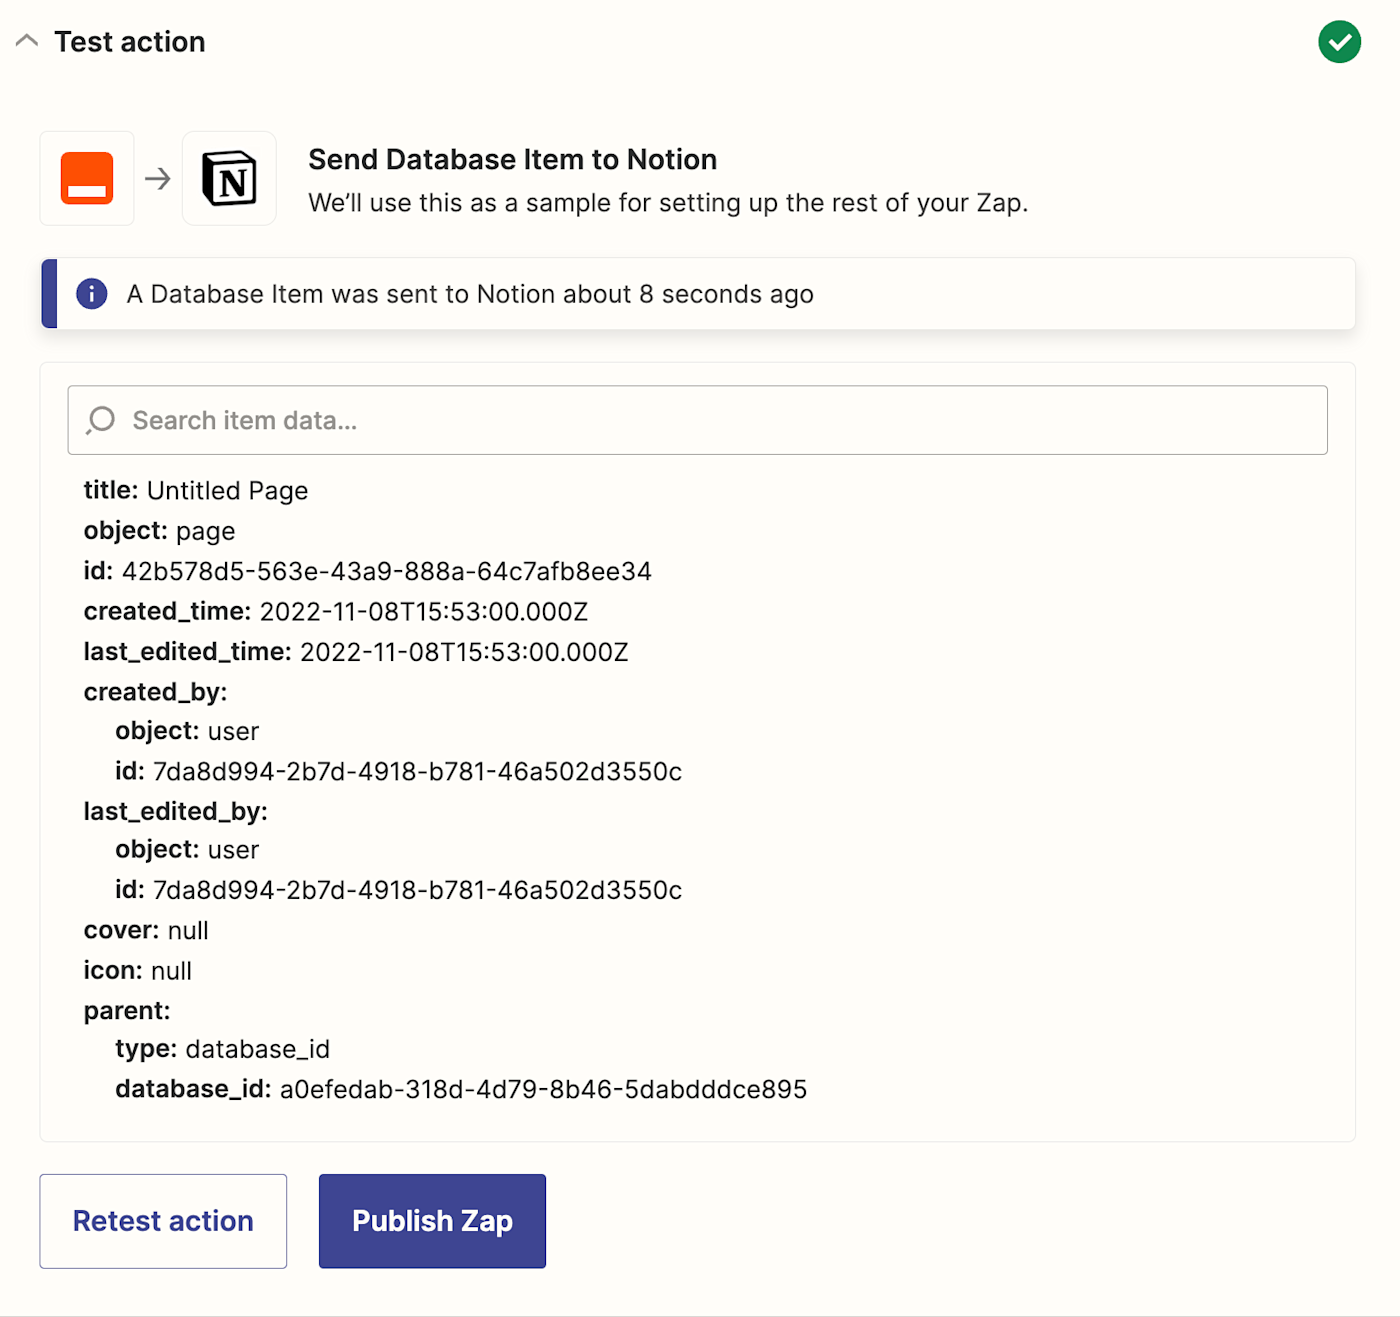
If your test looks right, you’re ready to use your Zap.
Keep track of all your events with Google Calendar and Notion
If you’re using Notion and Google Calendar individually, integrating the two just makes sense. Whether you want to sync your calendar to your Notion workspace and stay on top of your events or block some time on your calendar for tasks in Notion, you can do it all automatically with Zapier.
New to Zapier? It’s a tool that helps anyone connect apps and automate workflows—without any complicated code. Sign up for free.
Need Any Technology Assistance? Call Pursho @ 0731-6725516

")