
Notion is one of those products that can be many things to many people. For some, it’s a simple note-taking app. But if you dig deeper, you can turn it into a personal Wikipedia, a journaling system, or a full-fledged database.

The app’s table tool is quite extensible. You can add multiple data types and interlink in the table itself. But what transforms this humble table tool into a database system is its automation support.
In this guide, we’ll focus on how to automatically send Slack notifications when new items are added to your Notion database, giving your entire team instant data updates. Let’s get started.
New to Zapier? It’s a tool that helps anyone connect apps and automate workflows—without any complicated code. Sign up for free.
Option 1: Get started quickly with a Zap template
We have a template to help you get started quickly. Click on the Zap template below, and you’ll be guided through setup. You’ll need to create a Zapier account if you don’t already have one.
Here’s how it works:
-
Click on the Zap template.
-
Connect your Notion and Slack accounts.
-
Give Zapier permission to access all Notion workspaces containing databases. Next, choose the database you want to work with.
-
Choose the Slack channel where you want to post Notion updates.
-
Now for the fun part—it’s time to map the fields. Choose which data from Notion shows up in the message field in Slack. Make sure to add the right formatting, so it looks how you want it to.
-
Click the Next button, test out the Zap, and turn it on.
Option 2: Create your own Zap
If you’re looking for more customization options or you want more control over the process, try setting up your Zap from the ground up.
Go to the Zap editor to get started. All Zaps begin with a trigger, the event that starts your workflow. Search for and select Notion for your trigger app and New Database Item for your trigger event. Then click Continue.

Select your Notion account from the account dropdown. If you haven’t linked your account already, click Connect New Account.
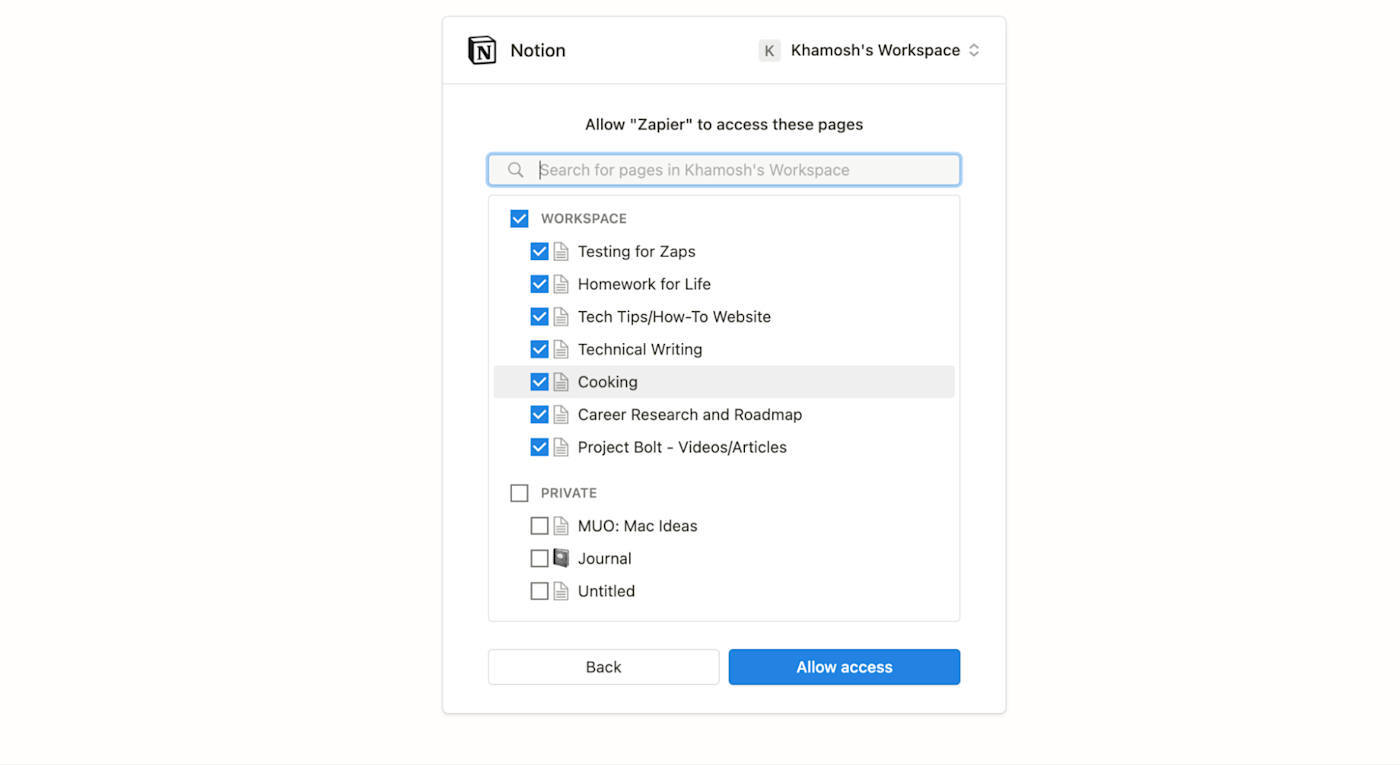
Log in with your Notion account. Click Choose Pages, select the workspace where your database is stored, then click Allow Access.
When you see your account in the dropdown, click Continue.

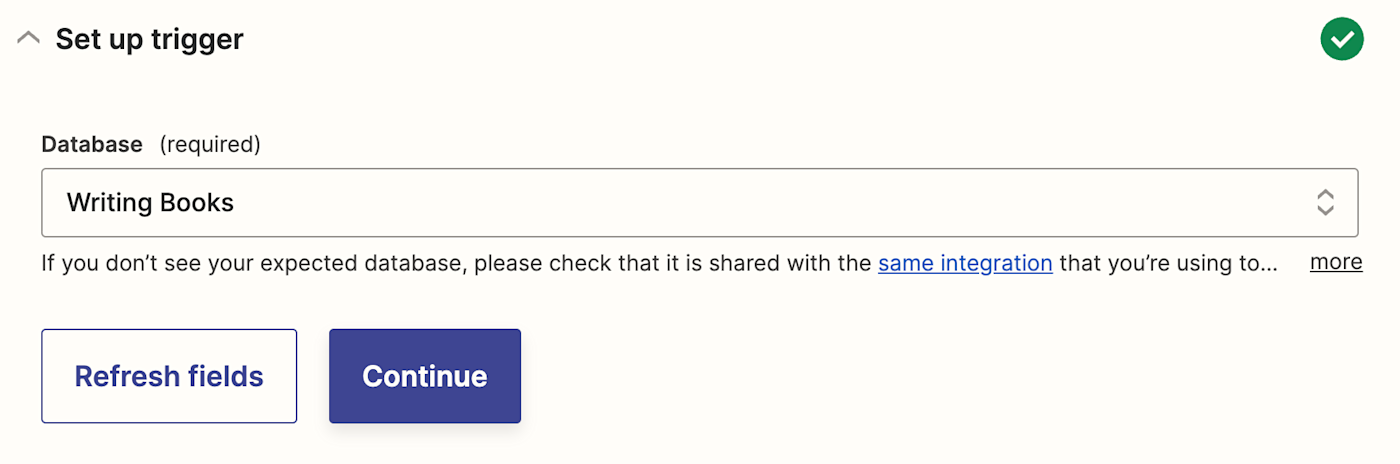
Finally, it’s time to set up the trigger. From the Database dropdown, choose the database table you want to automate, then click Continue.
Next, test your step by clicking on Test Trigger. The Zap should pull test data from your Notion database. If it looks right, click Continue.

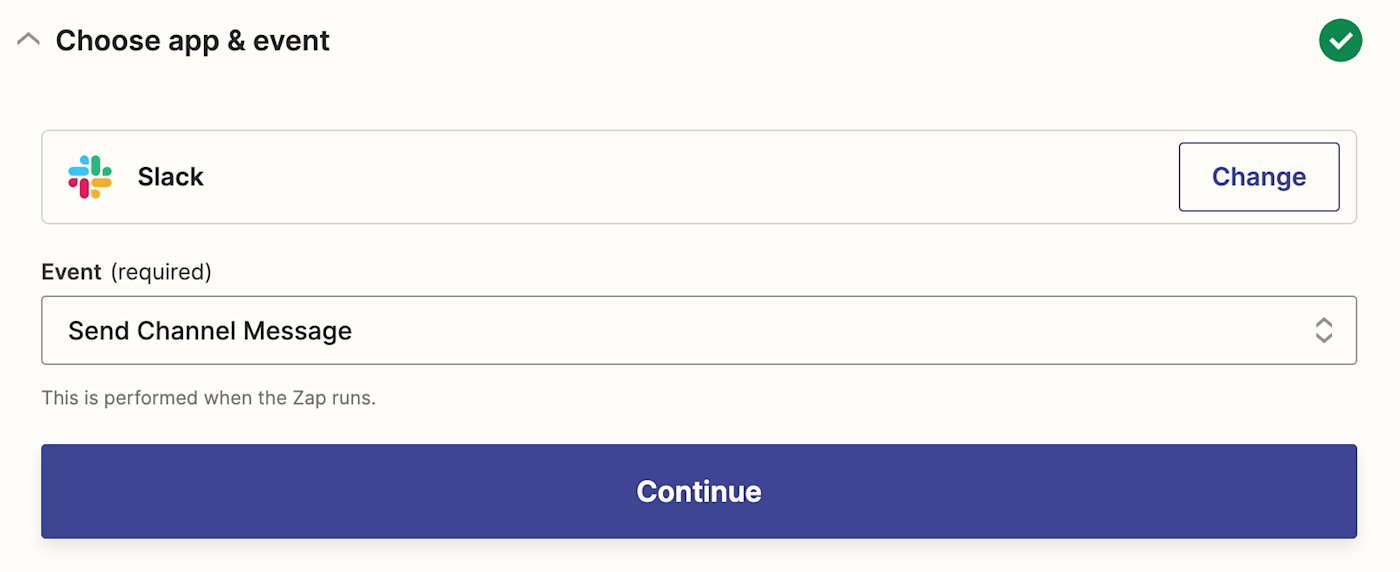
Now let’s set up the Slack action, the event that happens once your Zap is triggered. Search for and select Slack for your action app and Send Channel Message for your action event, then click Continue.
Next, select your Slack account from the account dropdown. If you haven’t linked your Slack account already, click Connect a New Account, and sign in with your Slack credentials to connect your workspace.
After selecting your account, click Continue.

Now’s the fun part—customizing the action. This is where Zapier’s advanced editor really shines.
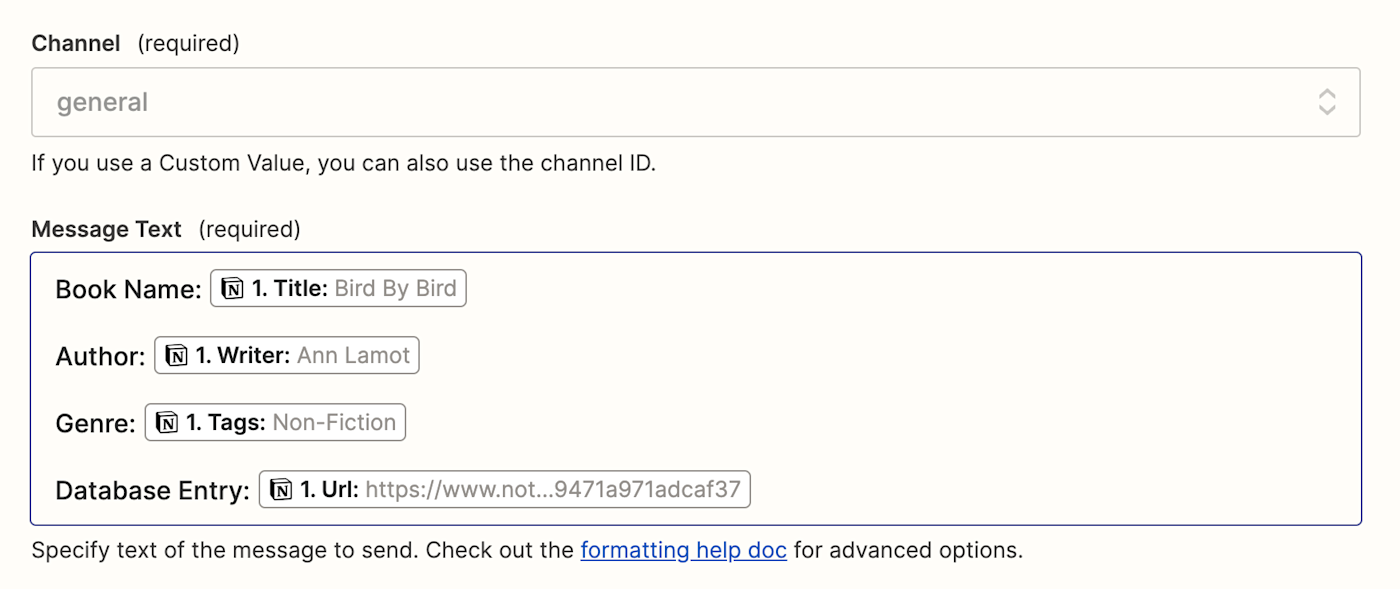
First, choose where you want the message to go in the Channel dropdown.
Next, fill out the Message Text field. You can type in static text that will show up every time Slack posts your message. And you can add data from your previous Notion step by clicking into the Message Text field and selecting the data you’d like to use from the dropdown.
For my example, I’m creating a table that contains books on writing that I want to read. I’m going to add a text label for each field from my Notion database on a separate line and map the Notion entry for each one next to the label. Here’s how it looks in the Zap editor.
The message will be displayed as a bot via Zapier. But you can make this a lot more interesting by changing the name and the icon.
Add a custom name in the Bot Name field. Add an image link or an emoji to the Bot Icon field. For my example, I’m going to use :open_book: for a book emoji.
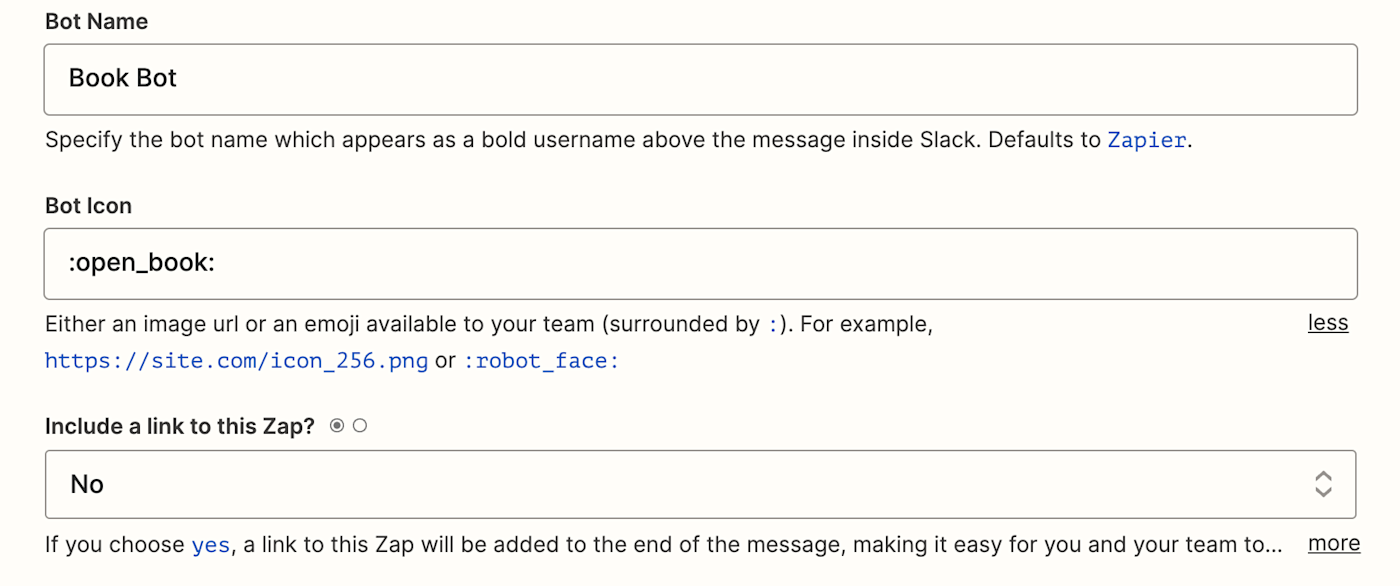
By default, the Zap will include a link to the Zap so anyone can edit it. This makes troubleshooting easier, but you may not want everyone to have access to the Zap or add extra text to your message. You can disable it by selecting No in the Include a link to this Zap? dropdown.
Finish customizing your Slack step, then click Continue.
Next, click Test action to test your Zap. It will send a test Slack message that includes the Notion test data from your trigger step.
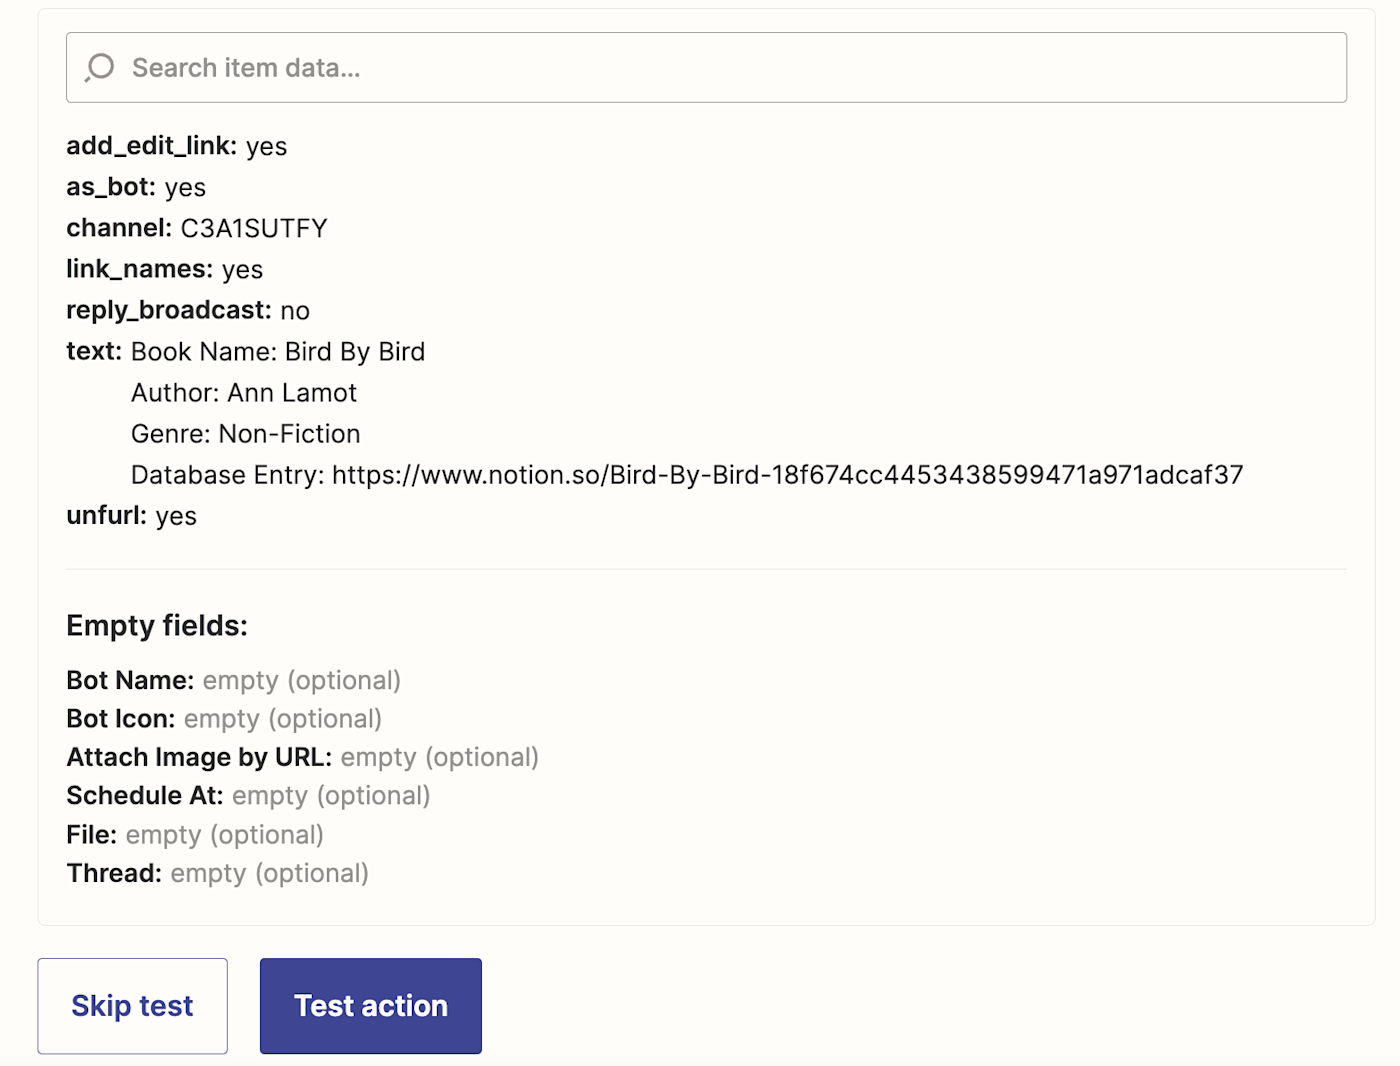
Here’s what the test entry looks like in Slack.

If everything looks right, you’re now ready to use your Zap. Now any time you add a new entry to your Notion database, you’ll get notified in Slack.
New to Zapier? It’s a tool that helps anyone connect apps and automate workflows—without any complicated code. Sign up for free.
Need Any Technology Assistance? Call Pursho @ 0731-6725516


